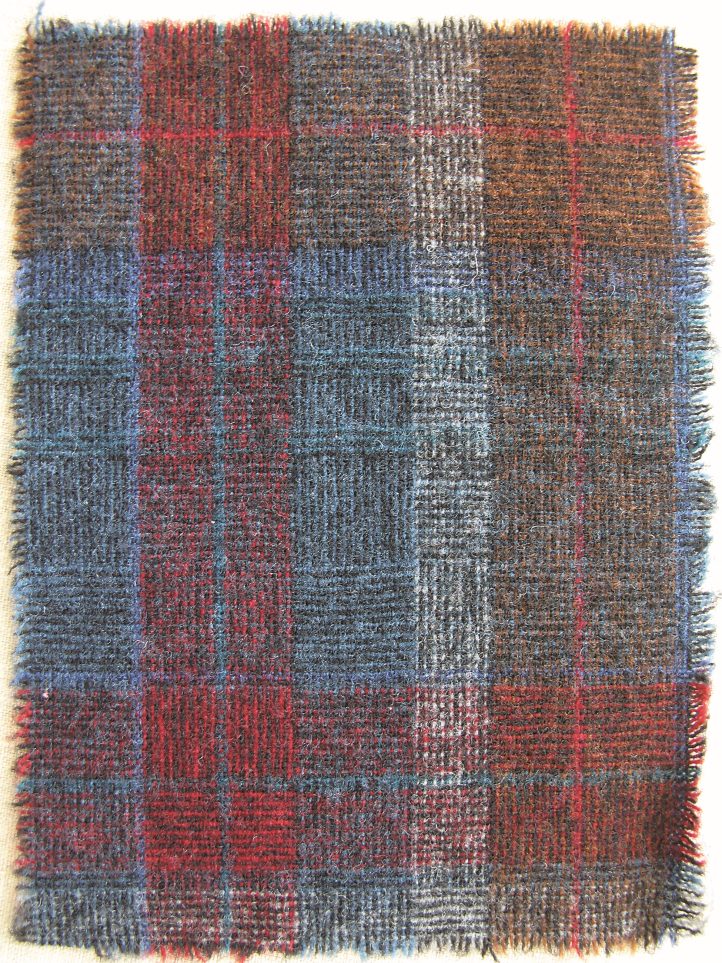
Teec, 24 1/2″ x 34″, #3-cut wool on monk’s cloth. Designed by Jane McGown Flynn; hooked by Jeanne A. Sullivan, Annapolis, Maryland, 2009.
One of the requirements for McGown Teacher Certification is to color plan and complete an assigned rug and then give a presentation at Teachers’ Workshop. For my show-and-tell project, I was assigned Teec, a geometric design by Jane McGown Flynn that was based on woven Navajo rugs from the Teec Nos Pos region.
SUPPLIES AND MATERIALS
- Scissors
- Ruler
- 1 skein Persian 3-ply wool yarn (I used Paternayan.)
- Matching color heavy weight cotton thread (I used quilting thread.)
- Sewing needle
- Binding tape, the length of the rug’s 4 sides plus 10″
- Straight pins (1 1/4″ is a good choice.)
Developing a Color Plan
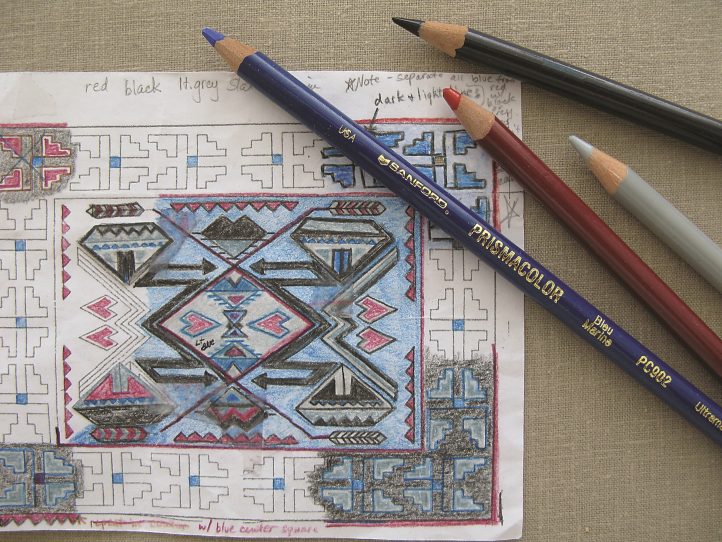
I started my project by making photocopies of the Teec pattern as it appears in the catalog and trying different color combinations with Prismacolor pencils. Soon I began to see the symmetry within the intricate system of outlined images, which at first went unnoticed given the complexity of the central medallion. Over the course of several weeks, I completed many different color plans, but I still was not entirely satisfied.
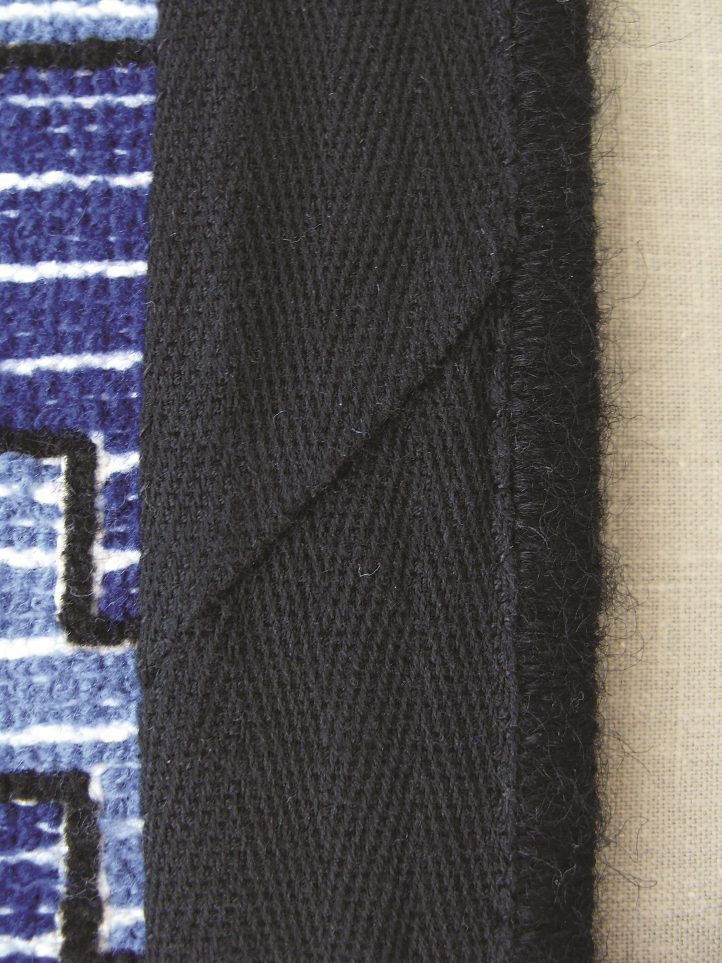
Detail of 45-degree fold at join (side edge, back view).
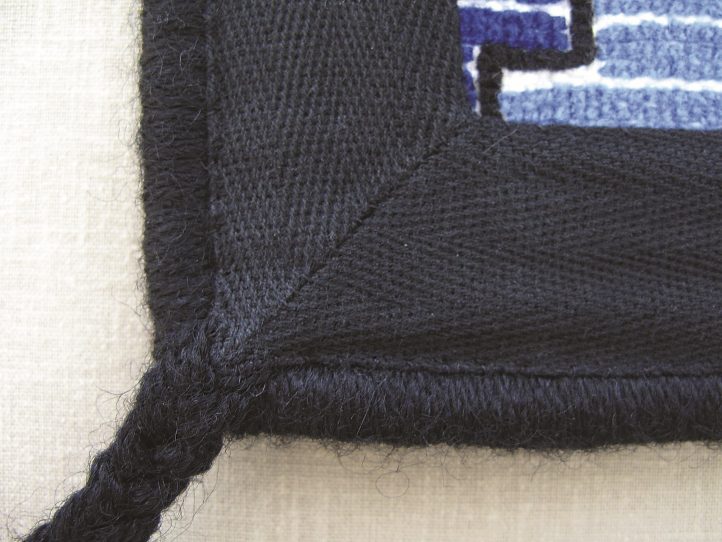
Detail of finished whipped edge, braid, and stitched binding tape with mitered corner (back view).
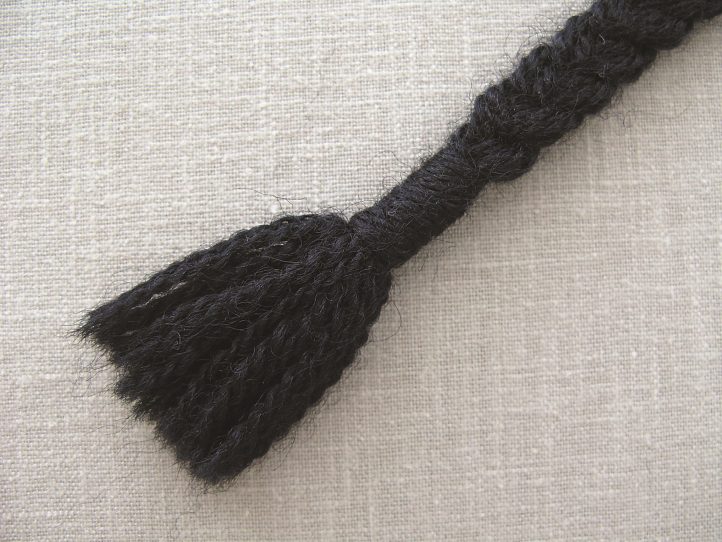
Detail of braid.
Inspiration for my color plan came unexpectedly when I was sorting through a pile of recycled woolens. A red, blue, and gray plaid caught my eye. I pulled out the individually spun wool yarns that made up the weave pattern and discovered six hues: royal blue, cranberry, light blue, medium gray, brown, and black. I decided to omit the brown because the traditional Navajo rugs I had studied used no more than five colors.
This sample of plaid wool texture inspired my color plan.
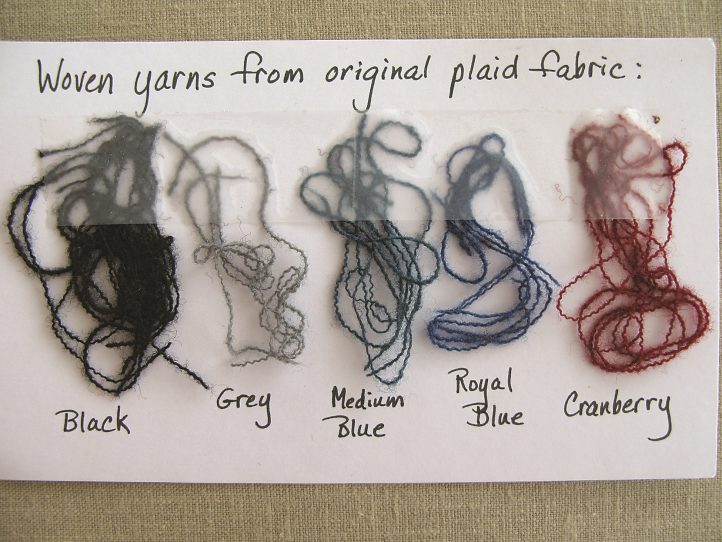
I pulled individually spun yarns from a plaid swatch to identify the colors.
Black lines between the cranberry and blues prevented the colors from visually mixing as purple.
When I picked up my colored pencils and started coloring a sample pattern, I faced another challenge: each time I would lay in a cranberry line or element next to a blue line or element, from a distance, it read as purple! Even in the colored sample my eyes were mixing the color, so I knew to expect the same from the hooked wool. I added a black line between these two colors each time they were used in close proximity. Perfect. My color sample paid off!
Before commercial yarns were available, Navajo women took great pride in their ability to accurately calculate, dye, and spin sufficient wool yarn for very elaborate woven designs in very large rugs. This was no small feat. They needed to find the necessary vegetal dye ingredients within a day’s walking distance of their home. They held themselves to high standards in producing solid, consistent, saturated color. Variations or mottling (abrash) in the finished weaving were not to their liking. Could I get truly solid colors in my own dyeing?
The answers were right there on my Dorr color card. I didn’t need to! The perfect, saturated, solid colors for my color plan were all available as off-the-bolt Dorr wool: #599 (black), #8218 (soft gray), #7268 (maroon), #6385 (royal blue) and Delft (lighter blue). Hooking the Pattern Due to the intricacies of the pattern, I settled on a #3 cut. My chosen foundation was monk’s cloth. I worked from the center outward, completing the entire center medallion before working on the border. Working to complete the center, I found that it was much easier to hook a single motif, and then hook its counterpart, thereby keeping size and color changes consistent and making the work go quickly on the repeat. After completing the motifs in a given area, I immediately filled in the background.
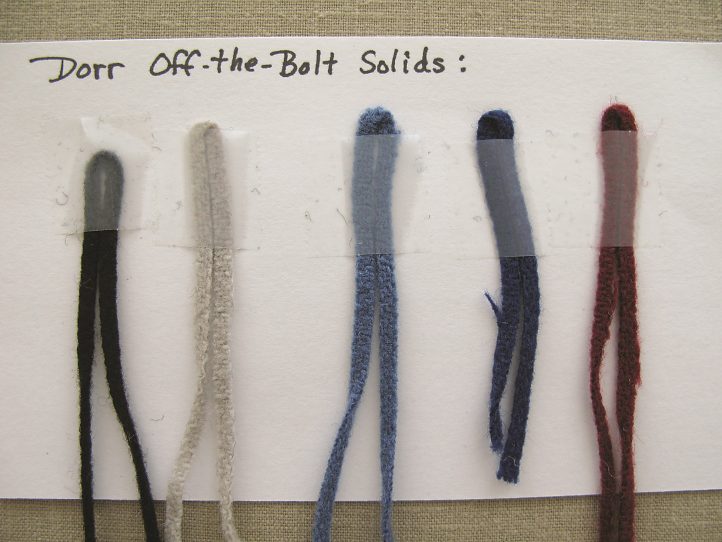
Off-the-bolt solids from Dorr provided a perfect match to my woven yarn colors.
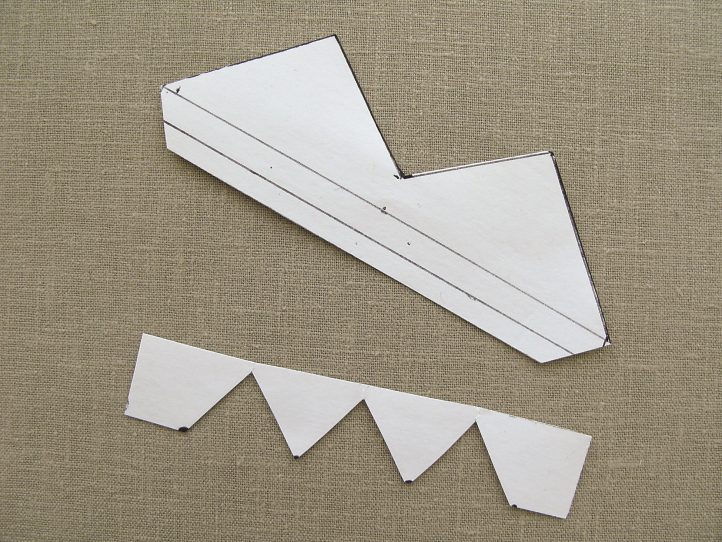
Templates ensured that I stayed consistent in my alterations.

A chart of the number of loops across and down helped me keep track of my hooking as I repeated motifs.
Working in solid colors required some added attention to get the even read I was after. Wherever possible, I followed these simple guidelines for motifs and background areas:
- Hook all in one direction to create a consistent nap.
- Use strips long enough to begin and end a row without needing to cut and join; cut ends read darker.
As I hooked in some of the center motif details, I took a bit of creative license and made a few changes to please myself. After marking a change on the rug foundation, I made a matching template from an index card to use for tracing the same change on the repeated symmetrical elements.
Consistency in the border would be critical to the final appearance, so I charted the number of loops across and down to give me an easy plan. On a photocopy of the pattern, I jotted down the number of loops as I worked across the rows of the first motif. That bit of extra work made the hooking go quickly because I didn’t have to second guess color placement and changes. After the side motifs were completed, I worked on the corners, then I filled in the border outlines and background.
Adding an Authentic Finish
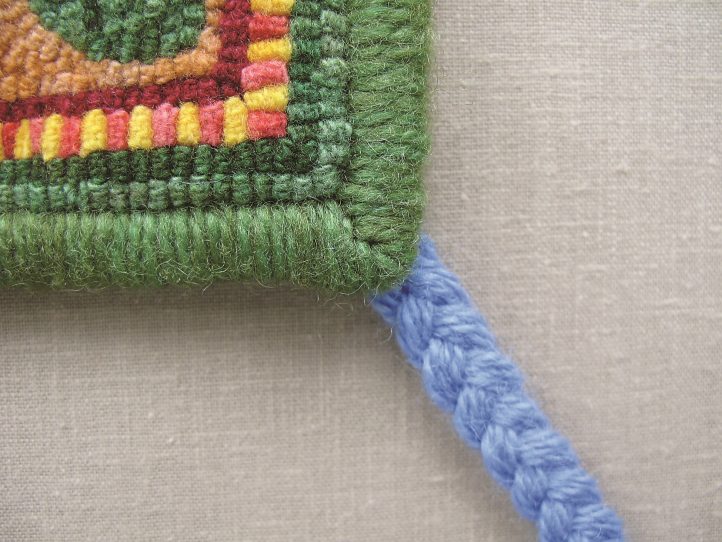
Teec Nos Pos rugs often have corners finished off by using warp and weft yarns to make braids. Because my goal was to simulate weaving in my hooked interpretation of the rug, I decided to add the corner braiding to my Teec.
Prepare:
- Rug edge. Note: The braids are added after the rug is finished with a whipped edge. (I used a double for-ward roll method for Teec, whipping the edges with Persian wool). The tutorial sample is a finished trivet I had on hand.
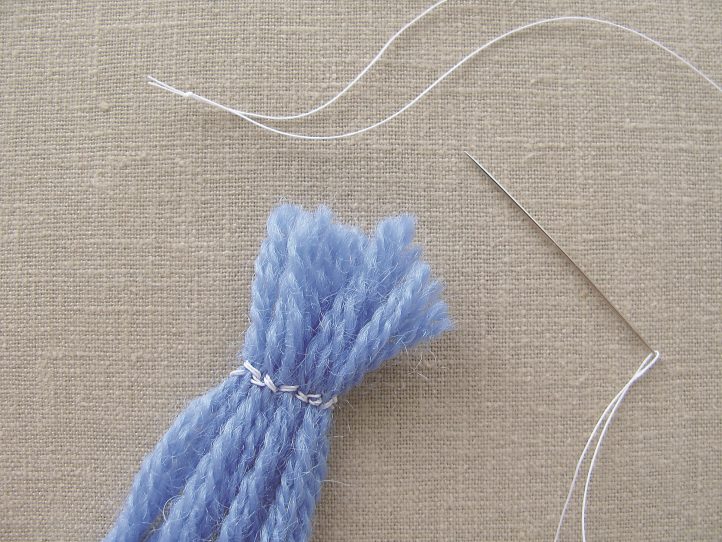
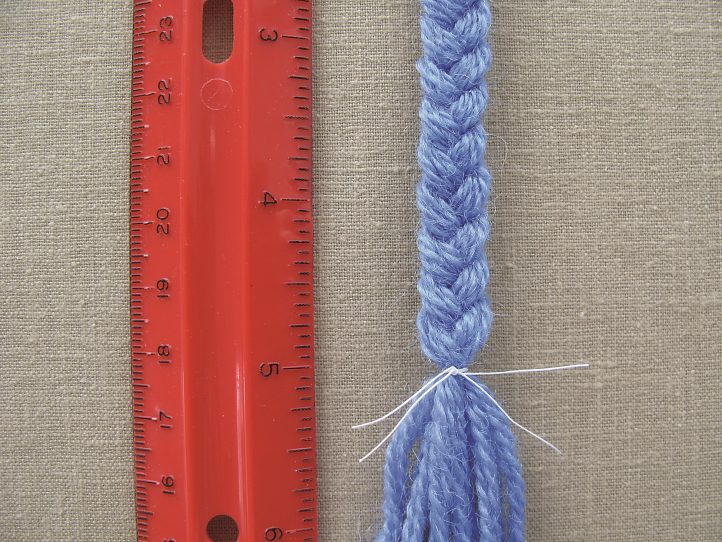
- Cut 10 lengths of 3-ply yarn, each 12″. Set one of the lengths aside.
(Note: Each length is 3 plies).

Setup for making corner braids.
Note: I used contrasting materials for visual clarity in these photos. When working on an actual project, use matching or blending thread, yarn, and binding tape.
Step 1. Line up 9 yarn lengths end to end to make a bundle. With thread doubled and knot-ted, use backstitches or a sewing machine 1/2″ from the end to secure the bundled yarn. Note: Flatten the bundle to reduce bulk. The sewn bundle is 1/2″ wide.
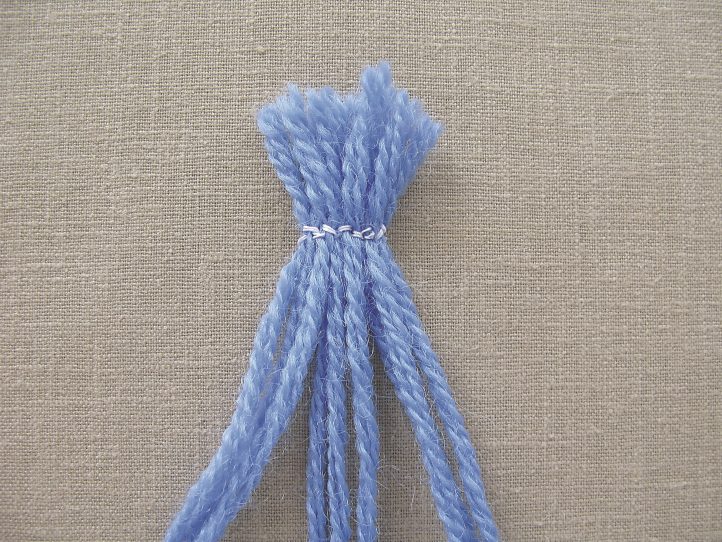
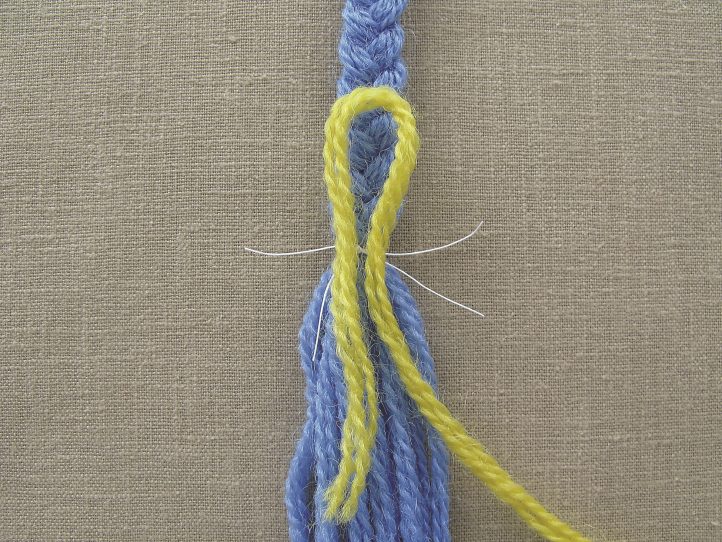
Step 2. Divide the yarn lengths into 3 groups of 3.
Step 3. Begin to braid the yarn. Weight the stitched end with a heavy object to make the braiding easier to manage.
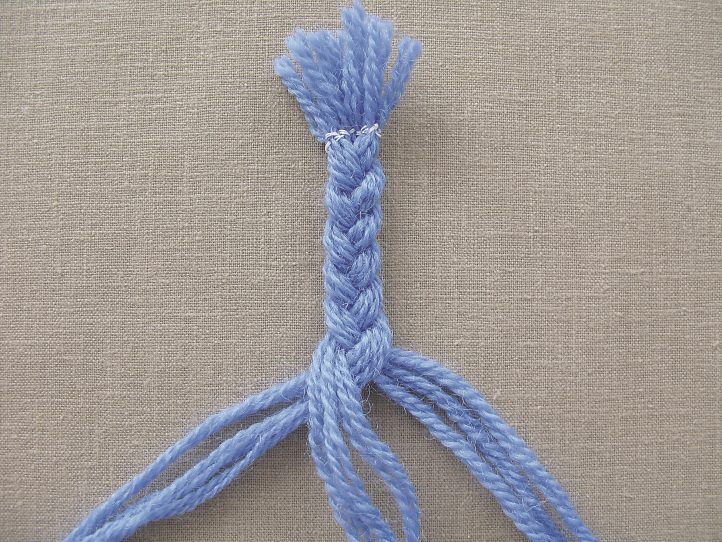
Step 4. Continue to a length of 5″ beyond the stay stitching. Tie off tightly with cotton thread.
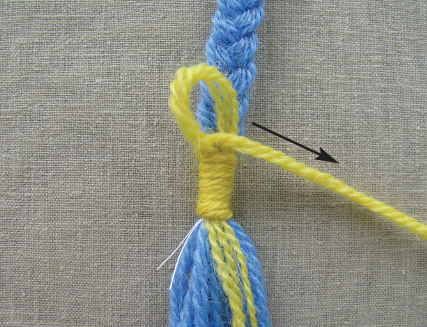
Step 5. With a reserved length of yarn, shape a loop leaving a 2″ tail on the left side and a long tail on the right.
Step 6. Press the loop against the braid with one hand. With your free hand, wrap the long tail counterclockwise in an upward coil around the braid, loop, and short tail. Wrap the coil taut, not tight. The spiral coil should measure about 1/2″.
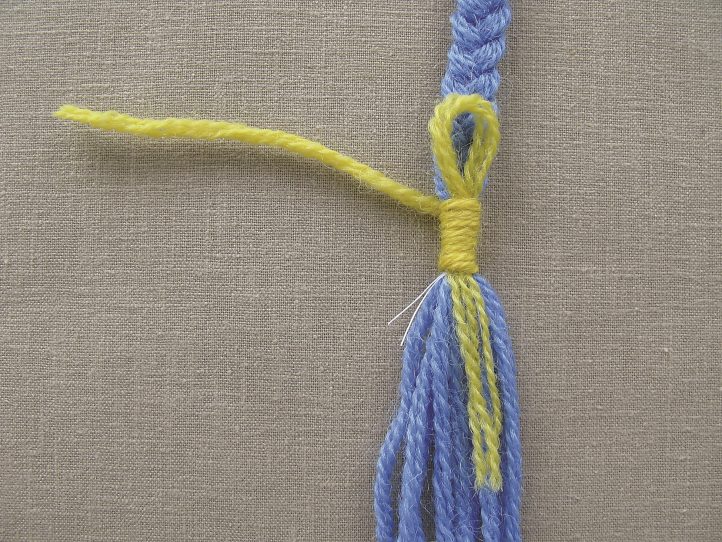
Step 7. Insert the tail through the back of the loop (left to right).
Step 8. Pull the long wrapping yarn tail tight toward the right.
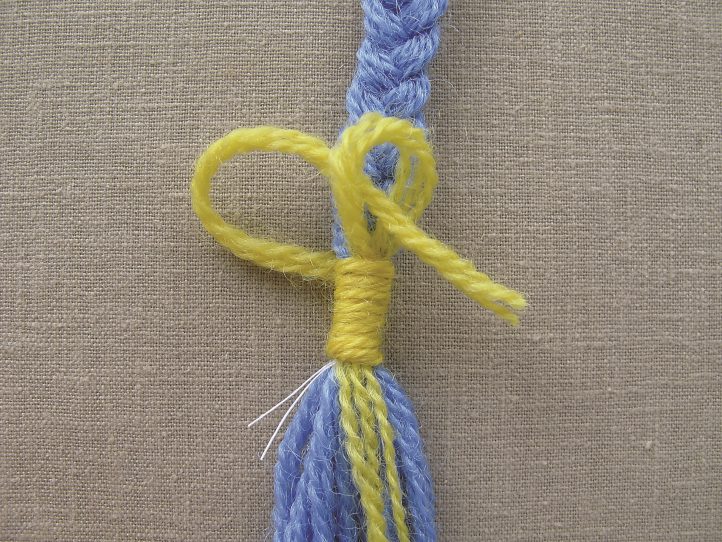
Step 9. Pull the short tail down, drawing the loop and long tail inside the coil. Note: The idea is to pull the loop top to the center area of the coil body. If you pull too hard, the loop will come out the bottom. To fix: Pull up on long tail to bring loop back inside the coil.
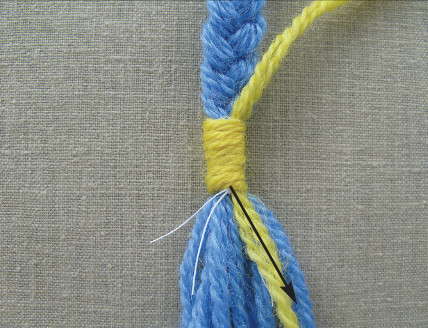
Step 10. Trim the yarn tails even with the edges at the top and bottom of the coil. Clip off the tying thread. Trim the tassel end 1 1/2″ below the coil.
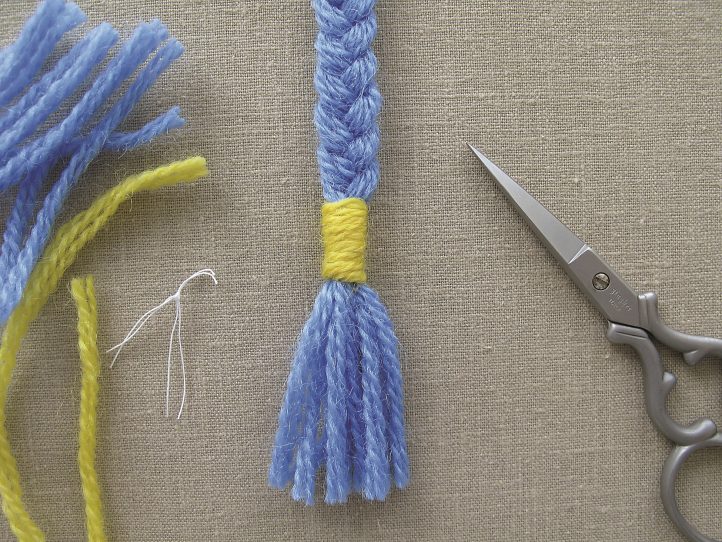
Step 11. Trim the yarn on the sewn braid top end, leaving 1/4″ beyond stitching. Place the braid top inside the corner whipped edges. Secure it with permanent fabric glue, or stitch it in place with matching color thread.
Step 12. Pin the end of the binding tape to the back of the rug alongside the whipped edge, 5″ or 6″ away from a corner.
Step 13. With the rug corner facing you, fold the binding tape under and toward the right, forming a 45-degree fold. The binding tape top layer will remain straight at the outside edge.
Step 14. Fold binding tape toward the left (underneath the 45-degree fold) to form a vertical straight fold (hidden under the outside straight tape edge). This step creates a mitered corner. Pin. Pin the binding tape along the outside corner edges next to the whipped rug edges. Continue pinning around the rug’s perimeter. End with a 45-degree fold at the join. With heavy sewing thread, use small overcast stitches to secure the binding. Sew down miters and the join fold.
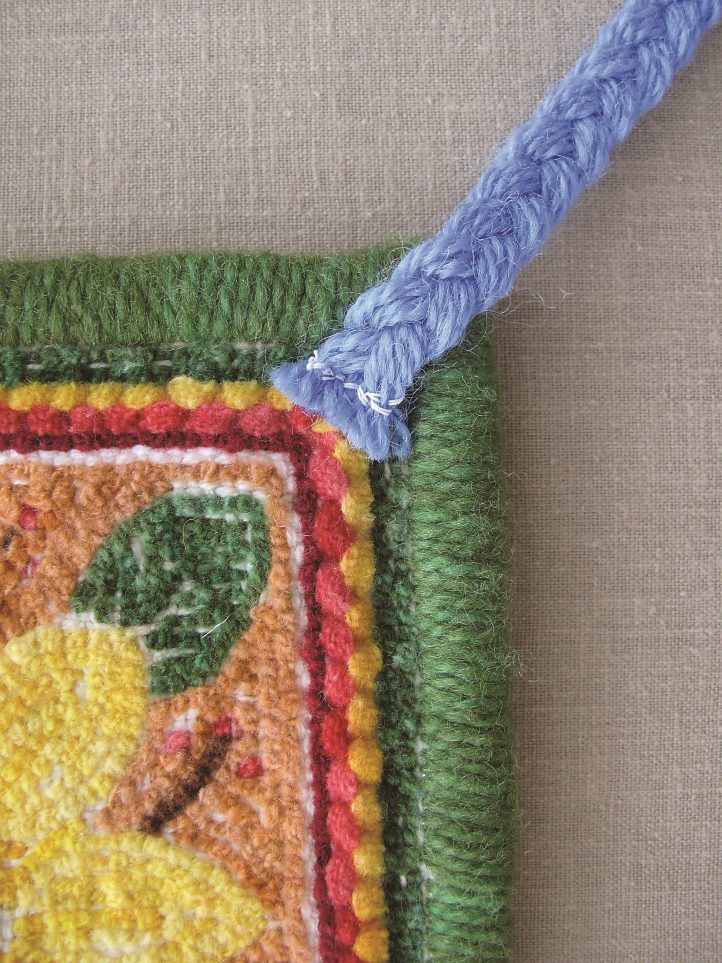
Step 15. Detail of finished rug with whipped edges and braid (front view). Binding tape on reverse side.