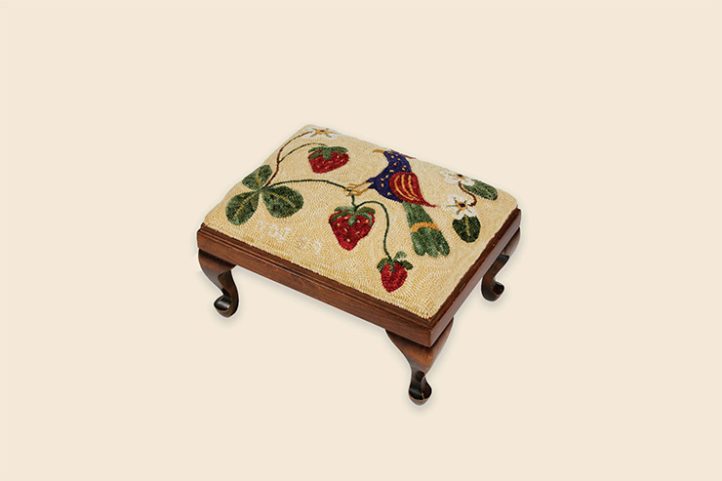
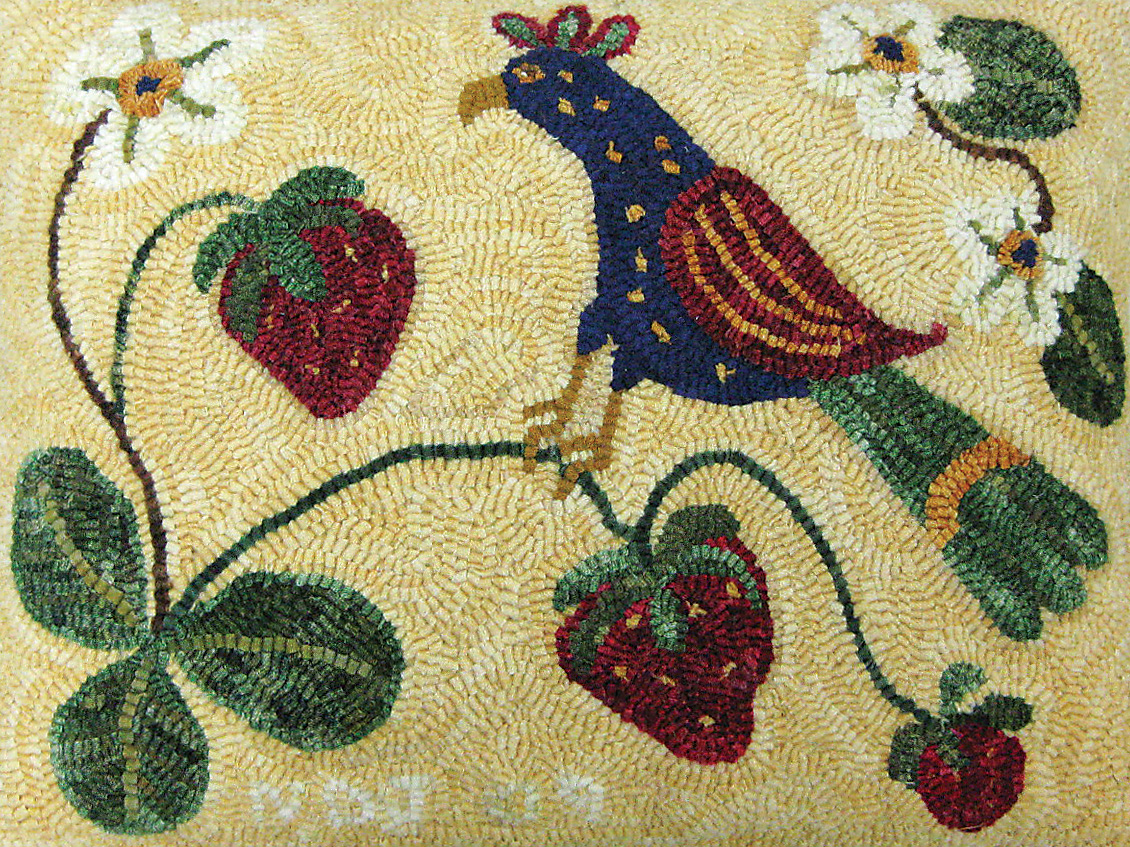
Strawberry Bird Footstool, hooked top, 161/2″ x 121/4″, #5-cut wool on linen. Designed and hooked by Nancy D. Jewett, Pittsford, Vermont, 2009.
Nothing is more inviting in front of a cozy chair than a footstool. Great for resting your feet, the right stool can provide extra seating and add a decorative touch.
My favorite footstool is the one that stood in front of my grandfather’s wingback chair. Whenever we visited my grandfather, the grandchildren would take turns sitting on his lap, his feet propped up on the covered stool. That footstool is now in my home.
Years ago, my mother-in-law hooked a beautiful cover for it which lasted for years. Over time, the footstool got such heavy use that the cover was damaged and repaired so often that it was finally irreparable and had to be replaced by upholstery fabric. Recently I decided to hook a new cover for it and was inspired by my love for birds, strawberries, and Fraktur folk art.
Materials
- Footstool with removable padded top
- Wool fabric to match one color in rug
- Heavy-duty staple gun
- Colored Sharpie
Preparing the Pattern
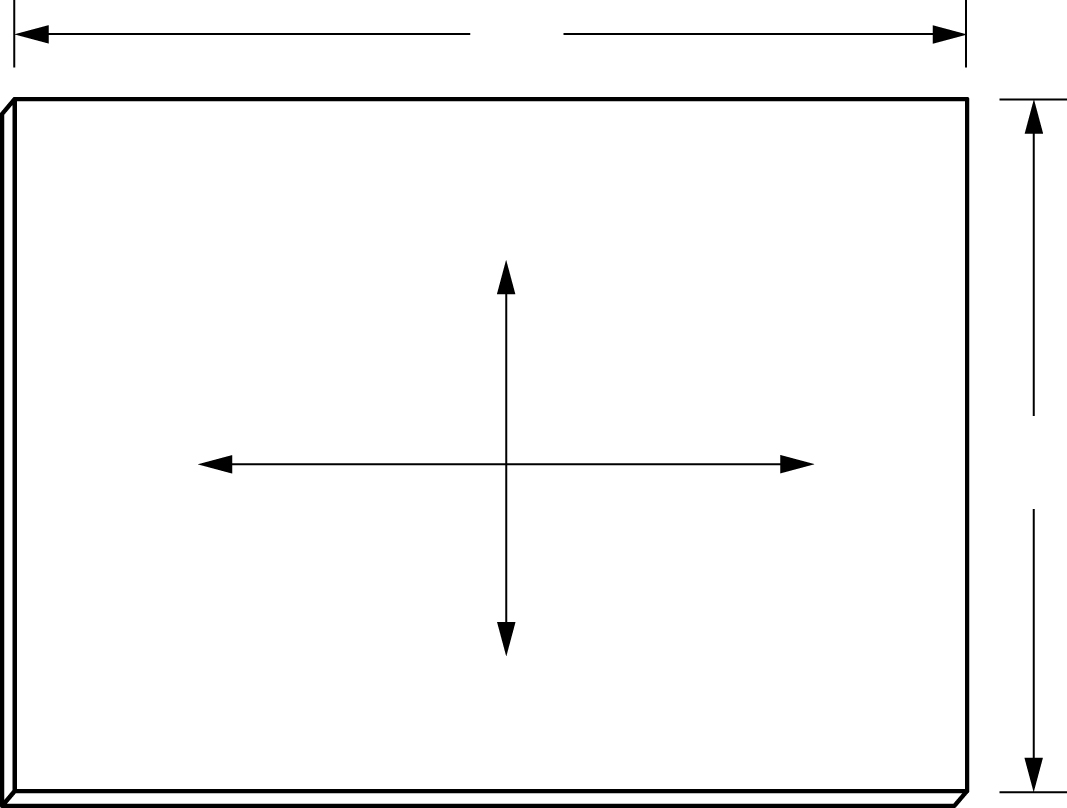
The footstool I plan to cover has a top that is held in place by screws in each corner, underneath the frame. First unscrew and remove the top from the frame. Now measure the top along both the short and long sides to check that the measurements match your pattern. (See Step 1 below.) Adjust your pattern accordingly, if necessary.
If the top of your footstool is padded, making it higher in the center than on the edges, you’ll need to add an arc to each of the four sides to compensate for the additional height. Measured the top through the center for the long and short measurements; then subtract the original edge measurements. Divide the difference by 2 and add that additional amount to the sides of your pattern.
Take my stool as an example: Measured along the edge, the long side is 15″, while across the middle it measures 16 1/2″, which leaves a difference of 1 1/2″. Dividing that by 2 gives me 3/4″, which means the arc I draw on each long side needs to be 3/4″ at its tallest point. The short side of my footstool measures 11 1/4″ along the edge and 12 1/4″ across the middle, which leaves a difference of 1″. Dividing that by 2 gives me 1/2″, which means the arc I draw on each short side needs to be 1/2″ at its tallest point.
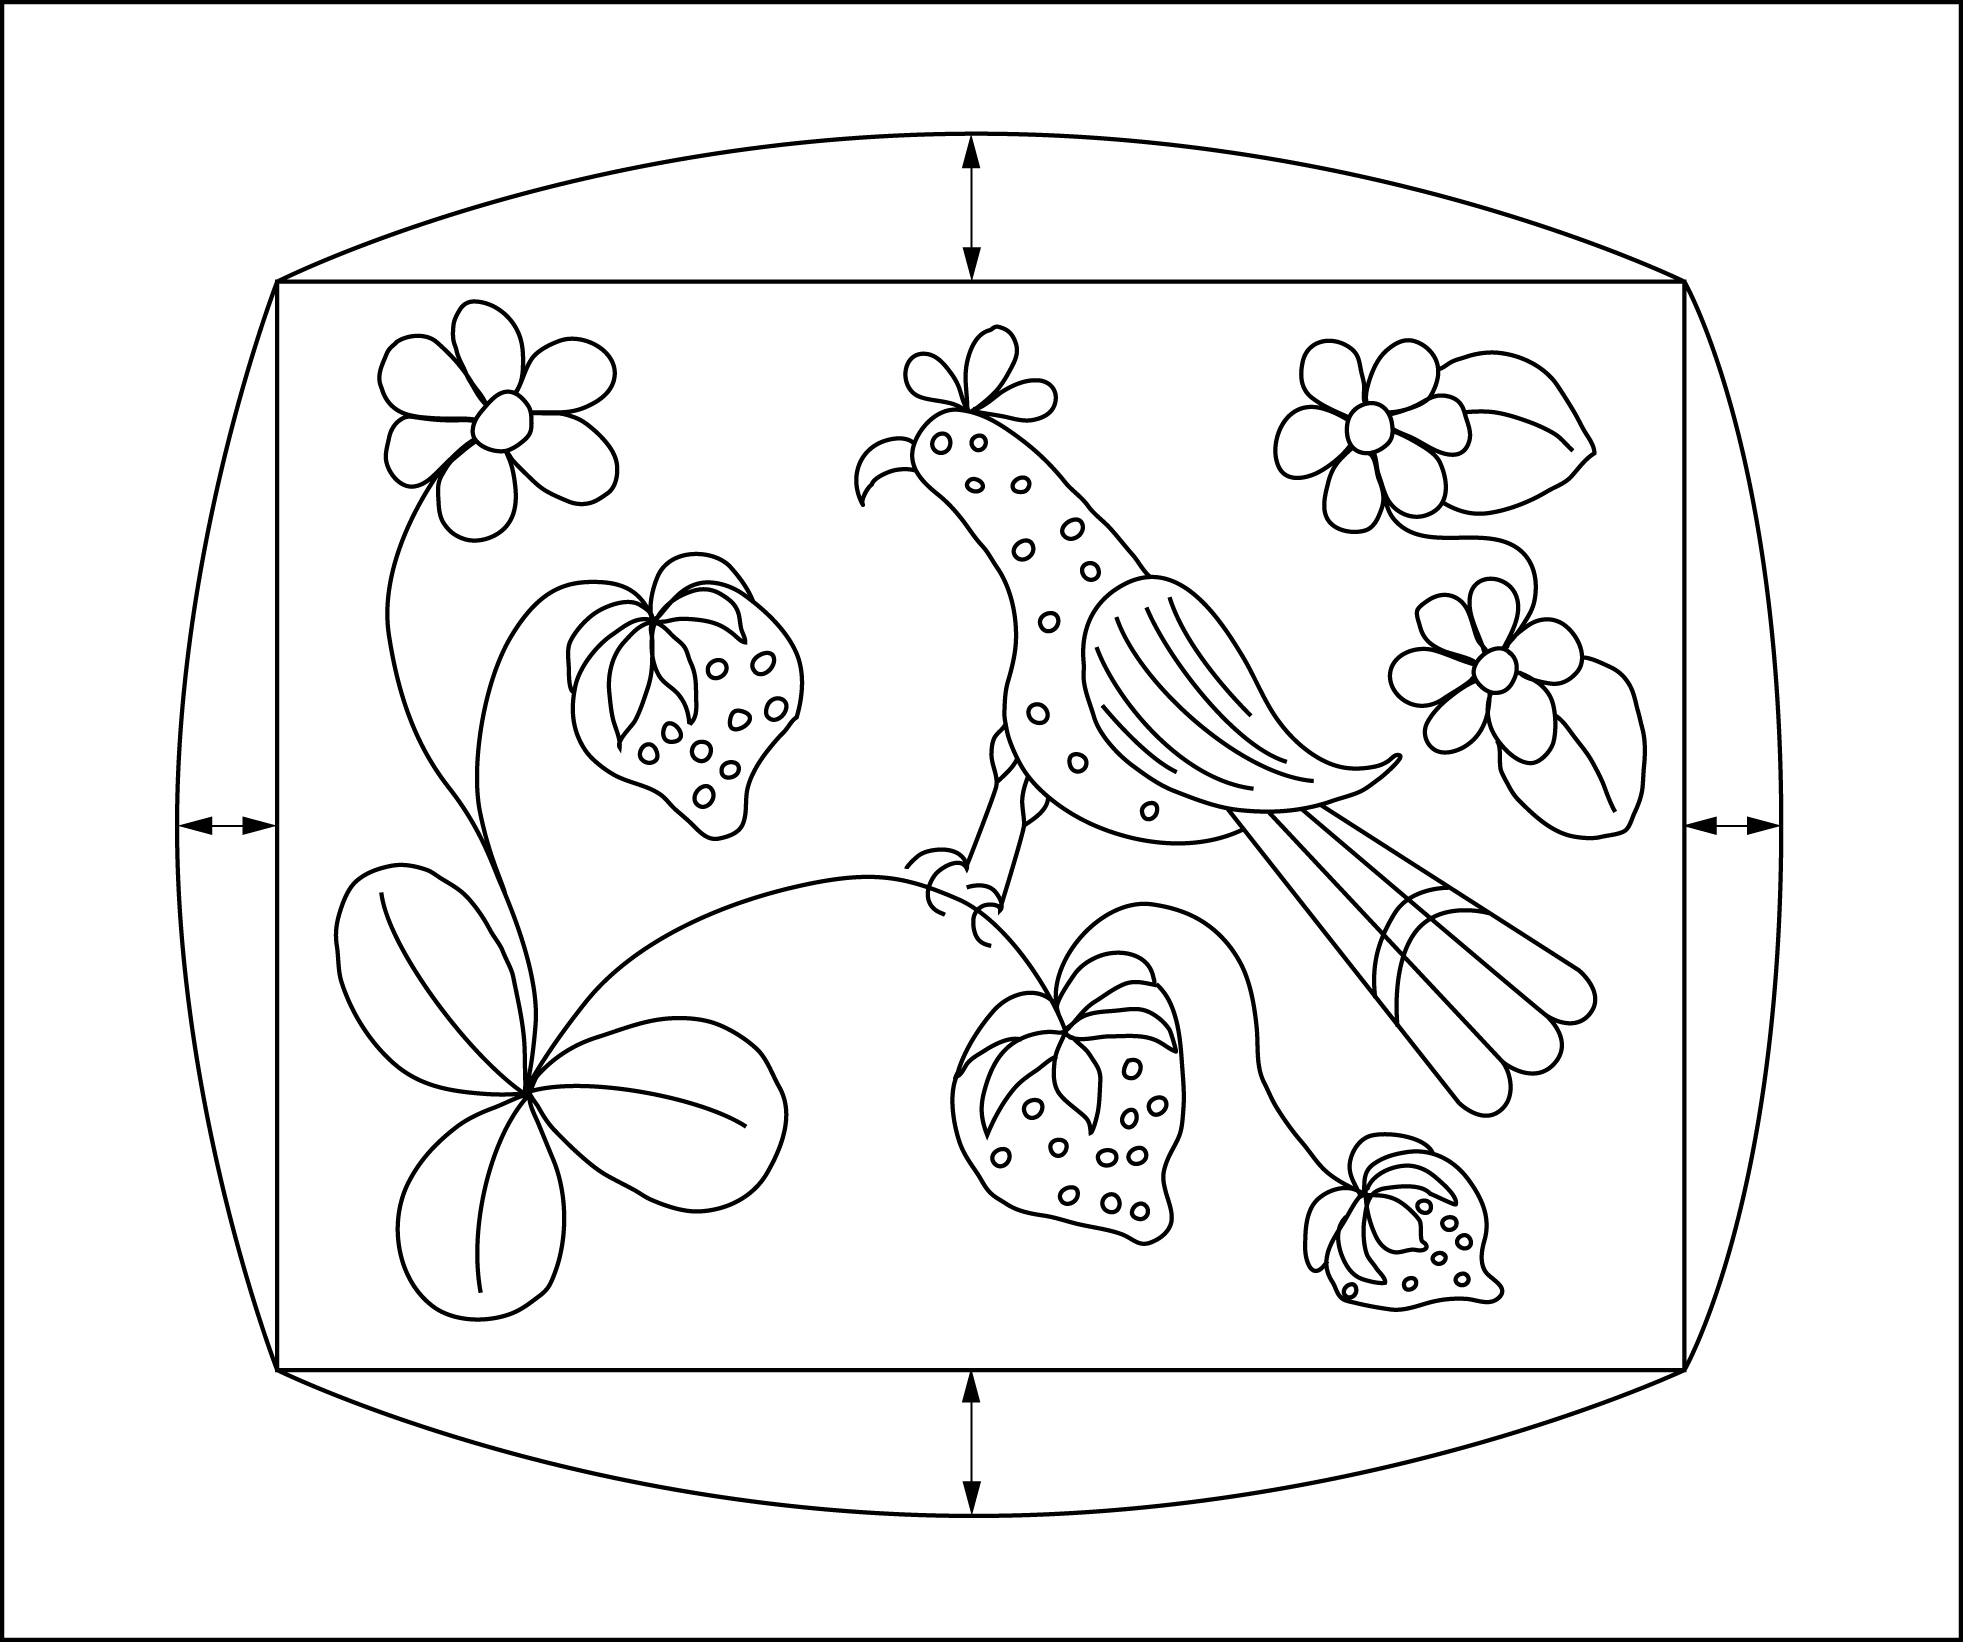
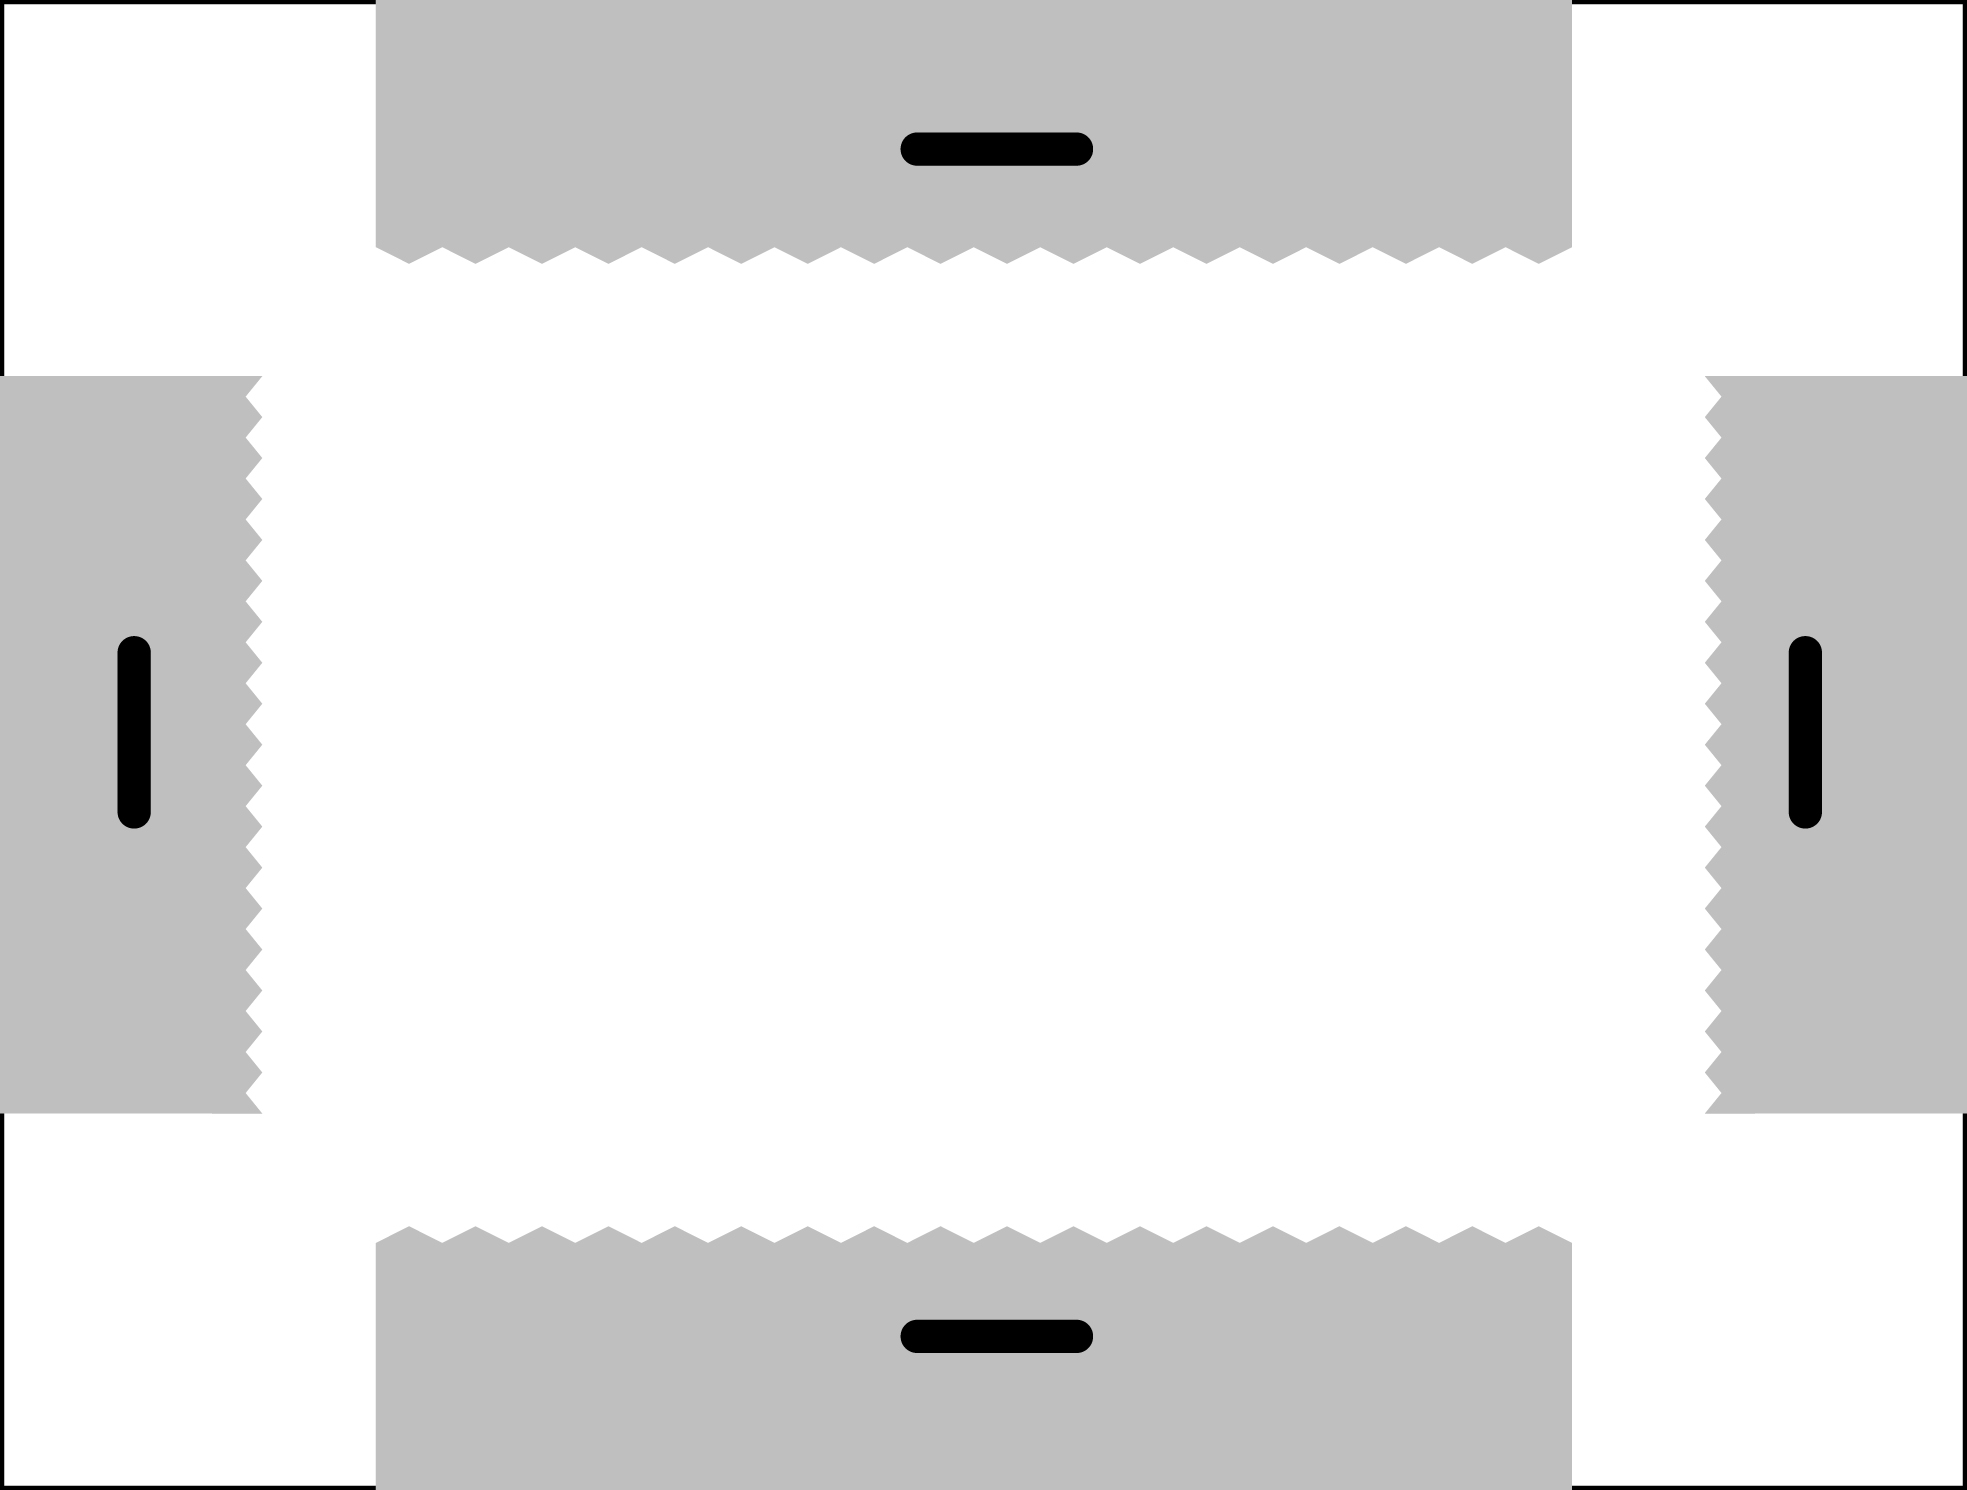
Now that you have the correct measurements, draw a gradual arc from one corner of the pattern to the next. (See Step 2.) Repeat the arc on all four sides. When you hook your pattern, be sure to hook all the way out to these new lines.
Add orientation lines so you will be able to correctly center the finished piece on the top of the stool. (See Step 3.) Fold the material in quarters to locate the center of the pattern, and then extend those lines beyond the arcs you drew in the previous step. Draw these same marks on the footstool top, using the center of the top as your reference point.
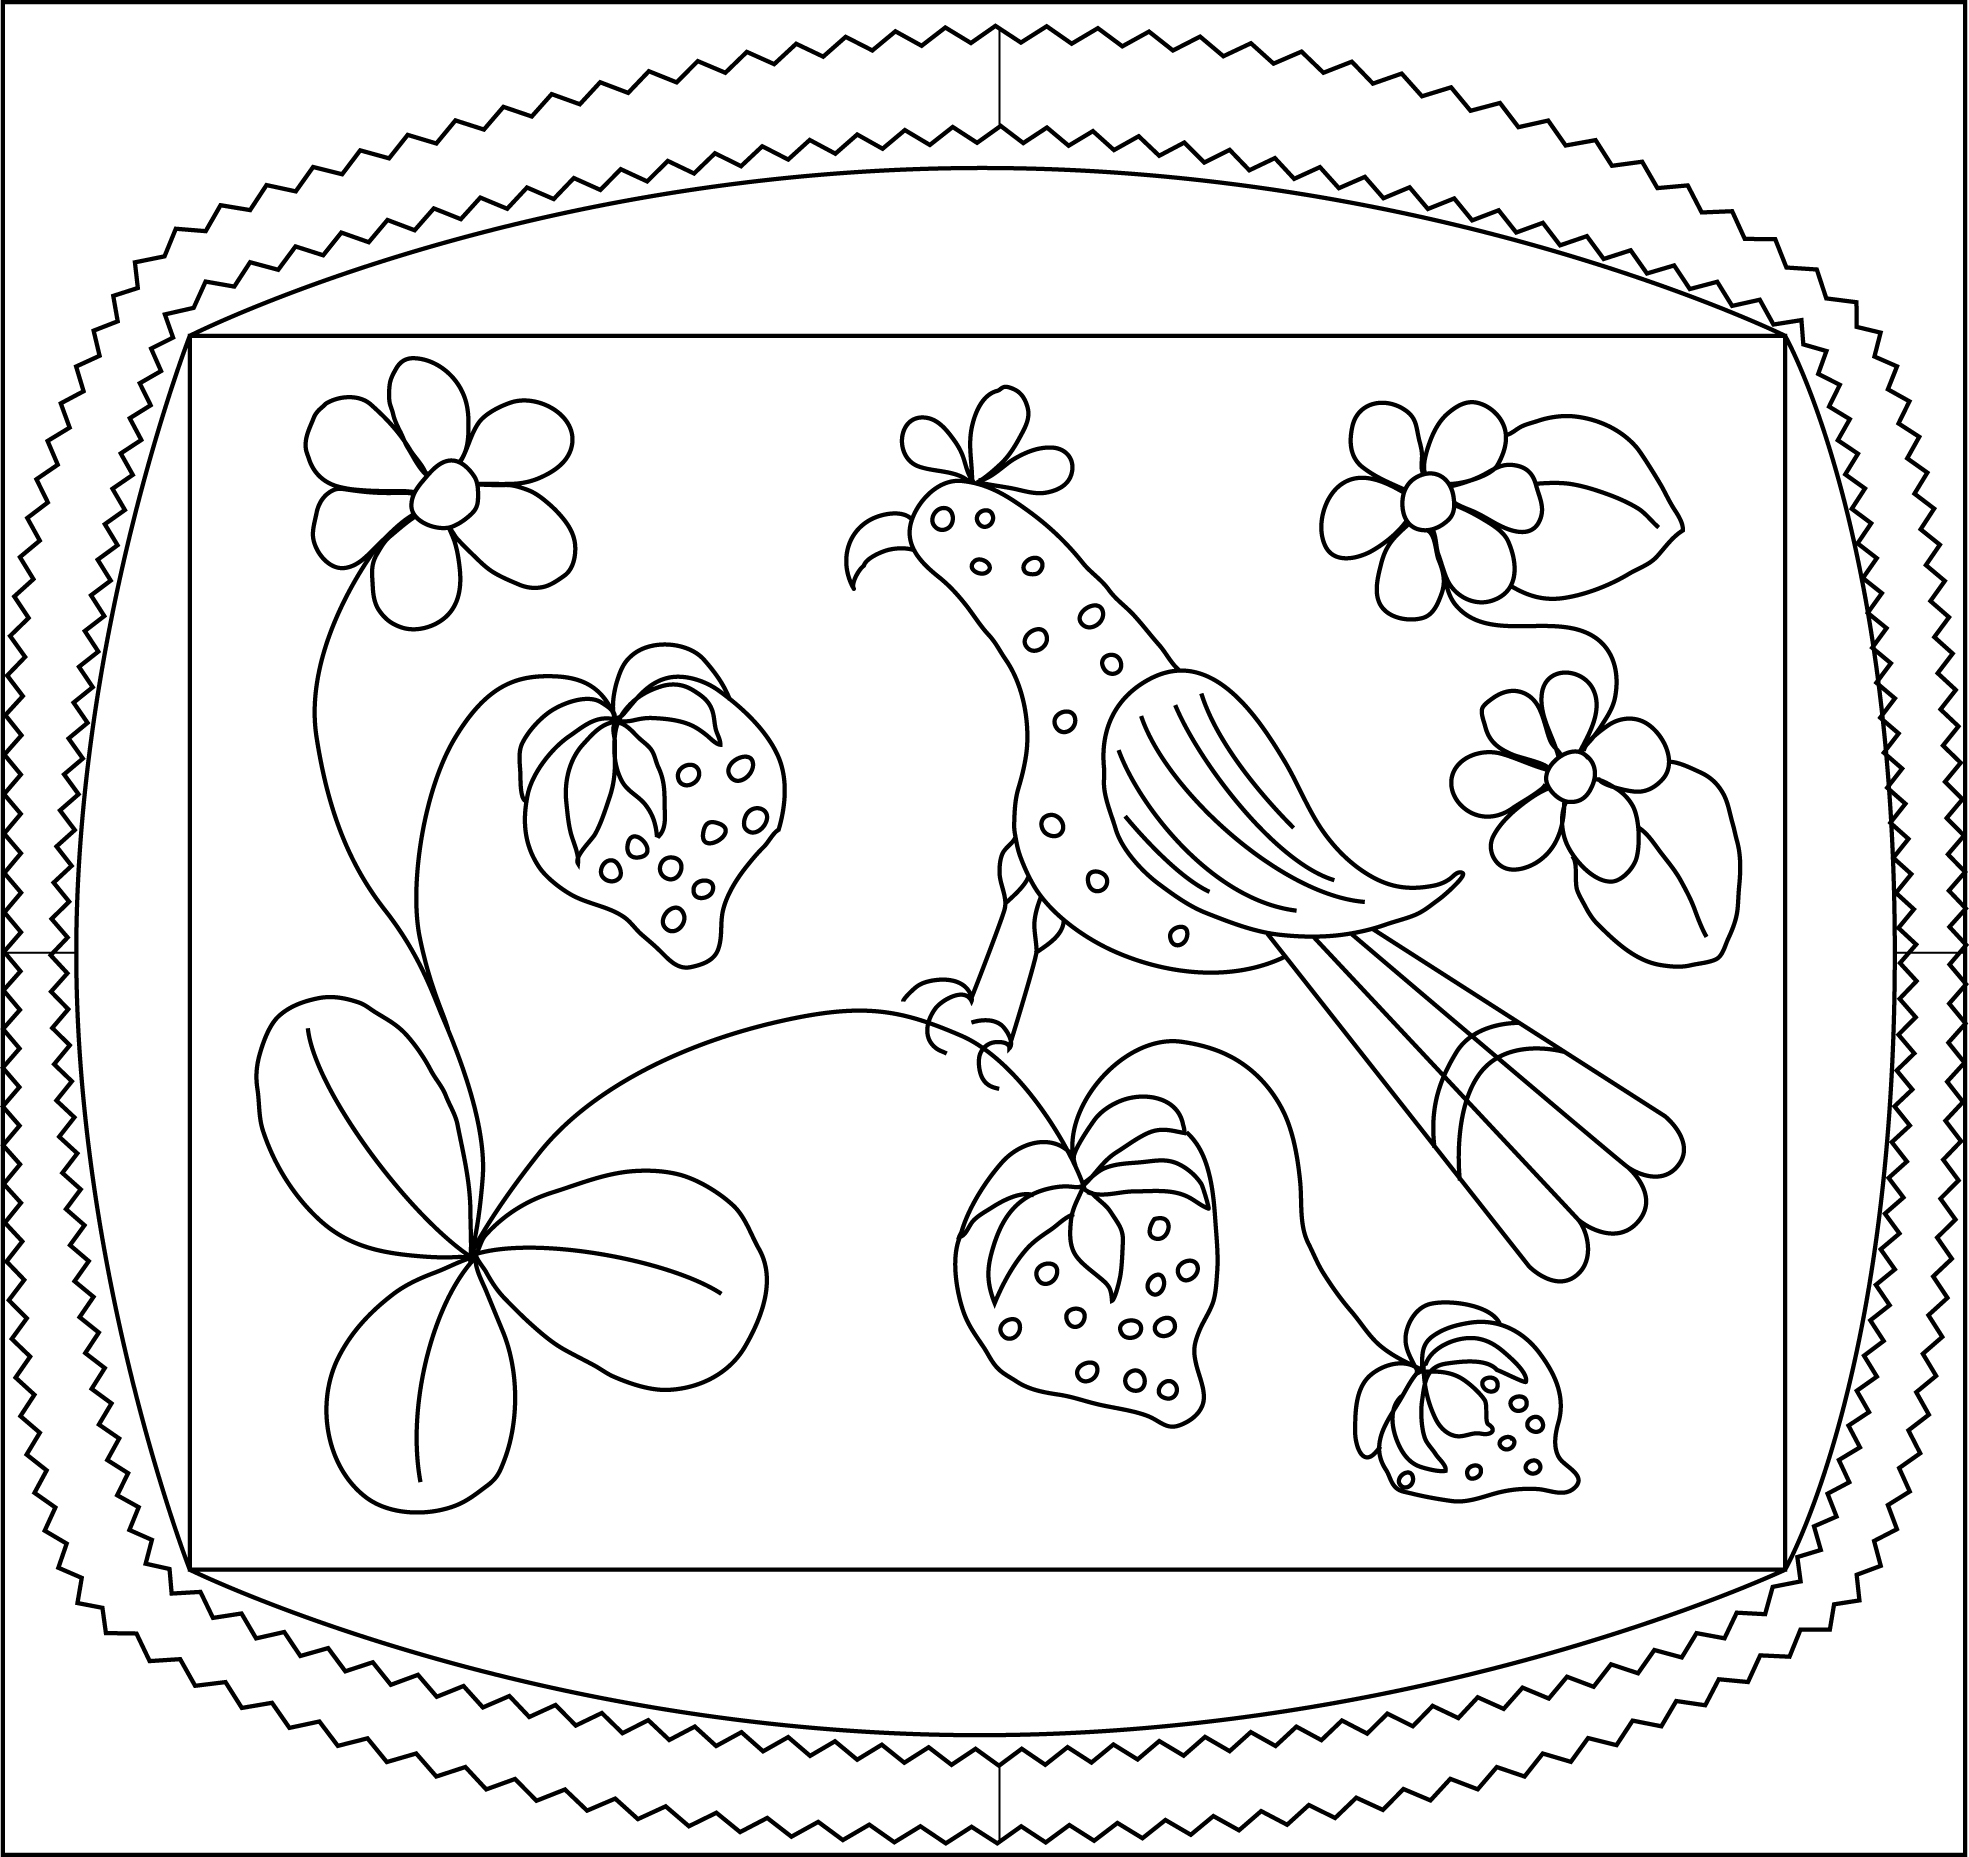
Zigzag 1/4″ away from the arc you drew. Then zigzag again 1 1/5″ away for a second reference. (Refer to Step 3.)
Hook the Pattern
Now you are ready to hook your pattern. Be sure to hook all the way to the adjustment lines you drew. After you have finished hooking, block your cover and cut off any excess backing beyond the zigzag stitching.
Attaching the Cover
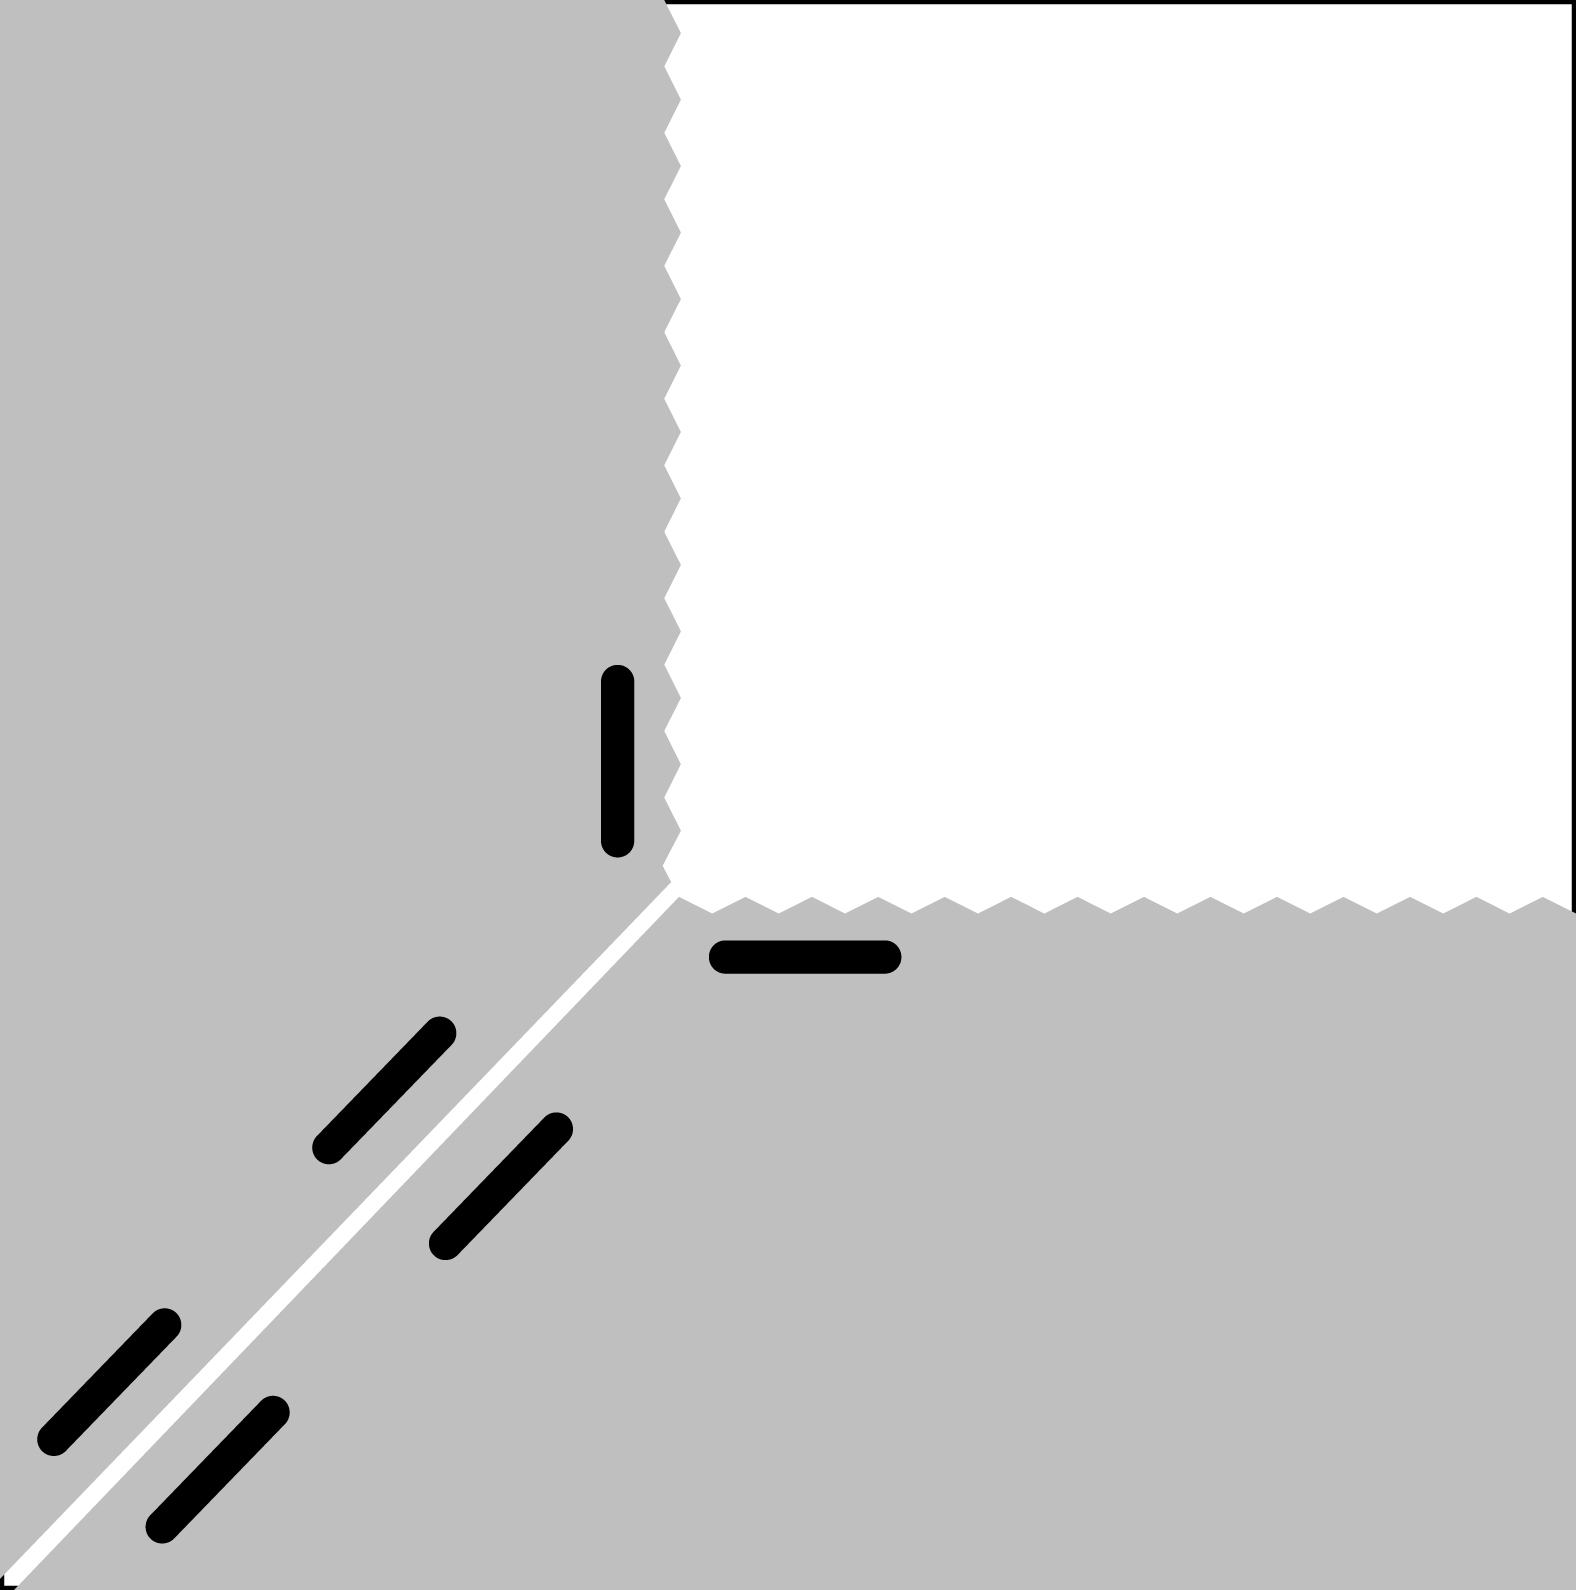
Lay the cover face down on a flat surface and then place the footstool top, upside down, on the back of the cover. Match up the markings on the cover to those on the underside of the footstool’s top. Choose a side of the pattern’s backing and pull so that the edge of your mat lines up with the edge of the top. Now staple, on the underside of the top, 1/2″ in from the edge of the backing. (See Step 4.) Adjust and staple the opposite side. Repeat this procedure on the remaining two sides.
Pull one corner of the cover until it fits snugly, making sure you keep the cover square on the base. Fold the corners in and miter, then staple. (See Step 5.) Now, at 1″ intervals staple the cover to the underside of the footstool’s top.
Cut a piece of wool the same size as the original measurements for your footstool cover (16 1/2″ x 12 1/4″, in my case) and center it on the back of the base. Staple the wool in place close to the edge. My footstool has a lip that supports the base and will hide the staples. Replace the screws. You now have a footstool that is functional and beautiful on top and underneath. RHM
Project Tip
If you need to adjust your pattern, split the differences in the measurements in half and add that amount to both sides of the pattern. For example, if the surface you want to cover is 12″ wide and your pattern is only 8″ wide, you’ll need to add 2″ to the left edge of the pattern and 2” to the right edge of the pattern to keep the design balanced.
How to Attach to the Footstool
Step 1: Disassemble and measure the top of the footstool along the outer edge, or across the center if the top is padded.
Step 2: Add curved lines to the perimeter of the pattern. This extra material will be used to secure the hooked cover to the top of the footstool.
Step 3: Zigzag around the pattern to prevent fraying. Add orientation marks to the pattern and the top of the footstool so you can easily center the finished piece.
Step 4: One side at a time, adjust the fit so the edges of the hooked cover are even with the edges of the footstool top; then staple the backing in place.
Step 5: Miter the corners neatly.
Detail of Strawberry Bird Footstool.
I am a gold member why doesn’t your platform recognize me???????????
Hi, Ellen! I’m sorry to hear you’re having technical issues. First, make sure you are logged in. If you are still having issues viewing all the projects, email our customer service team at customer.service@amprycp.com. I hope that helps!