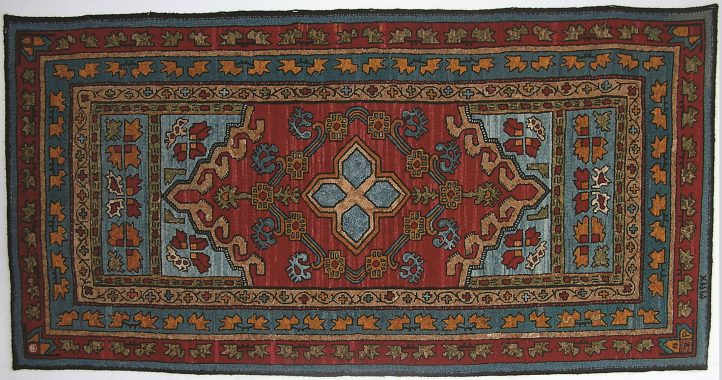
OSV 134 Large Frost Oriental, 37″ x 72″, #3- to 5-cut hand-dyed wool and antique paisley on linen. Designed by E. S. Frost and hooked by Nancy Z. Parcels, Mechanicsburg, Pennsylvania, 2010. Nancy’s rug is a finalist in Celebration XXI.
As I pull those last few loops and finish a hooked rug or mat, my mind often wanders to my next project. I am ready to move on, but I remind myself to concentrate on the last important step of finishing my hooked piece: grooming.
The several steps it takes to groom a rug should not be overlooked. I can’t tell you how often I have seen a rug on display and wished it would have gotten a good pressing! Judges are trained to look at detail and how the piece is prepared. Neatness counts, and a good grooming can make or break a rug.
Prepare Your Workspace
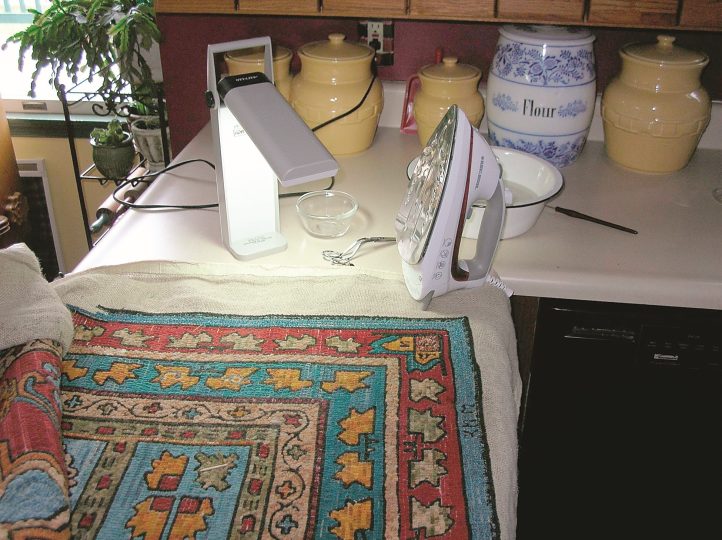
As you prepare to groom your rug, find a good place to work. The kitchen counter is an excellent choice—it’s higher than the table and working there is easier on your back. Gather all the tools you need:
- Retired beach towels
- Iron
- Light source
- Clean white washcloth
- Round toothpicks
- Pan to hold water
- Scissors
Start on the Back
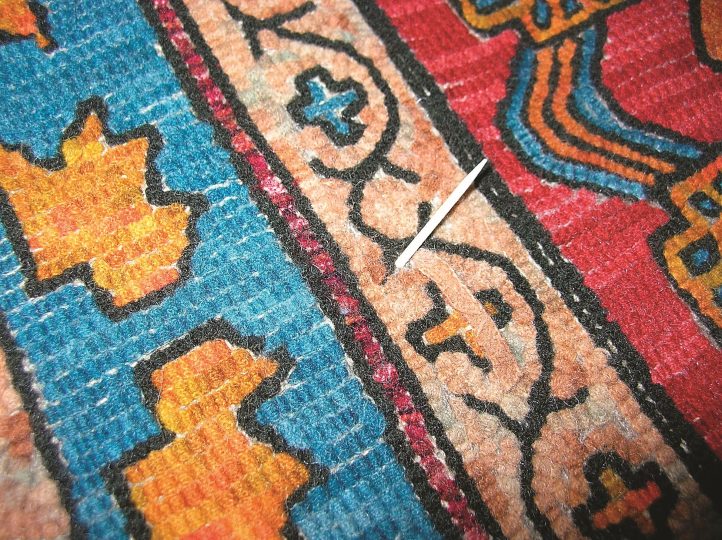
A “holiday” in a hooked rug is a space that needs to have one or several loops hooked into it. Those spots may not be visible from the front of the rug, but you can easily spot them from the back.
To fix a holiday, turn over your rug and look at your hooking from the reverse side. Do you see any areas where just a loop or two are needed? When you locate one, stick a toothpick halfway through it. With the hole marked, turn the rug over and add the few loops you need to make the hooking consistent.
While you are looking for holidays, check for crossovers, which is when one loop crosses over another. Crossovers are a hooking no-no. They will eventually wear unevenly and cause problems, so rehook them now to extend the life of your rug.
Are there threads from your wool that need to be trimmed away? Now is the time. Remember: the back of the rug really tells the story of how well it was hooked.
Steaming and Blocking
Steaming is a very important part of finishing your hooked rug. It helps to relax the fibers of the rug and the foundation, and allows your rug to lie flat. Steaming can also relax some of those loops that might sit a bit higher than others, evening out the surface. If you are working a large rug you can, and should, steam as you go. Steaming and blocking should be done both before and after whipping or binding to relax your whipping or binding so it sits more evenly with the hooked loops. New irons with water tanks are wonderful new tools to steam rugs, but they are expensive and don’t fit into everyone’s budget. Any iron that steams will work.
Here is how to properly steam and block a rug:
You may need an additional light source to see all the holidays, crossovers, and stray threads.
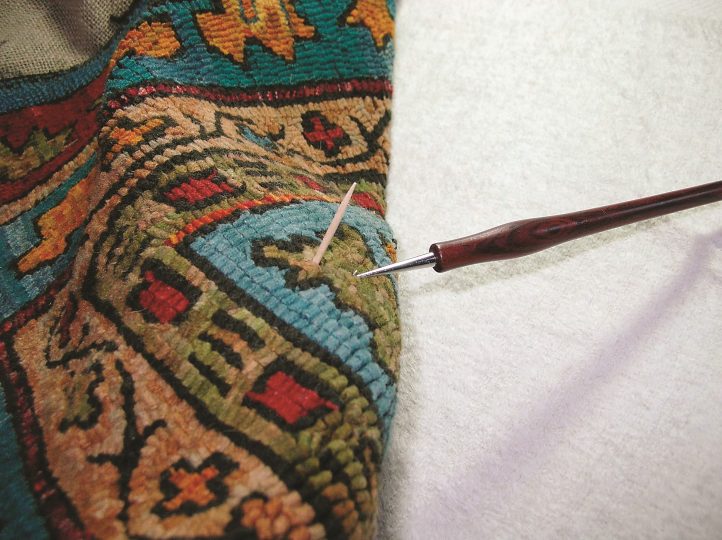
Holidays are tiny bare spots in your hooking. Find them on the back of your rug an mark each with a toothpick pushed through to the front.
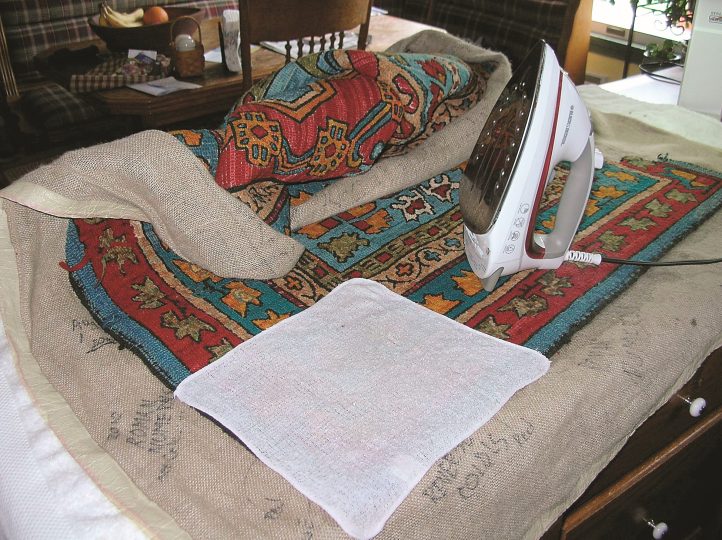
Lay a damp washcloth over the rug and steam each section of the rug with an iron.
- Lay two old beach towels over the counter to protect it and absorb the heat. I also position a portable light on the counter next to where I am working so I can see better.
- Set your iron on the wool setting, and fill it with water so it steams.
- Fill a bowl or pan with several inches of warm water. Put a clean white washcloth into the pan to soak up water.
- Lay the rug, hooked side down, on the counter. Make sure your rug is placed straight on the grain of your foundation.
- Squeeze some of the water from the washcloth, but leave it damp. Place the washcloth over a section of your rug and place the hot iron on top. Allow the iron to steam. Do not move the iron around: remember, we are steaming, not ironing.
- Hold the iron in place at least 5 to 10 seconds or until the sizzling has stopped.
- Lift the iron, now place it next to the area just done.
- Continue this process until you have steamed the entire rug, one washcloth block at a time. Every inch of your rug should be pressed.
- Turn your hooked rug over, and repeat the process again on the top surface.
- When the whole rug is finished, lay it on top of clean towels on the floor to dry overnight. A small fan placed nearby can speed up the drying process.
Note: For best results, steam and block your rug both before and after whipping or binding your rug. Then you will be assured that everything on your rug will lie flat, with no lumps, bumps, or unevenness.
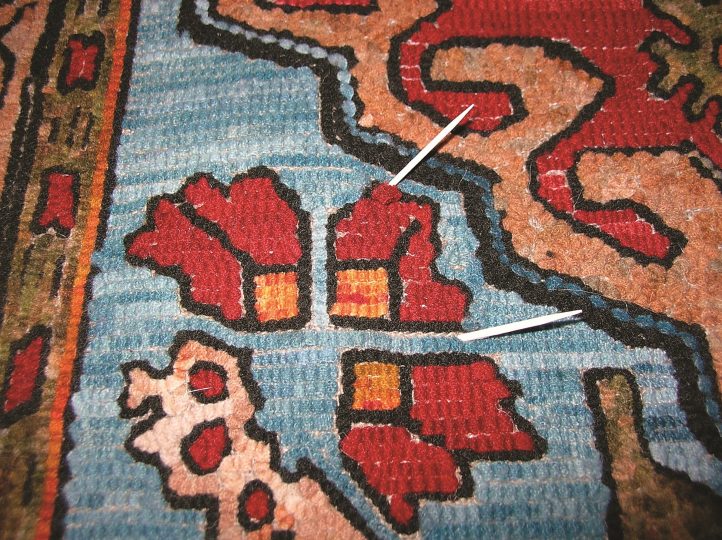
Look at the back of your rug for crossovers and holidays. Toothpicks mark the spots where repair is needed. Make the repairs before you steam the rug.
Add a Label
Last but not least is the label. Remember that our hooked rugs are heirlooms, and they will outlive us. Even if you have chosen to hook your name and date into your rug, you need to give credit to the artist—you—by putting a label on your rug.
A label should include any or all of the following information: your name, name of the rug, designer, type of foundation, size of rug, cut of wool used, dates began and completed, and camps or teachers who helped. One of my friends also included on the label which of her children should get which rug—a great idea, in my opinion!
You can make labels by hand or with the aid of computer programs, or you can custom order labels from a variety of businesses. I make my labels from muslin. Simply sandwich fusible interfacing between two pieces of muslin and press the three pieces according to the manufacturer’s directions. For multiple labels, prepare a larger piece of muslin and cut out the labels as you need them. Use a fine permanent marker to write information on the label.
GROOMING CHECKLIST
Before you call your rug done, look for the following “little things” that could affect the appearance and wear of your rug.
- Holidays
- Crossovers
- Stray wool threads
- Steam and block your rug at the following times:
- For large rugs: as you go
- For small rugs: before and after binding/whipping
Nancy is not only very knowable she is a very dear person. I am happy to say I have been introduced to her by friends.
Nancy is lovely! I had the chance to work with her at Rug Hooking Week last year. A wonderful woman and talented rug hooker!
Great reminders. Thank you!