Vintage baskets with hooked tops easily hold the wool, hooks, scissors, linen, and all the things I need for my work. Carrying hooking essentials in a sturdy basket keeps everything together and close at hand, and the hooked top adds that little extra flair.
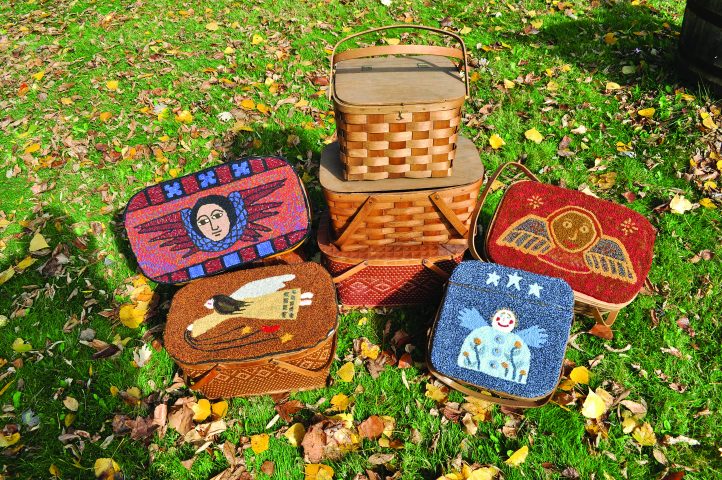
When I stroll through antique fairs and flea markets, one thing in particular catches my eye: vintage baskets. The baskets on my wish list are woven wicker or woven reed baskets with hinged wooden lids or tops that lift to open. They usually have two swivel or swing handles.
Baskets are an ageless art form, but like old hookings, they seldom reveal the artist’s identity. Unlike old hooked pieces that are in good condition or repairable, and tend to be rare finds, old pie and picnic baskets are easy to find and, better yet, quite reasonable in price.
As my collection of these baskets grew, I discovered a way to combine old baskets and rug hooking. I added another layer of “handmade” to some of them: I hooked tops.
Hooking these tops is easy and fun. Because of their small size, they work up quickly and they are a great way to use up leftover wool.
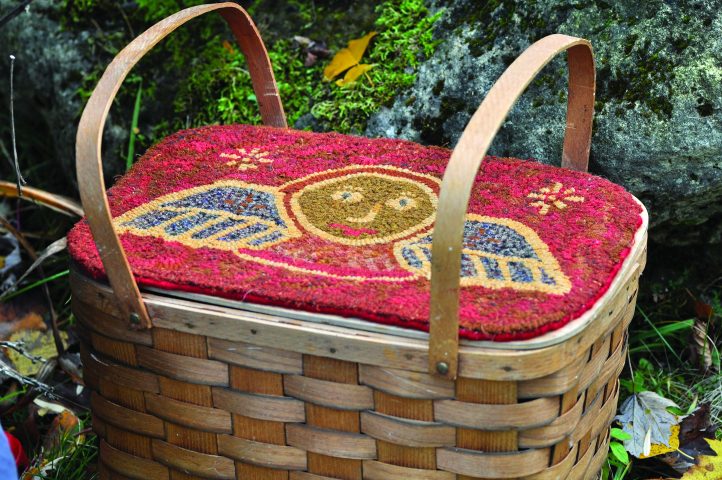
Design Tip #1: Swing arms make a basket easy to carry, but take extra care when planning so your loops don’t impede the arms.
Design Tip #2: Sometimes baskets are painted or woven with colored materials; take those colors into consideration when color planning.
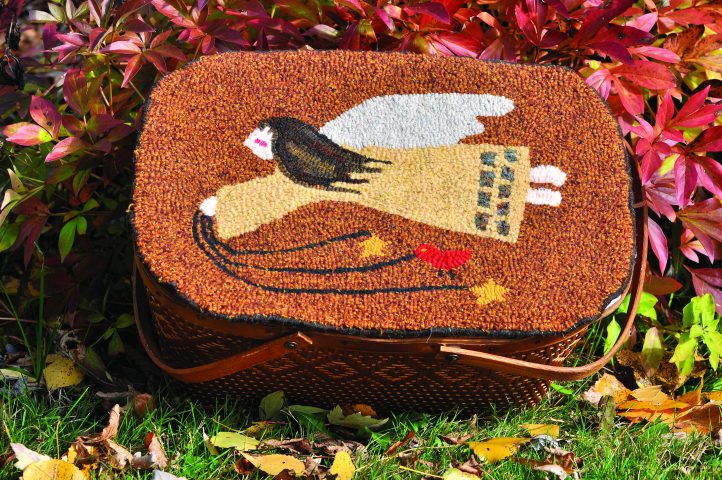
Designing basket tops is a wonderful exercise that allows you to focus on one motif. I have a lifelong fascination with angels, so I chose folk art angels as my theme. Pictures of angels are easy to find and easily adapted to hooking—and I kept them simple to guarantee that the projects are fun and fast.
So the next time you see a basket with a hinged wooden top at an antique show, a flea market, or a garage sale, don’t pass it by—even if the top looks damaged or scuffed. Antique baskets and rug hooking are perfect companions. Adding an angel or two on the top surely makes them heaven-sent.
TOP IT OFF
Securing your finished piece to the basket is quick and simple. After you steam the piece, whip the edges with yarn. Apply a generous amount of fabric glue to the wooden basket top and press the hooked piece into the glue. Pile heavy books on the cover to weigh down the hooking while the glue dries overnight.
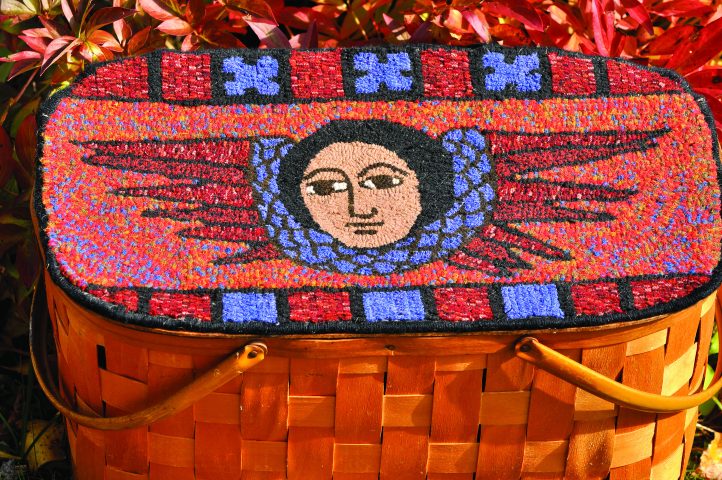
Design Tip #3: Think creatively when it comes to borders. Not all baskets need them, but a partial border can help to shape the space.
EASY AS PIE
To swap out tops on the baskets, use Velcro instead of glue. Velcro allows the hooked tops to be switched easily and safely. Sew a fabric backing to the finished hooked piece and attach the Velcro to this backing. Then glue the corresponding Velcro piece to the wooden lid. The backing on the hooked piece keeps it looking neat and finished and prevents any snagging.
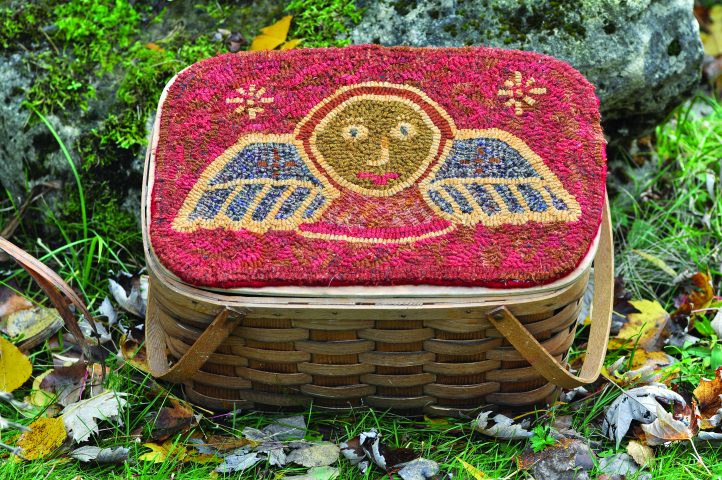
Design Tip #4: Keep the details to a minimum. I use a #7 or #8 cut.
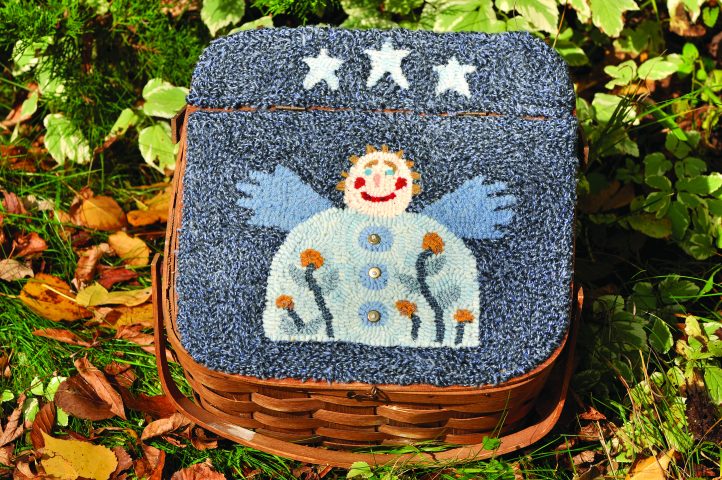
Design Tip #5: Carefully measure the circumference of the wooden top and adapt your design to fit into this oblong or square shape. If your basket is hinged, design separate hooked pieces, one for each side of the hinge.