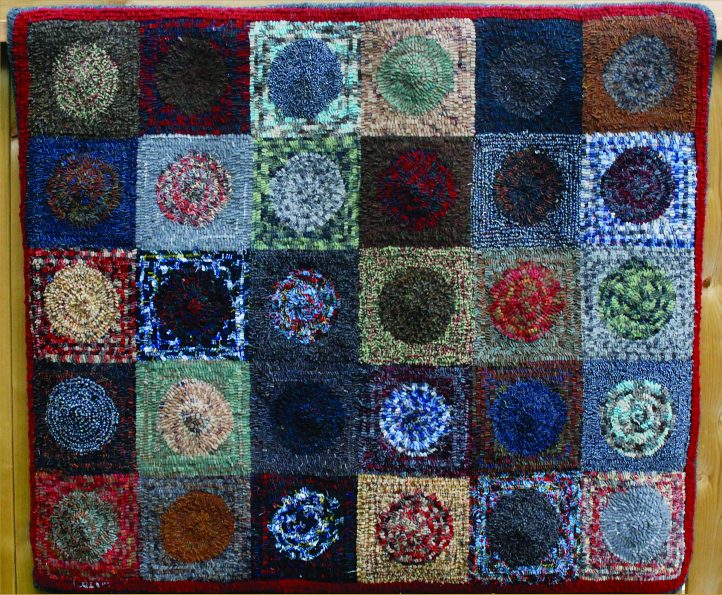
30 Plaids and a Plain, 36″ x 30″, #7-cut wool on linen. Designed and hooked by Laurie Wiles, Edmonton, Alberta, 2010.
PHOTOGRAPHS BY DAN WILES
Like most rug hookers I have a sizeable stash of wool waiting to be made into rugs. When I noticed that the plaid pile was starting to overrun everything else, I knew I had a problem: plaids had taken over my studio.
I tried to convince myself to make a sampler by hooking a few rows of each plaid and keeping a swatch so I could see how the colors in the fabric worked up. I know several hookers who make samplers, and I always admire their foresight. However, I have an aversion to hooking samplers. I needed a project to motivate me, something to use up several yards of wool—and something that would be fun!
I wanted to try a hit-and-miss, but I find that technique difficult. Seldom do I just hook what I’ve pulled from my stash. I almost always fuss and control what the outcome will be. So to eliminate the stress and meet my fun quota, I challenged myself to do a hit-and-miss rug, as that would be practically fuss-free.
PAIRING THE PLAIDS
I estimated I had about 15 plaids to play with and planned a simple design to show the plaids both hooked in a straight line and hooked on a curve. I settled on a design using 6″ squares and 3″ circles.
But when I went to my studio to pull fabric, I discovered I had over 30 different plaids. My smallish rug had doubled in size! Using linen as my backing, I drew 30 6″ x 6″ squares in six rows and five columns. Then I drew a circle in each square. My rug now had become a large 36″ x 30″.
Now the fun part: I had to plan which plaids would go where without being overly concerned about balance and color flow. After mulling over the possibilities, I decided to pair the plaids and hook two squares of each pair. Then each plaid would be used twice: once hooked straight as the square, and once hooked curved as the circle.
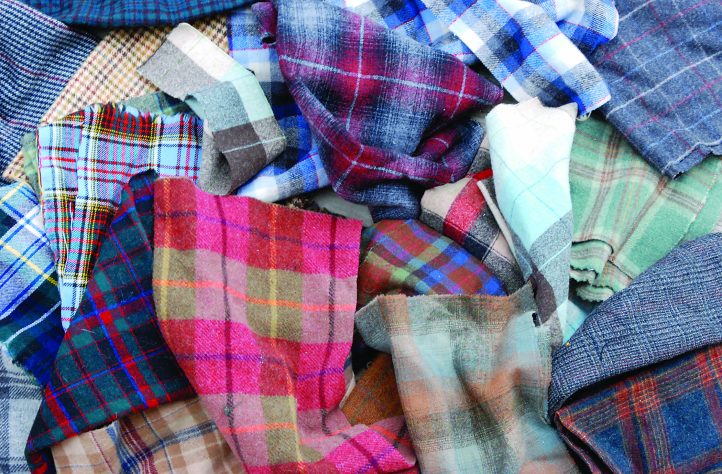
Laurie used this pile of plaids to create the 30 circles and 30 squares in her design. The only plain piece of wool in the rug was used to hook the border.
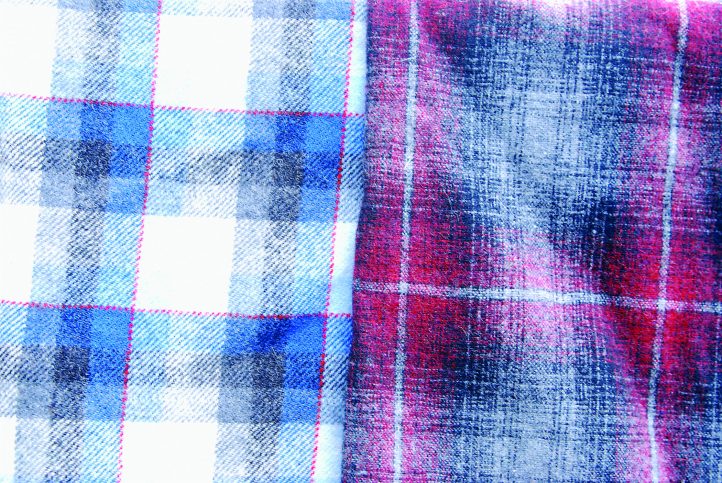
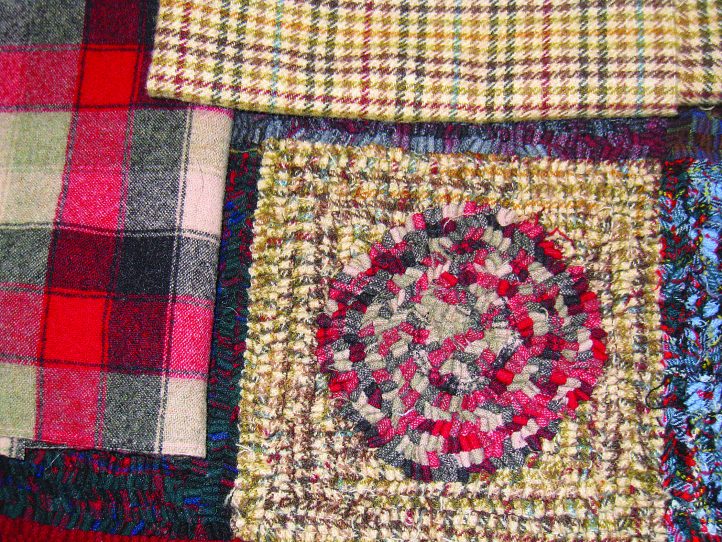
One of the squares and its circle. Laurie used the blue, black, and white plaid for the center and the red and black plaid for the square that surrounds it.
I resisted the urge to match lights with darks; I started randomly pulling pairs. By pair four, I found myself agonizing over which plaids to put together. I sternly reminded myself of the fun factor and started again. This time I laid out 15 plaids on the floor and randomly placed the remaining 15 without fussing. It was hard! I never thought of myself as a controlling person, but this rug really tested my resolve to stay in the true spirit of hit-and-miss.
During this matching step, I discovered that all my plaids where not created equal. Some were tightly woven, and some were a much looser weave; some were quite heavy and thick, and some were light or thin. To keep the thin wool from falling apart, I needed to use a wider cut. I settled on a #7 cut and estimated that I would need just under 1/3 yard of each plaid. (I estimated high: I didn’t want to encounter surprises along the way.)
FUSS-FREE (ALMOST) HOOKING
Now I was ready to start hooking. I cut up my first pair of plaids and pulled my first loops somewhere in the middle of the rug, hooking first the circle and then the outside square. I hooked the circle from the outside in, trying to maintain the circle shape while keeping the fabric loose enough to avoid little hills. I tried not to fuss too much about keeping the circle perfectly round, as I knew that our eyes would recognize the circle shape and correct any minor errors.
The squares were much easier to hook. I hooked them from the outside in also, keeping the lines straight and working up to the circle. When each circle and square pairing was complete, I moved to the next area. I always chose a new spot away from the just-finished square. Now my biggest struggle was to not plan and balance the pairs of colors. The fun factor wobbled as I started to worry about how the rug would turn out.
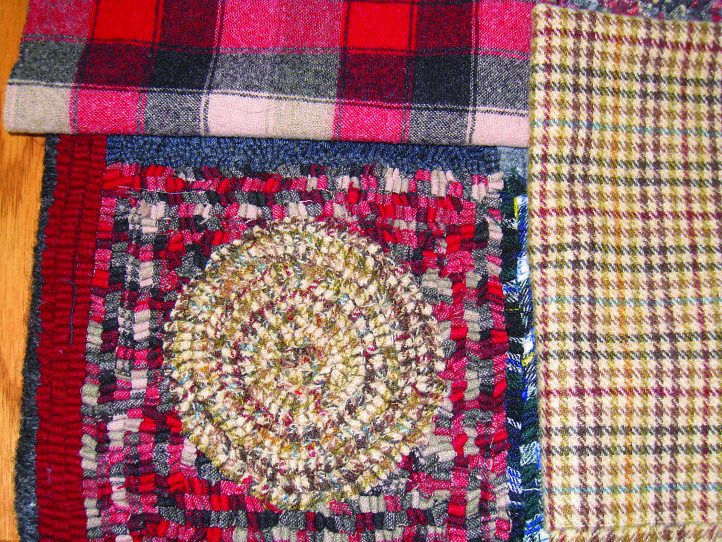
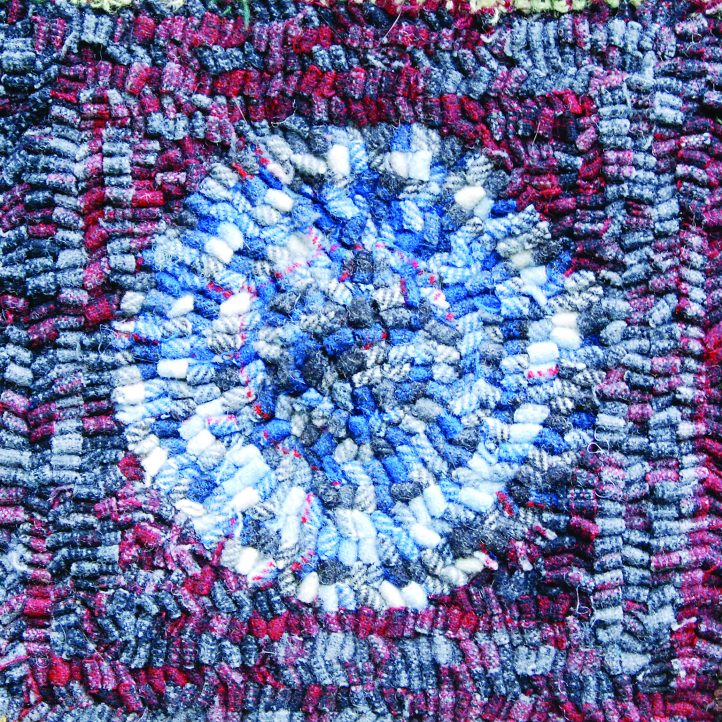
By using each of the plaids twice—once in the circle and once in the square—Laurie was able to see how each would hook up. The end result was not only a fun rug, but also a guide for how to use her plaid wool in future rugs.
Some of the wool was very thready, but I resisted changing out any of the plaids I had chosen. As the rug progressed, it became easier to let go and just hook the squares as they came. The fun factor raced back up the scale.
I told myself if I only hooked one square a day I could be finished in about 30 days. It seemed like such a simple plan, but life, as usual, got in the way. My month-long project stretched to 3 months, and then I needed another month to settle on the border and finish the whipping. Either green or blue would have worked for the edge, but I chose red because I liked how it pulled the rug together.
PUTTING THE FUN IN HIT-AND-MISS
In the end, the rug hooked up much better than I ever imagined. I love how the plaids are muted and soft, giving the piece an old-fashioned, antique feel. Even though some of the values of the plaids are close in tone, the direction of hooked squares and circles helps to differentiate the individual plaids. Only one square makes me feel uneasy, as it seems to pop out instead of blending in with the rest of the rug. So far I have resisted the urge to pull it out and replace it with another plaid. I suspect you’ll know which one I’m talking about when you look at the rug.
I used my favorite method for finishing: rolling the edges forward and using the excess material to act like a cord. I used a herringbone stitch to whip the edges. After several false starts using different colors of whipping wool, I finally settled on a soft charcoal grey. This little bit of wool is the only “plain” in the rug.
I seldom feel the urge to hook the same rug more than once, but this is one I can imagine hooking again. Next time I will be much pickier about keeping my circles round and less concerned about the final outcome. I might not pair up the plaids; I might just hook them in randomly. I might also mix in some solid colors and textures. This simple design can be as easy or complex as you want, and it can be a real stash buster.
LESSONS LEARNED
- Let go of control; not every rug has to be planned to the last detail.
- Plaids change greatly when hooked on straight or curved lines.
- Even the brightest plaids blend together and mellow once hooked.
- Hooking with different textures and weights of wool adds depth and interest to a project, but remember to hook the thin wool tighter and the heavy wool looser.
- Smaller plaids look less like plaids and more like textures once hooked.
- Keep the stitch length even. Thicker material tends to hook lower, and thin wool is easy to pull higher.