
Purples, pinks and blues—imagine these as flowers!
PROJECT AND PHOTOGRAPHY BY GWEN DIXON
Hydrangeas are my favorite flower. The blooms are full and lush and call out, “Look at me!” The lacy, star-shaped petals are charming, and the woody stems suggest strength and support. There are more than 70 species of hydrangeas, and the variety of colors means that everyone can find at least one species to love.
For a workshop in July 2018, I had intended to teach hooked hydrangea, but struggled to figure out how to highlight their fullness. Proddy was the answer.
I had tried proddy hooking with both a proddy hook and with a regular rug hook, and I preferred using the regular rug hook. I wanted everyone in the workshop to be able to finish, or nearly finish, their projects by the end of the day, so the question became how to make that possible. Hoop art was the answer.
Now to plan the proddy hydrangeas. I researched the variety of colors of hydrangeas with the help of Google, then began dyeing wool. So much fun!
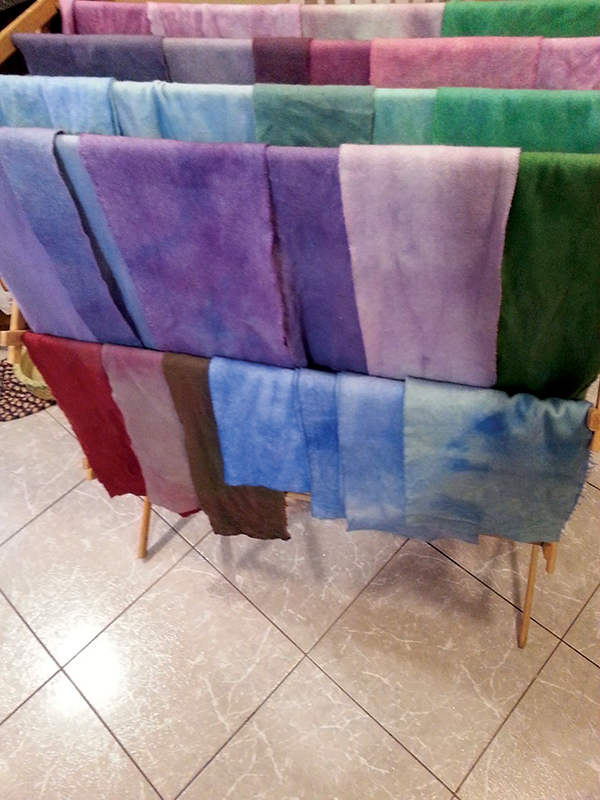
Purples, pinks and blues—imagine these as flowers!
After dyeing, it was time to prep the wool. I cut the wool into squares and trimmed off the corners to get the hydrangea petal shape. The squares were 1 ½” in size.
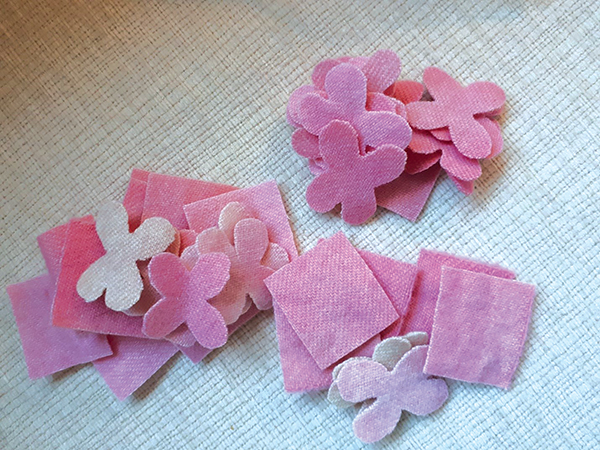
Wool cut into shapes, ready to assemble into hydrangeas.
PREPARE THE PATTERN:
I drew three hydrangea blooms on the burlap and finished the edges. When you are making your own pattern, the blooms can vary in size and be round or cone shaped. To secure the edges of the burlap, I stitched around the 10-inch circle drawn on the burlap.
In the workshop, each student received a 10-inch hoop, the burlap with pattern, and three bags of wool. The bags contained mixtures of flower-colored wool of different values. Students could exchange the bags to get different colors or exchange wool squares to customize their blooms. Each bag had some wool squares already cut into flowers. The students used good-quality small scissors to trim the corners to make more flowers.
MAKE THE FLOWERS:
- Pull each petal up through an opening in the burlap, working in a square pattern. You can vary this shape slightly, but for beginners this is an easy way to start.
- You may want to cut a flower piece in half if you have a smaller area to fill.
- Leave spaces between the flowers, so that the petals can look loose and natural.
- Hook the stems and leaves with a variety of greens and browns. Use what you have on hand.
I have found that the larger blooms take 50-55 squares and the smaller blooms take 40-45 squares. Be sure to have extra squares on hand, depending on how full you hook your hydrangeas. You can also add colors from neighboring blooms, or use green at the base of the bloom or in a few places throughout the flower.
This project is perfect for beginners. You can create lovely, lush hydrangeas in a hoop, which means that you don’t need to own a hooking frame. And the size of the project is appealing—it is not large or intimidating, and you can easily finish their project right in the hoop.
FINISH THE PROJECT:
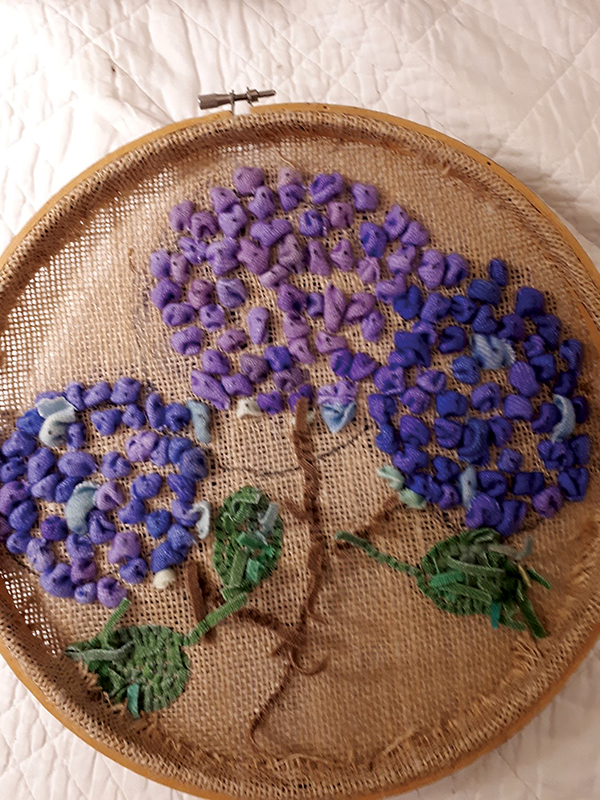
The finished back of the proddy hydrangea hoops looked like this.
- Remove the burlap from the hoop.
- Cut around the circle, leaving 1 1⁄2″ of burlap.
- Place the burlap back into the hoop.
- Tighten the hoop.
- Glue the burlap edges to the wooden hoop with tacky glue. Hold the edges down for a minute or so as you work your way around the hoop.
- Hang your hoop with a small nail or pin and enjoy your beautiful flowers!
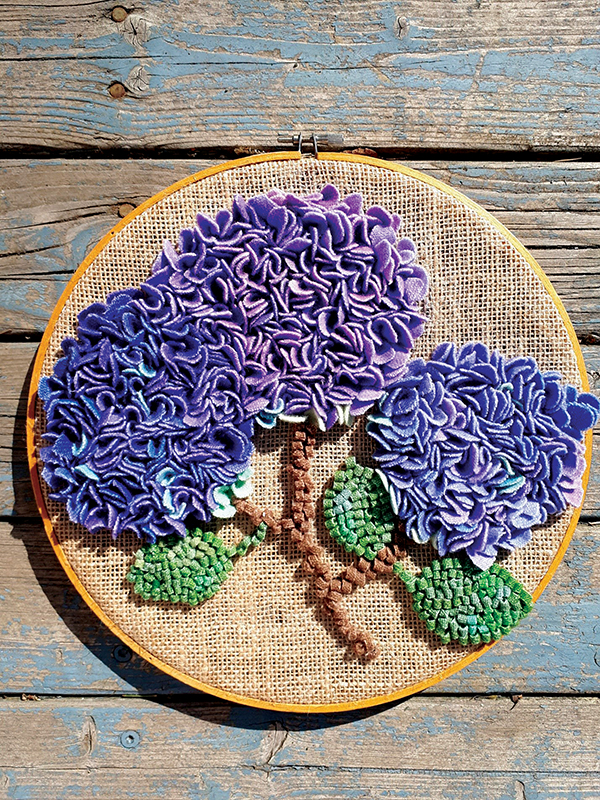
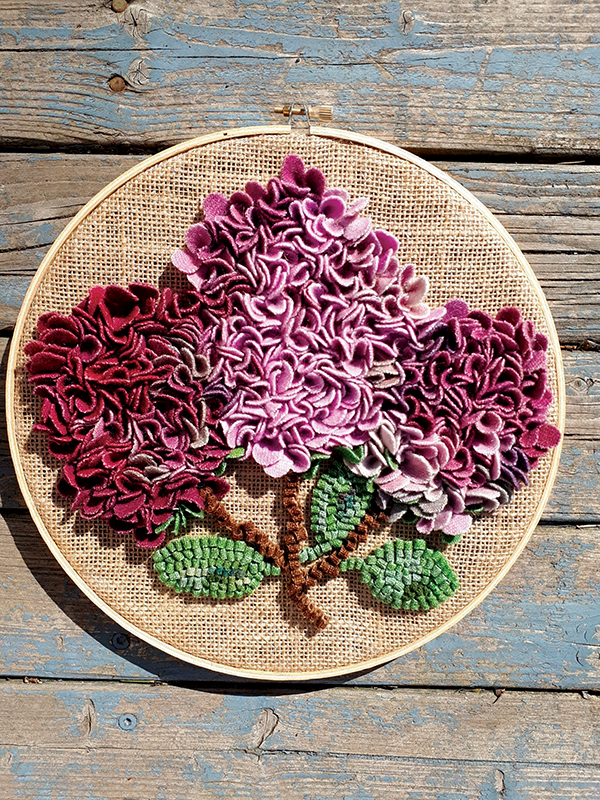
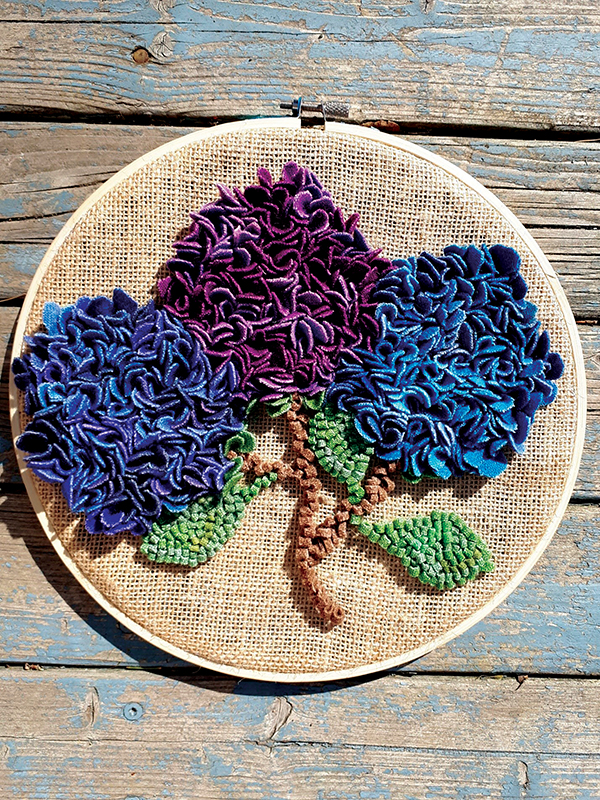
These are examples of the samples I created for this workshop. My friend Karen Garston hooked two samples and I hooked two samples.
This is the pattern for the hooked proddy hydrangeas. Feel free to revise it to make it your own.
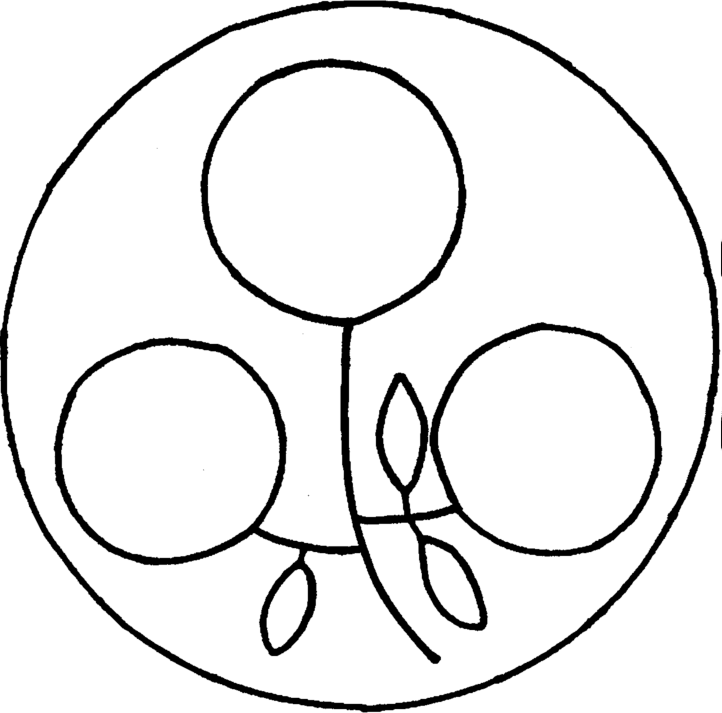
This is the basic pattern showing the shapes of the flowers. Size your design to suit your needs and to fit your hoop. If you have any questions, suggestions, or need help with this project, feel free to contact me at gwendixonwoolarts@gmail.com.
- Size it to fit the hoop you intend to use: make the blooms larger, smaller, or all the same size.
- Move the leaves up or down on the stem.
- Change the shape of the blooms to a cone shape by hooking more at the base and fewer at the tip.
- Make the leaves larger or give them a central vein in a darker shade of green.
- Place the blooms closer together.