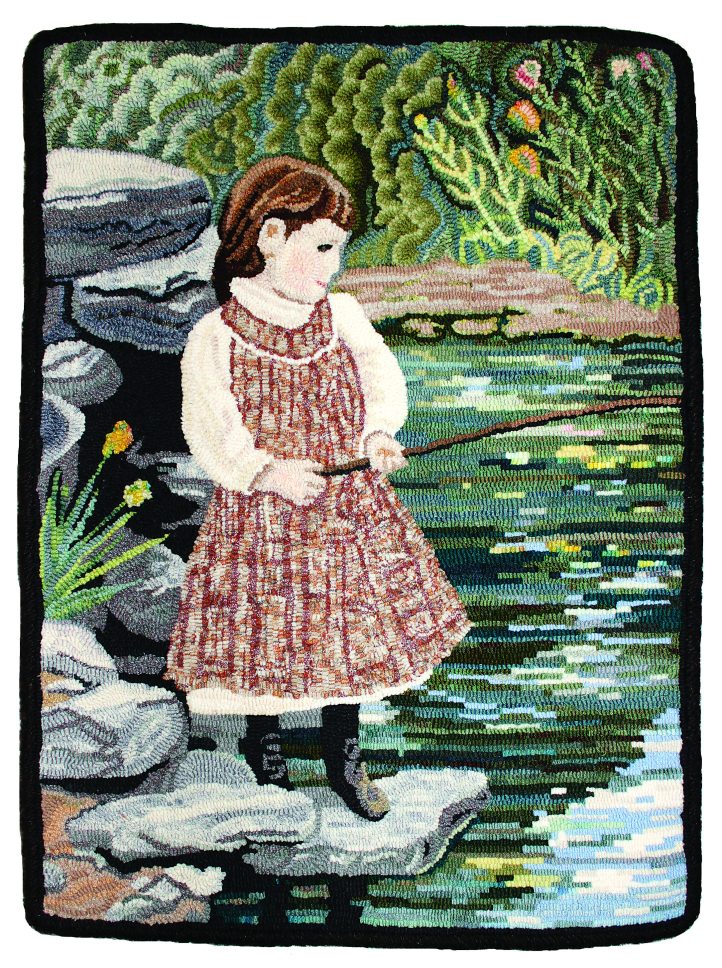
Little Mabel, 15″ x 20″, #3- and 4-cut wool on linen. Designed and hooked by Laura Pierce, Petaluma, California, 2003; Celebration XIV finalist.
Light and reflection are visual magic that add something special to any artwork. A reflection can be the main attraction or just a detail. It may seem impossible to use wool to create light and reflection, but the key is all in how you use color.
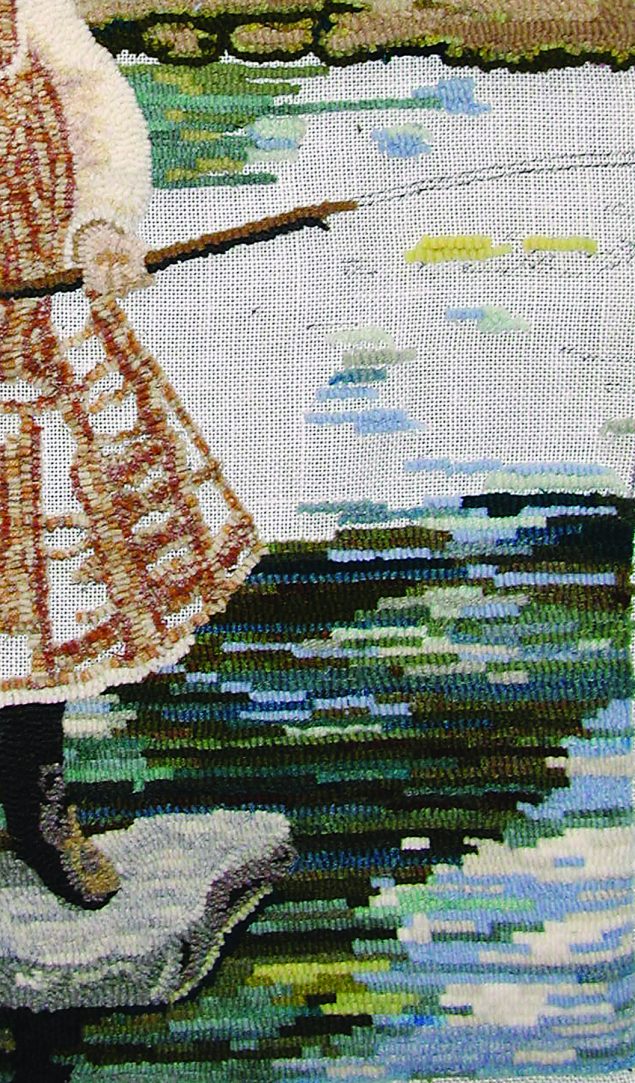
Little Mabel (detail), 15″ x 20″, #3- and 4-cut wool on linen. Designed and hooked by Laura Pierce, Petaluma, California, 2003; Celebration XIV finalist.
In 2002, I took workshops taught by Elizabeth Black and hooked my grandmother as a little girl. I used a sepia photograph taken by my great-grand-mother in 1892 to design Little Mabel. I wanted to hook this rug portrait in color, so I referenced two of my own photographs: one of my daughter, Emma, at that same age and one of a small river in the Sierra foothills to use as a visual guide for the rocks and water. Mabel was quickly hooked—and then there was the water. I knew I needed to work some visual magic on the surface of the stream.
Blue sky reflects in the lower right corner and light filters through the trees on the bank; these reflections make the water believable. Flowers add bits of color, while Mabel’s boots reflect in the water below the rocks. To create the water reflections, I cut up a variety of greens, a few light blues, and white in #3 cut. Then I threw in a few random flower colors. I hooked the rows pretty close together. The whites and lights came first. Then I put in the blues in the lower right corner, and here and there. I hooked some colors where the flowers might reflect from the bank, then filled the rest in with the greens. The placements aren’t exact, but they give the impression of reflection.
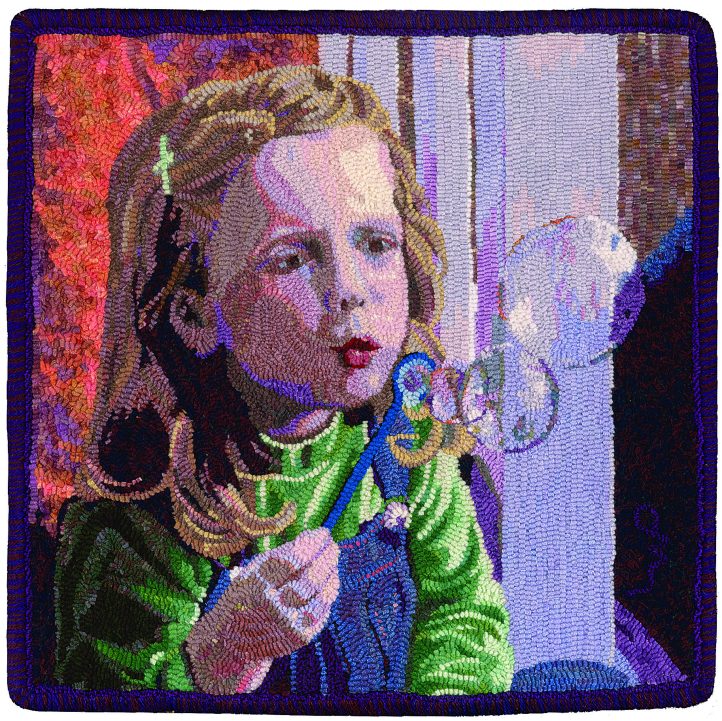
Emmy, 16″ x 16″, #3- to 6-cut wool on linen. Designed and hooked by Laura Pierce, Petaluma, California, 2007; Celebration XVIII finalist.
At Cambria Pines Rug Camp in 2006, I planned a portrait project for class with Michele Micarelli. I wanted a challenge, so I decided to use one of my favorite photographs of our daughter, Emmy. After hooking most of Emmy’s face, Michele wanted me to focus on those bubbles! When the light reflections were hooked, it started looking good; with a bit of the background hooked in, you could see the possibilities. A fine line of light on the thin circumference of the bubble and two highlights completed the illusion. When Emmy was selected for Celebration, Emmy and I became famous!
Suddenly there were requests for portraits and bubbles. Well, what fun; everyone loves bubbles! To teach myself how to hook bubbles—I had just depended on a photograph when I hooked them in Emmy—I used a visual of everyday bubbles and switched the light source so I’d have to translate what I was seeing to what I was hooking. I’m most grateful to my students in the Spring of 2010 at Texas Yellow Rose and Maryland Shores for teaching me a lot about teaching bubbles.
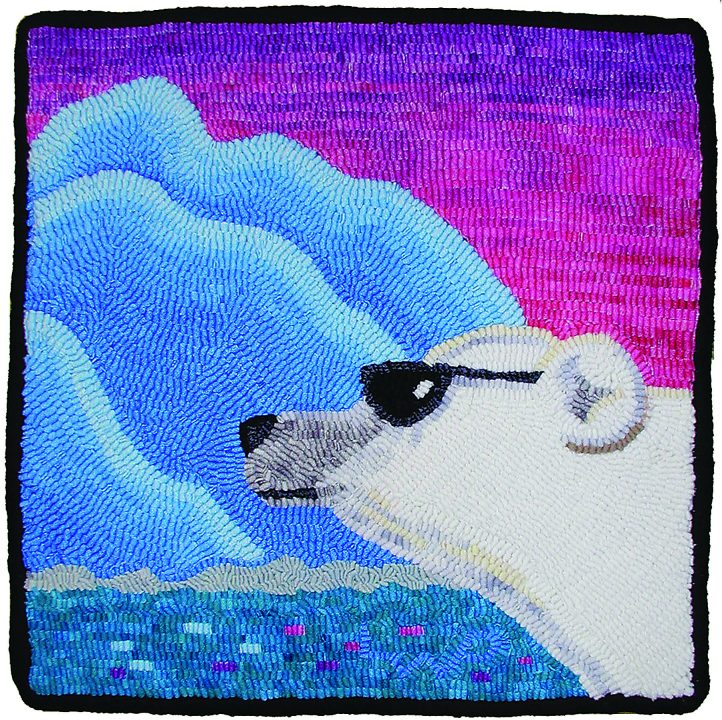
Cool Bear, 14″ x 14″, #8-cut wool on linen. Designed and hooked by Laura Pierce, Petaluma, California, 2007.
Sometimes a reflective detail is tiny, like the dot of light that glistens in your eyes. Graphic artists use a little dot of light to add glisten to myriad products and symbols. You could hook one on a juicy grape or shiny cherry; the same works for dark glasses, as I did for my Cool Bear.
Gradually I’ve learned about creating reflection and glass through watercolor painting and rug hooking. Now, I’m ready to hook some jewels: opals, rubies, diamonds, and pearls!
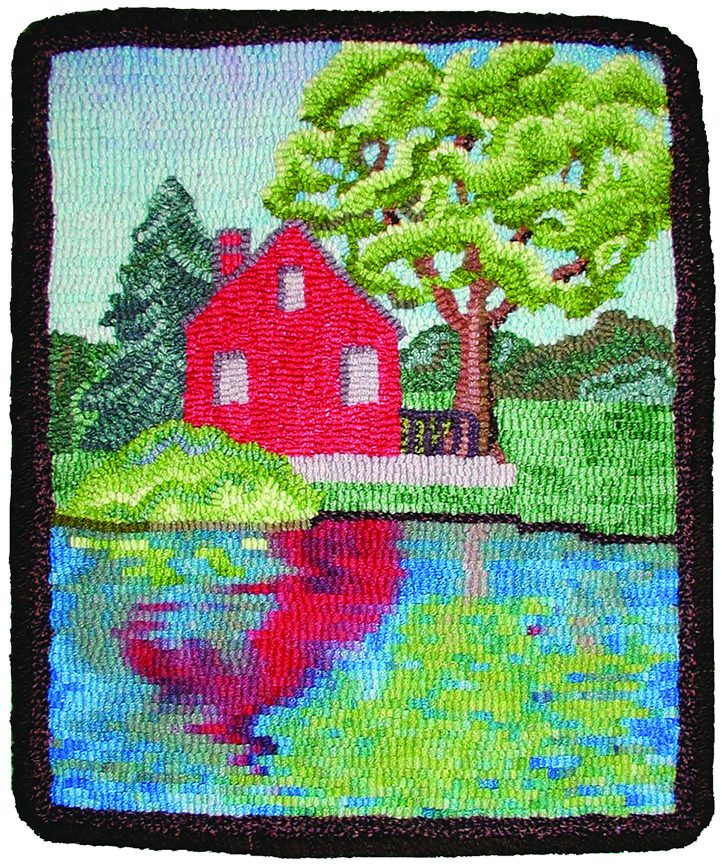
Day Break, 10″ x 14″, #4-cut wool on burlap. Designed by Jane McGown Flynn, wool kit and class by Laurie Wiles, hooked by Laura Pierce, Petaluma, California, 2004.
Day Break is a little landscape reflected in a pond. Laurie thought long and hard about how to create a reflection for the class project; painted wool was her solution.
To figure out how much wool she would need and where the colors should fall, she hooked one continuous row across the pattern and marked where the reflections of the tree, house, and bush would be. Then she unhooked the strips across and measured them so she could dye 1 piece of wool, 33″ x 6″, for the whole width of the water. Laurie hand-dyed the wool to show a stretched-out version of the landscape, reversed and upside down. It was great fun to hook the hand-painted water and see the reflection appear! I changed my tree to a big and glorious Eugene tree, so I made adjustments in my water reflections and borrowed a bit of painted wool for the bushes.
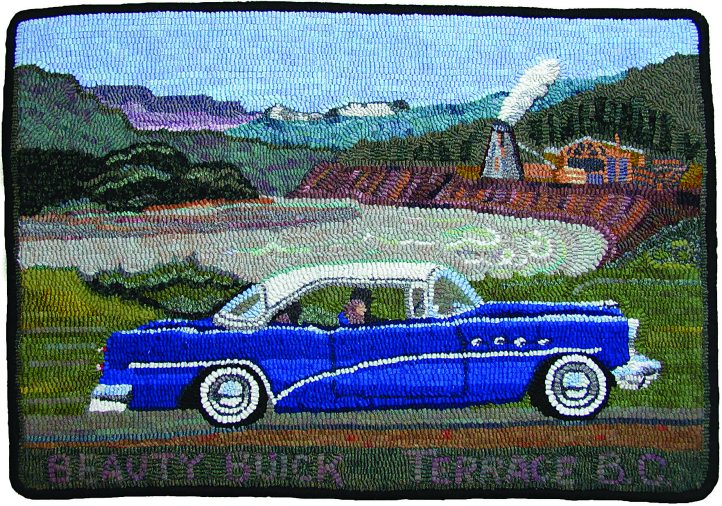
Beauty Buick, 14″ x 20″, #3-, 4-, and 6-cut wool on linen. Designed and hooked by Laura Pierce, Petaluma, California, 2006.
Sometimes a reflection is so small or natural that we don’t really notice it; these are the reflective details that are so important. In 2006, I decided to hook my mother’s Beauty Buick, a ’54 hardtop that with the front and back windows rolled down would create one big window, for the Sonoma County Fair Theme. I knew I could hook glass, but chrome was a new challenge. I recreated the chrome, which is highly reflective, with light blue to reflect sky, light gray for the metal color, and white to reflect sunlight. The front wind-shield and rear window were created by using a pastel blue to reflect the sky, dull green behind the window, and brighter green in the open windows. Light blue shows sunlight reflecting on the high points of the fenders and hood of the royal blue body. What a ride!

Cathy’s Tulips, 12″ x 15″, #3-, 4-, 6-, and 8-cut wool on linen. Designed and hooked by Laura Pierce, Petaluma, California, 2011.
In 2010, I taught a new project based on a glass vase of flowers. Edges of glass reflect the surrounding light, and adding a dark background would set off that light. I needed photographs from which to work, so I set a glass vase with flowers in a sunny spot with a dark background. The best light for pictures was outside in the backyard on a glass café table on the patio. Here was a great teaching pattern with lots of reflections and transparent glass! I call it Cathy’s Tulips, to thank Cathy Williams, my mentor for this workshop.
I dyed wool kits for the glass and reflections, pastel spots (Pastel Meadow), a light green with bits of light magenta, and a sky spot with blue and lavender (Purple Haze). I also included pastel purple for dull shadows, dark blue for dark shadows, and white for the light reflected on the vase, the top of the water, and the bottom of the vase.
BUBBLES ARE TRANSLUCENT, REFLECTIVE, AND SPHERICAL…INSIDE OUT!
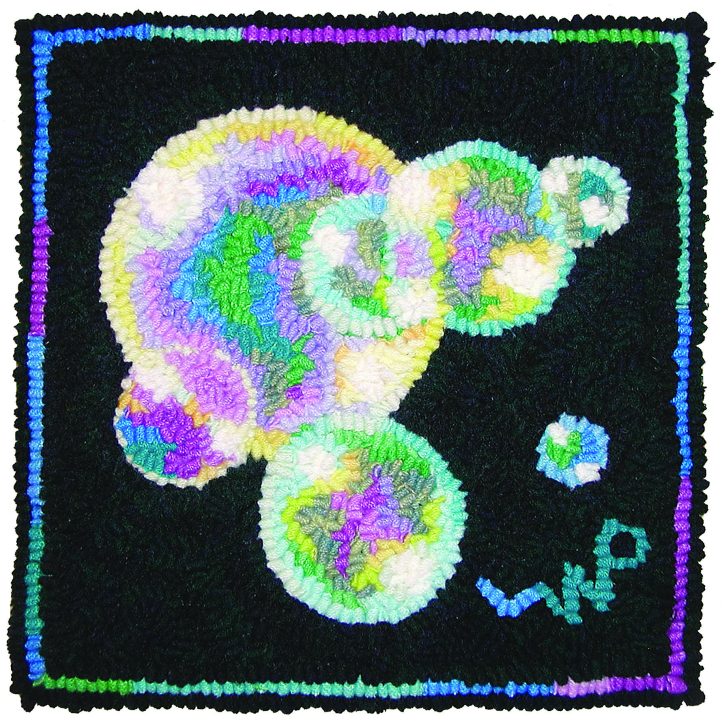
Rainbow Bubbles, 10″ x 10″, #3- and 6-cut wool on linen. Designed and hooked by Laura Pierce, Petaluma, California, 2009.
Translucent: Some bubbles are see-through, except for highlights and whatever color is on its thin surface; some are a soapy rainbow of colors or reflections. What is behind a bubble can some-times be seen in the center of the bubble. When a bubble’s surface is very thin, the background can appear all the way out to the edges (like Emmy’s bubbles).
Reflective: The surface of the bubble reflects the light and surroundings in two places: the outside on the front and the inside of the back. The front is right side up while the back is upside down. The highlight is like the gleam in an eye, but because we see through the bubble, the highlight also shows up twice: outside front and inside back.
Spherical: When there are images on the surface of a bubble, these images are a curved and squashed reflection of the surroundings: one image outside front and one image inside back (upside down, reversed). As a child, I remember staring at my reflection in a spoon. It was mysterious how my face was upside down in the bowl of the spoon, but on the back of the spoon, I was right side up. A spoon is like a bubble—reflective and spherical.
Hooking a bubble is the opposite of shading a pear or cup. The outer edges of a pear are in shadow and are hooked in darker values, while the outer edges of a bubble are reflecting light and should be hooked with light values. Use two or three light values (pastels) of yellow, purple, green, magenta, and blue, and hook them gradually, working around the bubble and the highlight. Depending on the bubble, hook one to four rows of pastels starting with the lightest on the edge and getting darker as you work into the bubble. Hook the outside row neatly around the circle. After that use the random fill or fingering method of hooking so each row blends with the next. After the outer pastel edge is complete, fill the rest of your bubble with the background color.
Random Fill: I learned this technique from Michelle Sirois-Silver. It’s a wide-cut method ideal for creating texture and blending colors. Instead of rows of nice fat loops, turn your hook for each loop, zigzagging and mixing up the loops. The freedom of this method allows you to put the loops where you want them. It takes a bit of practice, but once you learn it, you’ll find you can use it with any cut.
How to Hook the Rainbow Bubbles
- Draw highlights in all the bubbles in a consistent manner.
- Hook one bubble at a time. Start with the top bubble, the one closest to you, and work your way back. Keep in mind that because bubbles are transparent, the back bubbles will be vaguely visible.
- Hook an irregular oval for each highlight with white; generally, the top highlight is bigger than the bottom highlight.
- Hook the rim of the bubble with a lighter pastel; vary the pastels for each bubble.
- Hook around the highlight (irregularly) with a lighter pastel.
- Blend the next darker value of color as you fill in around the bubble.
- Where bubbles overlap, use lighter colors.
- Hook the background color in the center of the bigger bubbles. Make it a duller version of the background.
- Add reflections if you want a challenge.
- Blend the center with the outside edges until the bubble is complete.
How to Approach Cathy’s Tulips
- To make this difficult pattern manageable, I broke it up into sections and took it “one bite at a time.”
- Hook the glass vase first. Use light wool for the edges along the rim and down the sides. Hook a highlight on the side surface of the glass vase, on the opposite side underwater, and on the bottom of the vase where the glass is thick.
- Hook the section of vase with the water; the sunshine streams in and reflects white light on the surface of the water, while the stems shift in view and have an enlarged effect under the water. Suspend all logic and follow the visual. Hook the lights and greens of the stems, hook the dark blue inside the vase bottom, and hook the lavender and pastels in between.
- Hook the tulips.
- Hook the leaves and stems above water and continuing out the top of the vase.
- Hook the reflection of the vase and stems on the glass table.