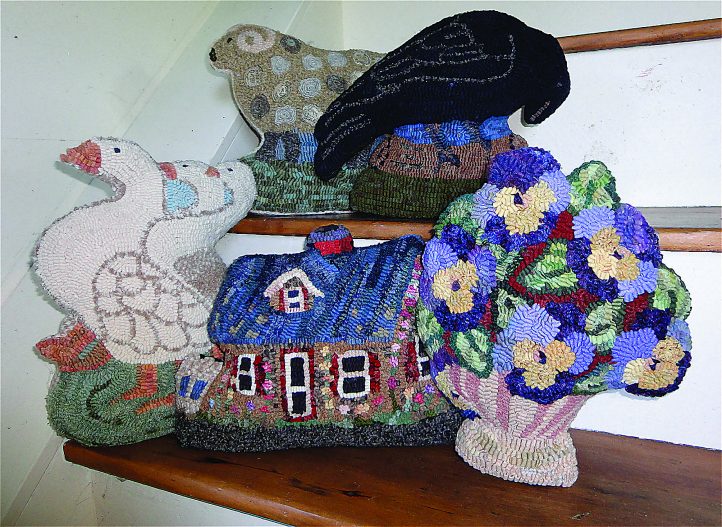
These hooked rug doorstops, based on antique cast iron originals, are soft yet still strong enough to brace a cantankerous door.
I bought my first antique doorstop when I moved into our old house in 1997. The doors did not line up exactly plumb, and stops were necessary to keep a few of them propped open. A second doorstop, then a third and a fourth followed my first purchase, and to thwart my compulsion to begin yet another collection, I bought The Doorstop Book: The Encyclopedia of Doorstop Collecting (Schiffer, 2006) by John and Nancy Smith.
The resurgence of doorstops as collectibles today is motivated by nostalgia, aesthetics, and in cases like mine, the actual need to keep a door propped open. However, doorstops by nature are very heavy, and they have often scratched my floors when I accidentally knocked one over. How cool would it be, I thought, to hook them in wool and just weight the bottom?
Four years later, my good idea still nothing but that, I solicited the assistance of a rug hooking friend, Stephanie Gibson, to help me bring my idea to fruition. I searched the web and found copyright-free photographs to use in my project. (Many collectors have blogs, websites, and selling platforms where the images can be accessed, like eBay, or other antique auction sites.) Additionally I contacted Nancy and John M. Smith, who are widely recognized authorities of figural cast iron and who have been avid collectors for over forty years. Nancy (who also collects hooked rugs) was excited about the project. She gave me permission to use any of the photographs from her website.
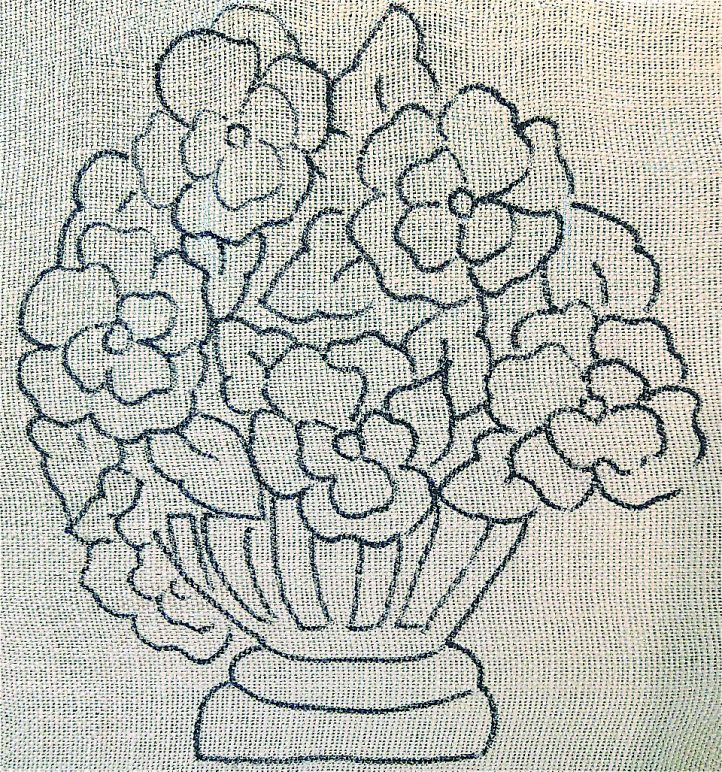
The outlines of the actual doorstops were altered to create rug hooker-friendly patterns.
Creating a Softer, Gentler Doorstop
Stephanie and I spent a weekend cutting, pasting, and enlarging some of our favorite doorstop images into working patterns for rug hooking artists. This design process involved altering background lines for enclosure, rounding off corners for backing easement, and sizing details to accommodate #6- and 8-cut strips. For most of the stops we redrew the bottoms so that they would sit evenly on the floor.
I love using up my worms, and I had enough color arrays to use them on Pot of Pansies (A). I picked out a complementary fabric—a nice blue plaid—to use for the back of the piece. I cut some of that same fabric into strips to hook in the flower petals so I could maintain continuity between the front and back of the piece.
After the piece was hooked, I spritzed it with water and pressed it flat between wet terry towels with a hot iron. When it was dry, I laid it on a counter that was protected by plastic wrap. I spread a bead of tacky glue around the edges of the hooking (B) and pressed this flat into the backing material with the tip of a wooden tongue depressor (C). The “trail” of glue measured approximately 3/4″ wide (D). I let it dry overnight.
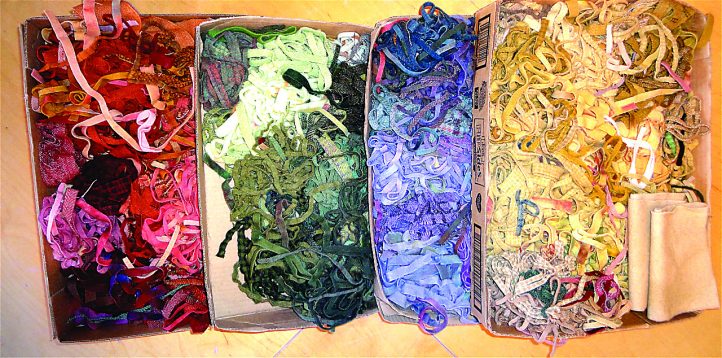
Photo A: Gather a wide variety of noodles from previous projects.

Photo B: Place a bead of tacky glue at the last row of hooking.
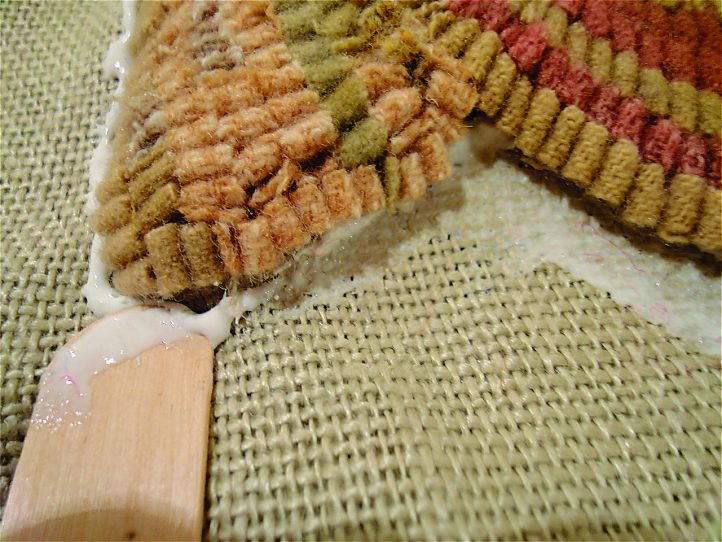
Photo C: Thin out the glue with a wooden tongue depressor.
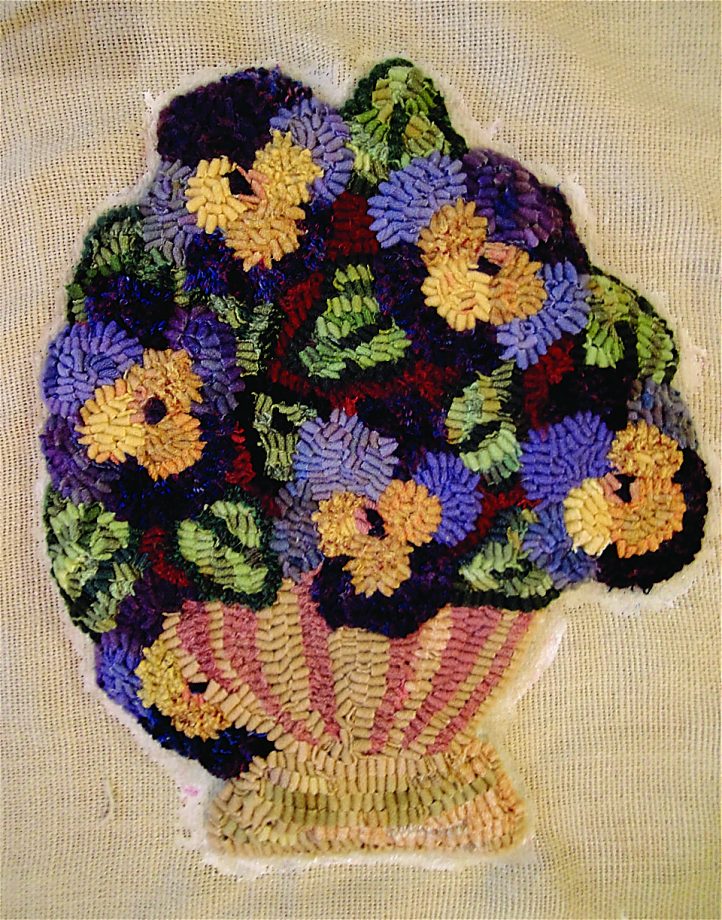
Photo D: Allow the glue to dry completely overnight.
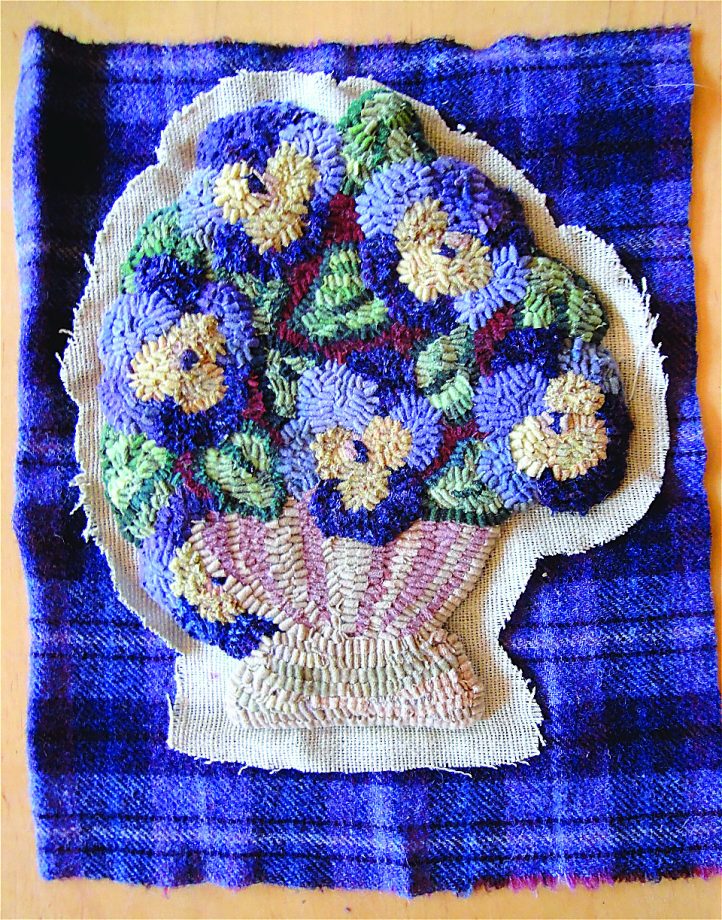
Photo E: Carefully trim the backing at the ¾” glue line.
Next, I trimmed the backing at the 3/4″ glued selvedge mark (E). I placed the hooking on top of my plaid backing fabric and cut the backing to the same size (F). With a pair of small sharp scissors, I cut darts around the selvedge on the hooked piece only, being careful to get into the valleys between the pansies and the leaves.
Then, I folded the selvedge to the back of the piece and pinned the hooking to the backing plaid, wrong sides together (G). Starting at the front bottom side, and using button and carpet thread and a hidden hemstitch, I sewed the front and the back together, pulling tightly and turning under the backing fabric and darting as needed for easement (H). I left the bottom of the piece open.
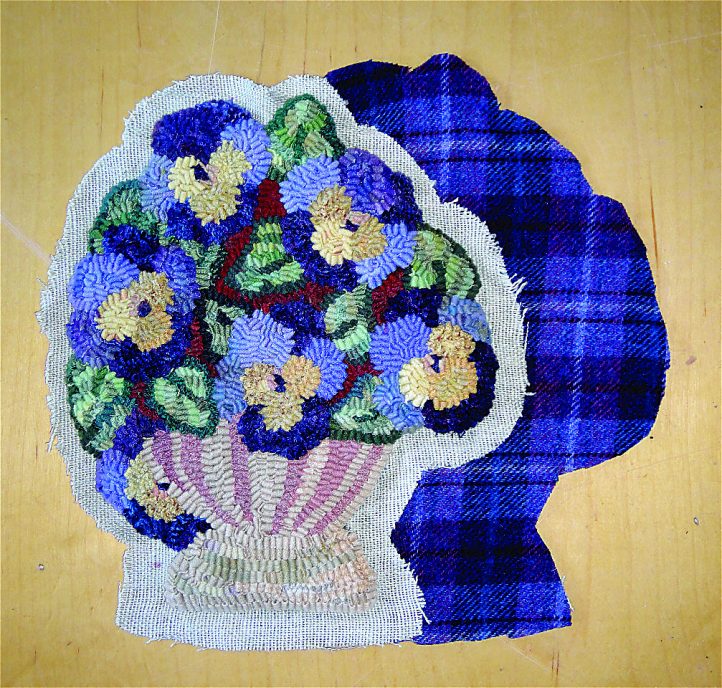
Photo F: Cut the fabric that will be the back of the doorstop.
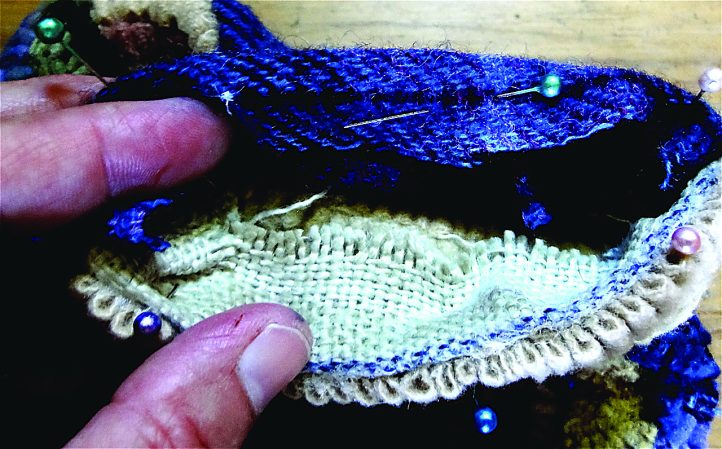
Photo G: Pin the hooked piece and the fabric wrong sides together.
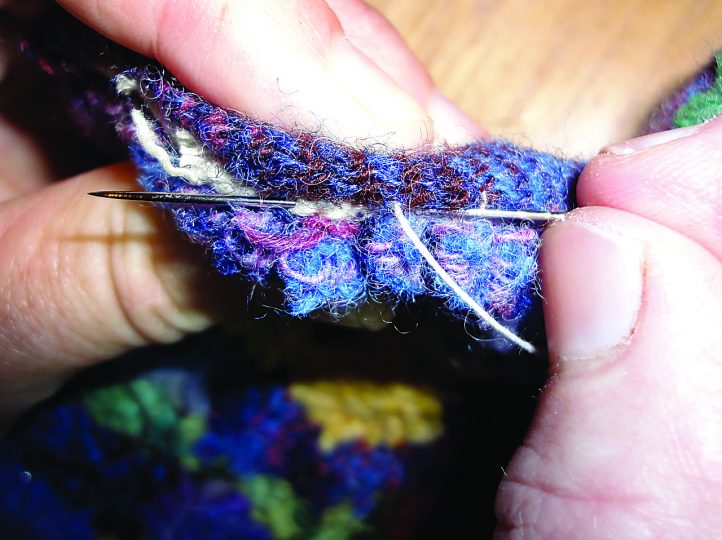
Photo H: Stitch the two pieces together with tight, invisible stitches.
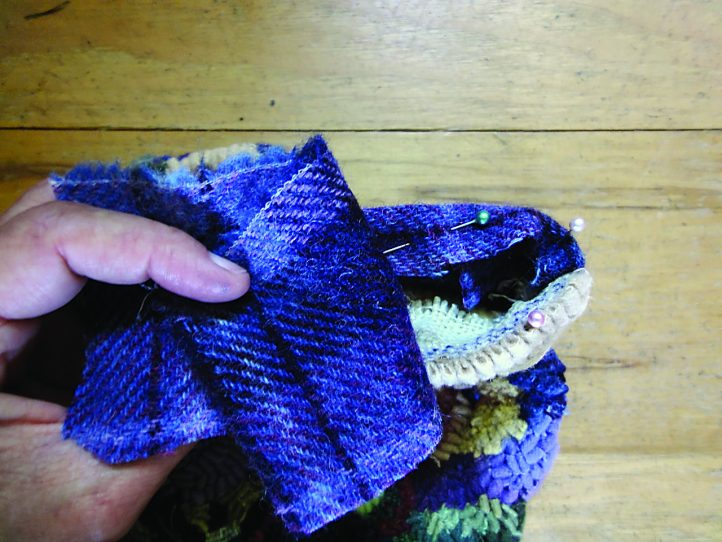
Photo I: Cut a piece of fabric for the bottom of the doorstop.
Then, I cut a rectangle of the backing fabric for the bottom, roughly 1/2″ larger than the opening, and pinned it into place (I). I turned under the 1/2″, and using the hidden hemstitch, sewed the bottom into place, leaving one of the long sides open.
Through this opening, I stuffed the piece with polyester fill, using the blunt end of a chopstick to fill the leaves and using my hand to flatten and smooth the filling. I left the base of the stop unfilled to make room for a weighted bag of BB shot.

Photo J: Fill and close securely a simple bag filled with buckshot.
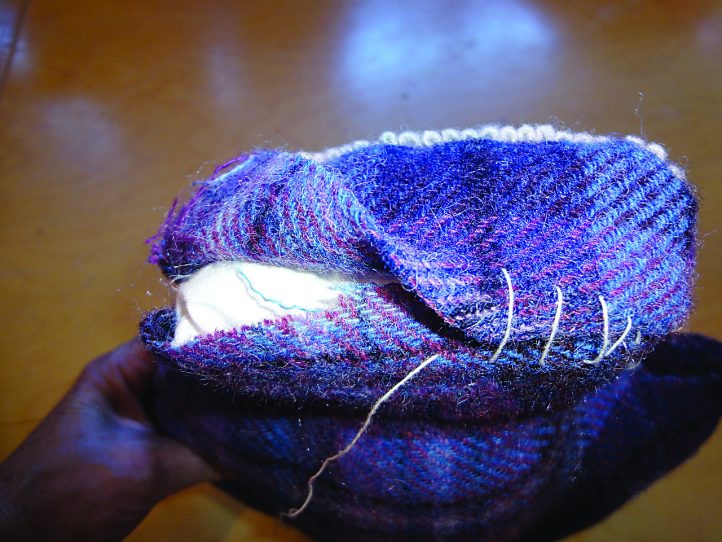
Photo K: Stuff the doorstop, add the bag, and sew it closed.
The shot bag is made from scrap fabric and is 2″ wide (J). I made it longer than necessary so I would have enough fabric to tie or sew the bag shut. I filled the bag with shot and used as much as I needed to make a good fit on the bottom of the base. The amount of shot used will vary from piece to piece, but the objective is to use enough to keep the hooked doorstop standing upright. When the fit was sure, I finished sewing the bottom of the doorstop (K).
Voila! The hooked doorstop holds itself upright, and propped against my stairwell door, it allows the cool air to waft up to the back bedroom, keeping it cool on hot Ohio summer days (L).
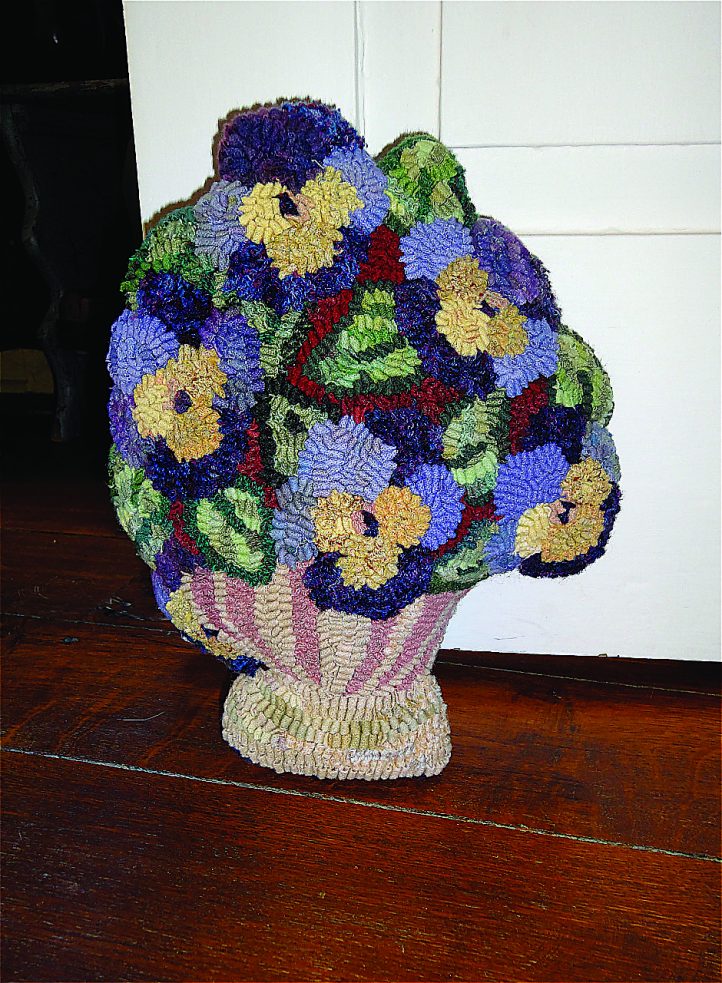
Photo L: Put your new doorstop to work.
ORIGINS OF THE DOORSTOP
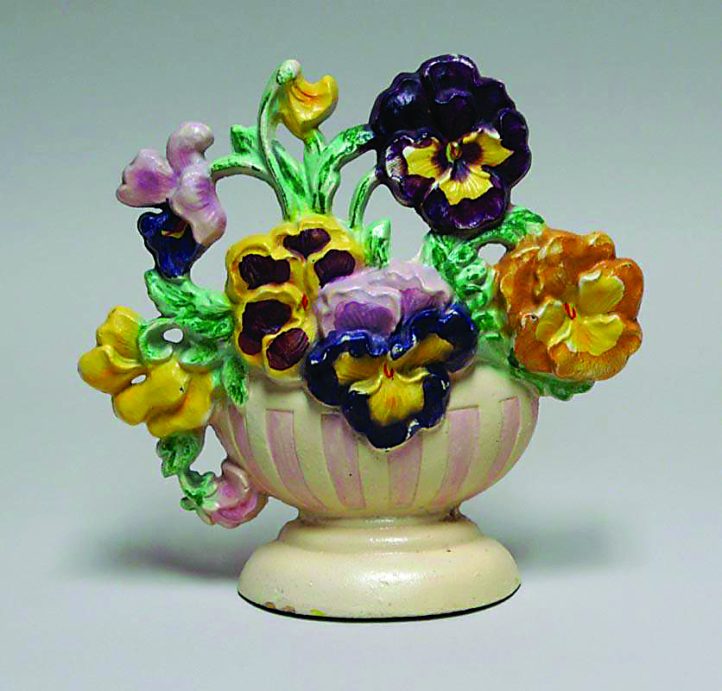
Antique cast iron doorstops such as this pansy-filled flower-pot from the collection of John and Nancy Smith—along with the need to keep her floors from being scratched—inspired the author to create a hooked doorstop. JOHN AND NANCY SMITH
Doorstops, originally improvised from logs, brick, or stone, were used in colonial times to keep doors open so air could circulate: cool air in the summertime from the outdoor breezes and warm air in the wintertime from fireplaces. Commercial manufacturing of the stops began in the mid-1800s when American foundries first accessed European designs for inspiration.
The Albany Foundry in New York, Bradley and Hubbard in Connecticut, Hubley in Pennsylvania, and Eastern Specialty in Massachusetts manufactured some of the most collectable doorstops. These foundries also produced bookends, andirons, and desktop accessories. American women, in their desire to add decorative appeal to the functional and the utilitarian, soon gave the originals a much-needed facelift!
The newer, more stylish doorstops were made using a wooden mold, which was pressed in firmly packed sand. After the impression was made, the mold was removed and molten iron was poured into the cavity. The doorstops were then painted by hand or airbrushed with a color scheme that had been established by the designer at the factory.
The themes of the stops were often a reflection of the times, and included flowers, fruit, dogs, cats, birds, reptiles, houses, and people. Most of the factories closed after World War II due to the increased costs of raw materials and, more importantly, to the advent of air conditioning and centralized heating.
For more information on cast iron doorstops, visit John and Nancy Smith’s website, www.castirononline.com.