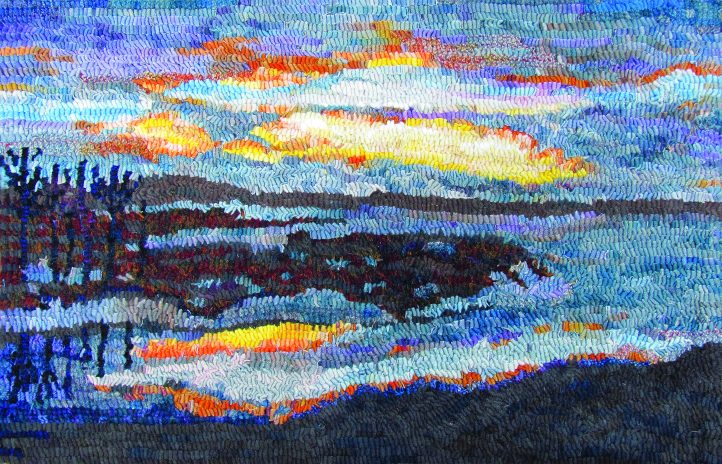
Boat Lake Winter Sunrise, 23″ x 15″, #8-cut hand-dyed wool on linen. Designed and hooked by Wanda Kerr, Wiarton, Ontario, Canada, 2010.
Long ago, I bought all the back issues of Joan Moshimer’s wonderful rug hooking magazine, News and Views. That is where I saw an idea that has intrigued me for over 12 years: dyeing all the wool for one project in one pan—all at the same time. How would you like to join me?
Rather than have us all hook the same picture, I’d like to tell you the nuts and bolts of how I created my pictorial so you can adapt these steps to your own selections. You can then use this method to dye wool for many types of rugs.
Step One: Inspiration
Find or take an interesting photo. (Would you rather find a great pattern? I’ll leave that up to you.) Try to incorporate areas of very light and very dark to create drama. I’m using this sunrise photo of the Rankin River as it runs into Boat Lake as my inspiration.
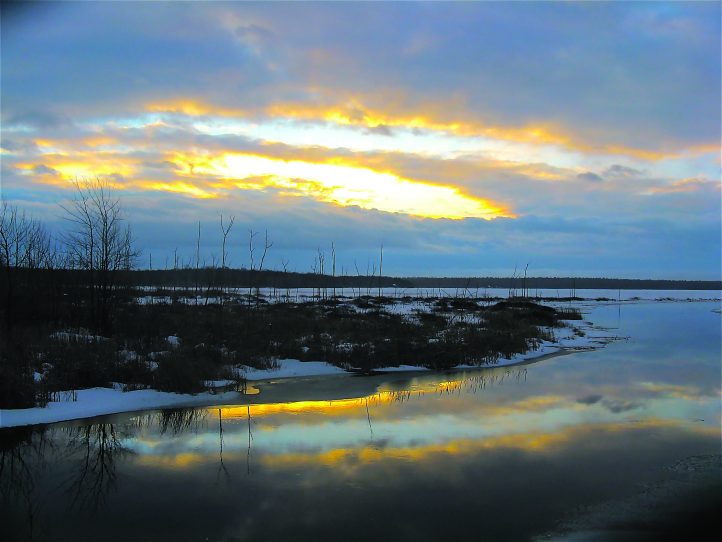
The Rankin River empties into Boat Lake, providing inspiration for this dye method. MARTIN KERR
Step Two: Color Inventory
Take an inventory of all the colors in your inspiration.
First look for the darkest ones:
- Dull gray brown
- Black brown
- Green brown
- Black navy
Then look for the lightest ones:
- Light dull blue
- Light blue
- Light turquoise
- Light dull blue-green
- Light bright yellow
- Bright yellow
- Light dull pink
- Light dull violet
Now look between the lights and darks for the mediums. These colors are often the hardest to detect. They are hard to recognize at first; they act invisible, but they are the framework for the whole structure of the rug and they provide the bridge between the dark and the light.
- Dull turquoise
- Blue
- Dull violet
- Darker violet
- Pink
- Orange
- Dull orange
Step Three: Prepare to Dye
You’ll need a big pan, about 18″ x 30″. An aluminum roaster works; just put a cookie sheet underneath before filling it so you can transport it safely from the counter to the stove to the sink. The pan should have some depth to hold all the wool for your project.
Now look in your stash for wools that might suit the dark colors. Anything can be used to make darks: to create similar values, add more dye to your lighter pieces. I recommend you let some be lighter, some brighter, and others darker and duller. The variety makes them more fun to use and provides some richness and depth—as well as form—for the object you are hooking. And this is true for every value layer we will create!
Step Four: Dye the Darks
Crumple up the darks, and lay them in the bottom of the pan. (Photo A)
One key point with this method: use the dye formulas at the highest temperature, making sure the water is boiling and no cooler water is added. Add acid to the formulas before applying them. This ensures that the formula and the wool have the optimum environment for conducive and quick intermingling and that the dye will stay where you put it.
I poured 2/32 tsp. black then 2/32 tsp. brown over all the pieces of wool. Next I poured moss green over half the wool and navy over the other half.
Now lay several long, narrow pieces of beige and natural wool flat on the top of the dyeing. This layer—called an echo because it creates a lighter version of the dyed wool beneath—does not impede the dye transference but instead captures some colors from both layers and creates some rich wools. (Photo B)
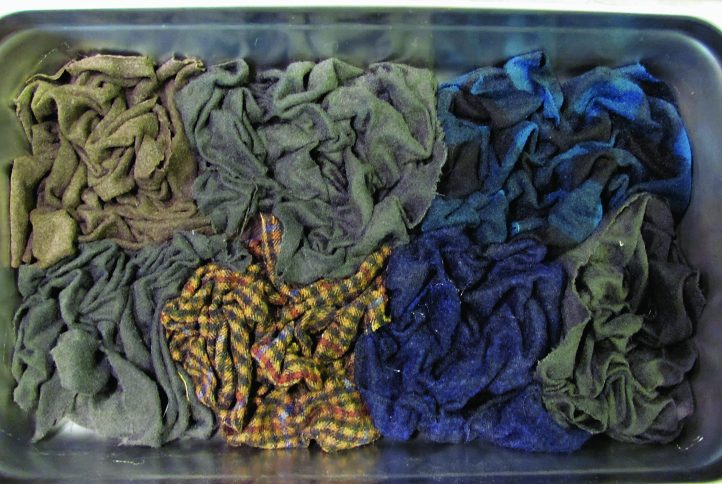
Photo A: The dark valued wool lies crumpled in the bottom of the pan, awaiting dye.
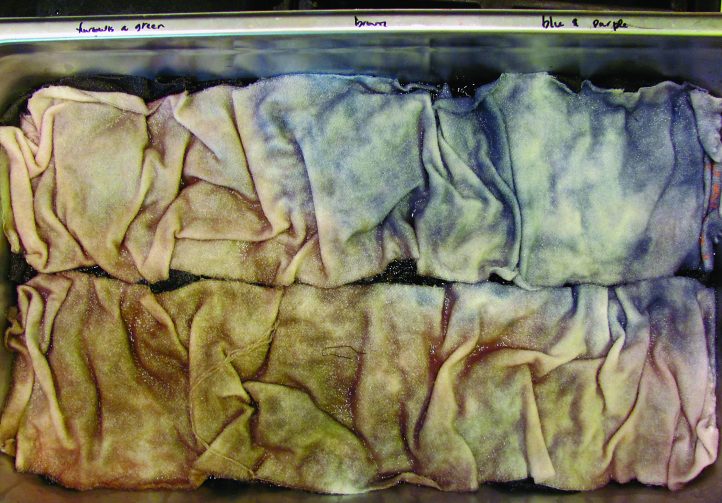
Photo B: Once the dye is applied to the dark wool, echoes are laid on top, allowing dye from this step and the next one to cast shadows on the top layer.
Step Five: Dye the Mediums
In the next layers, I keep the dye application separated into quadrants, which I will try to keep to as I dye the other areas. I want to make some darker medium values next, so I need to make sure that the wool I choose is lighter than the required value I want to end up with. Dye makes everything darker.
Looking over my list of required end results, I see I need several oranges, violets, and blues. Mostly I used dye straight out of the jar, adding black if I needed a duller color or making sure the wool I was dyeing over was duller.
Once again I crumpled up the wool. (Photo C) And I made sure to keep the blues to the blue area and the oranges and pinks directly in the right-hand corner. If I thought there was too much dye, I quickly laid a prepared wet light piece of wool flat on top and pressed it down. This measure would both soak up a bit of dye and give me an interesting light color.
Once I laid a piece of wool into the pan, I did not move the wool nor remove it to a lighter area if it was light. I did, however, keep the color families stacked one on top of the other in their quadrants.
I dyed blue right across the top, kept the violet in the lower left corner, and put the oranges in the lower right corner. The wools I laid across this layer as an echo gave me the most useful transitions as I hooked the rug.
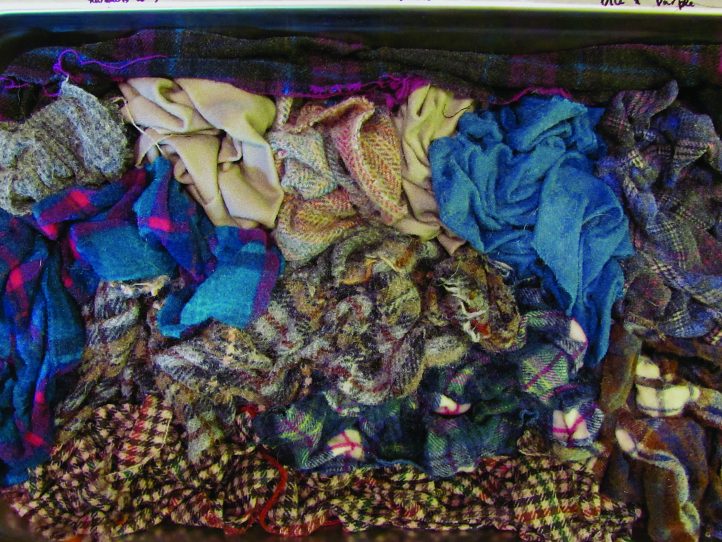
Photo C: Next, medium-valued wool is crumpled and placed on the echoes.
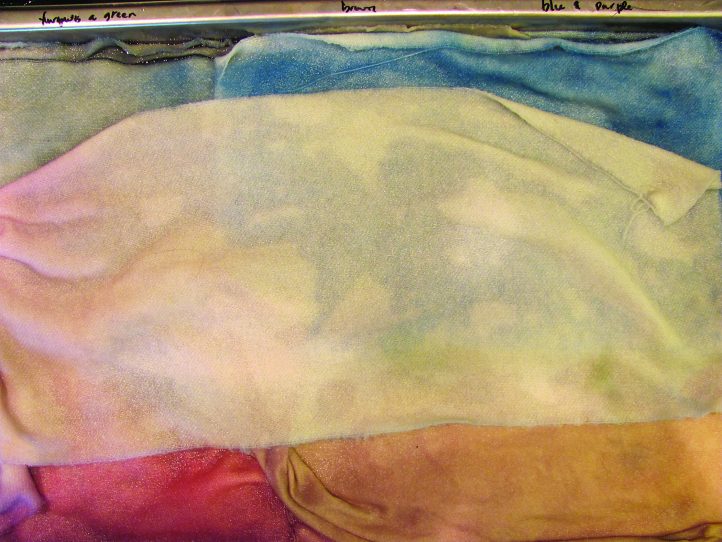
Photo D: This whole set of colors is ready for the oven.
Step Six: Time for Lights
I used boiling water in the dark and medium layers, but for the lighter values, I wanted less grabbing, so I used cooler water. The wools I used were light gray, dull light beige, natural, and white. The dyes I mixed up were weak. I didn’t need too much color in my lights because I had an area of very light yellow, and I needed a very bright one, too. I dyed these colors right on top of the oranges. I also needed light blues, a snow color, and transitions in the sky and water.
By now my pan was full to the brim, so I set it in a 350˚F oven for one hour and went off to draw my pattern. (Photo D)
As I hooked my rug, I realized I was not going to use some colors at all. Others I used right up! That was fine with me—the more dyed wool I have on hand the better I like it.
The roses and pinkish colors did not work well. I had almost no coral to transition between these and the oranges and yellows, so I left them out. I worked from a printed picture on card stock (not the actual photo), so I ended up editing out many things. The ice on the lower right-hand corner of the photograph is one example. Having this flexibility does make hooking easier.
I did add two thin strips of nylon, perfectly white and undyed (cheater!!!), but I felt I needed them. With this exception, the whole rug was done in one pan at one time. Wow! This rug was a great challenge, and I loved making it.
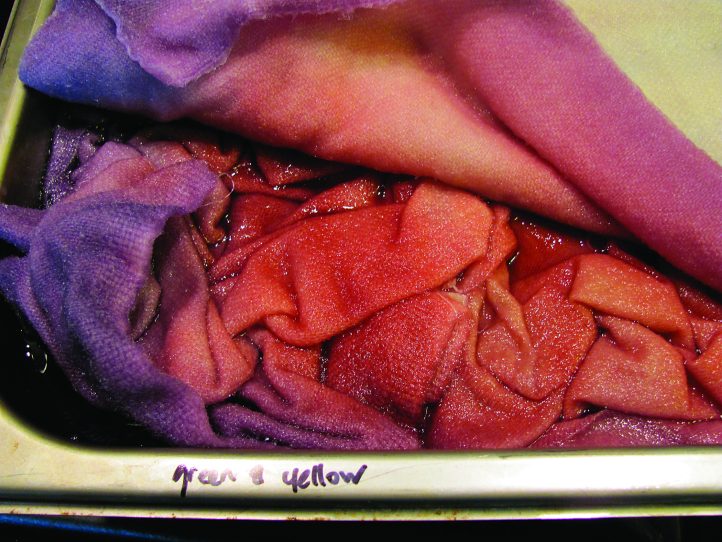
Photo E: Once processed, the wool shows an amazing array of colors in the purple/pink quadrant.
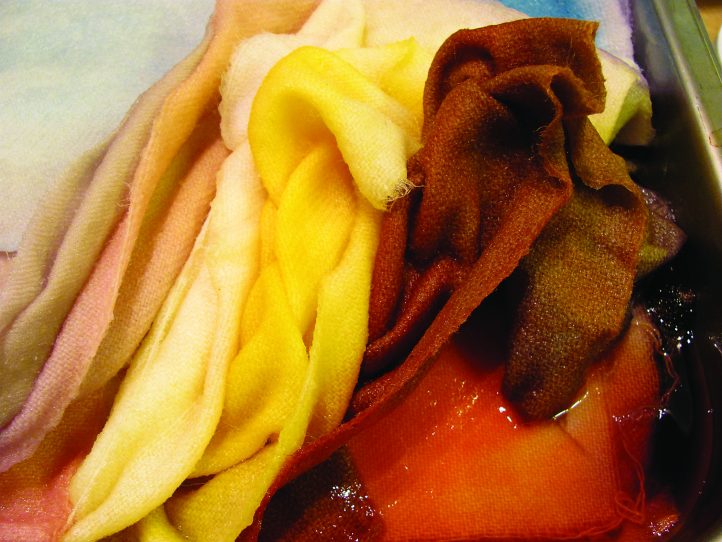
Photo F: Lift up the orange and yellow corner to look at the amazing depth of values!
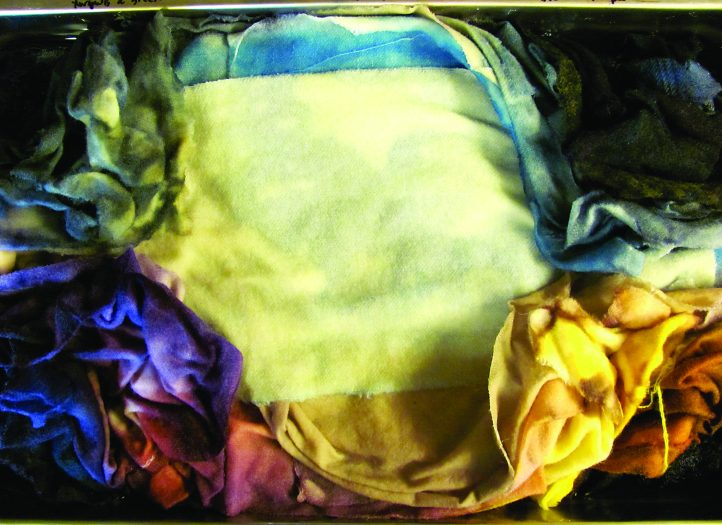
Photo G: I lifted all the corners of the wool in the pan to show you the delicious insides.
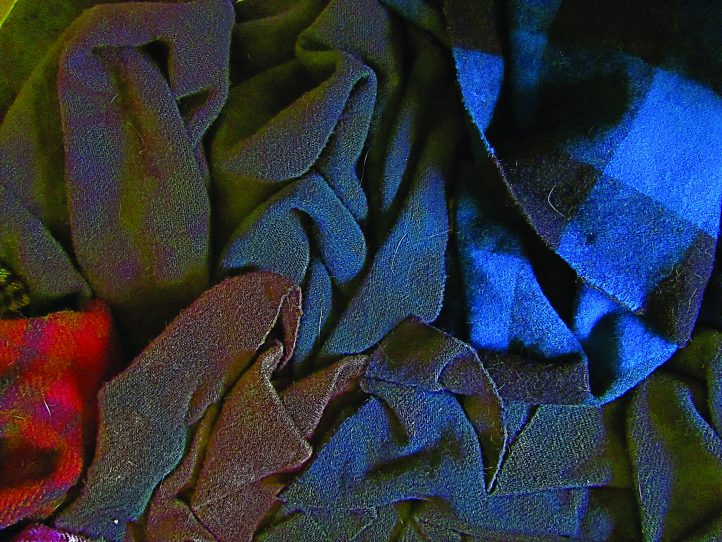
Photo H: The dark results are dry and ready to cut.
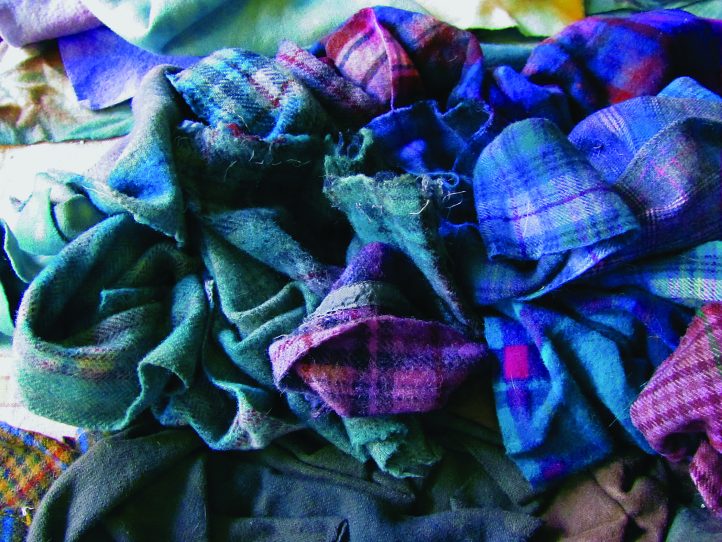
Photo I: These are the dark mediums.

Photo J: The lighter mediums are revealed.

Photo K: The dyed lights are shown here after drying.
Photo L: These transitional pieces, which were the echoes, flow from one color to the next. They were the most useful wool in the project, and they allowed a smooth transition between colors.
I’m off to take a look at Joan’s ideas and how she worked her magic. . . . I think I’ll try a primitive floral next and use all the leftovers from this mat for a dark background on the new mat.
Try this method for any type of simple pattern. Of course, making a small project the first time is a good idea. I hope you have fun dyeing this way.