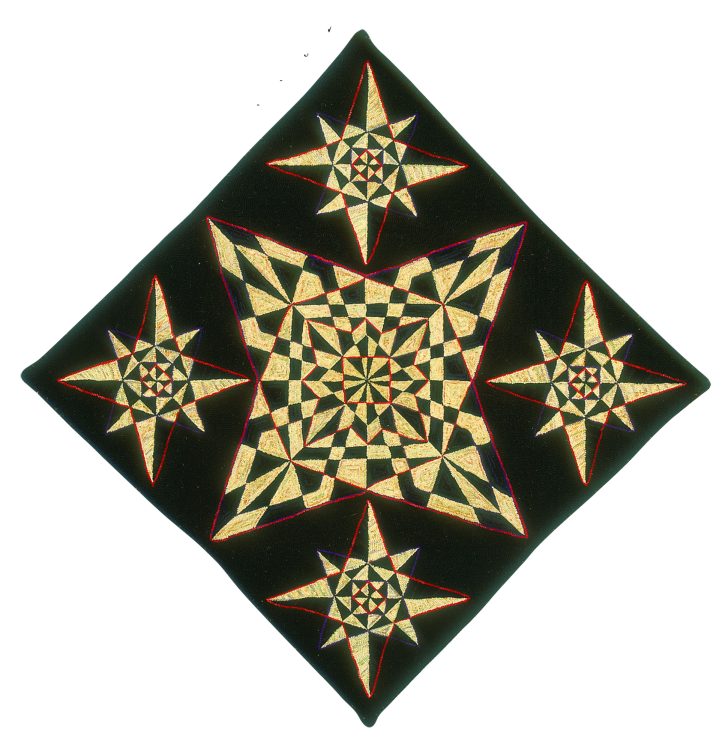
FIVE STAR ONE, 4″ x 4″, #4-cut wool on burlap. Designed and hooked by Nell Greenfieldboyce, Washington, D.C., 2003.
You’ve wanted to hook a certain pattern forever and now you’ve got it and are about to begin. As you gaze at the design, thinking about your gorgeous color plan, you suddenly notice—as never before—lots of edgy challenges. You see multitudes of pesky diagonals, dizzying circles and scallops, spear-pointed stars, right-angled corners, and teensy, tiny motifs. And for a moment you say—(very quietly to yourself) What was I thinking?
Admittedly this scenario is a bit over the top (perhaps it doesn’t have all of those shapes). But surely every one of us has run into design motifs that will require patient, precise hooking along difficult edges. Is your usual approach to think first and hook later? Or do you just dig in and let the lessons follow?
Here to share some ideas about hooking on the edge are hookers known to excel at this technique, who specialize in a particular hooking style, or those that employ an unusual edging method.
Geometrics
We’ll start with a genre of hooking that probably is most demanding of precise edges—geometrics. Whether it’s a repeat pattern, interlocking pieces, rectilinear or curvilinear shapes, a geometric requires strict definition for the piece to succeed.
“The first thing to know with geometrics is to make sure your pattern lines are printed or drawn properly,” advises Gene Shepherd of Anaheim, California who is strongly drawn to hooking geometric rugs. Recognized in A Celebration of Hand-Hooked Rugs XIV for his original pattern Russian Birch, Shepherd is the director of Cambria Pines Rug Camp, in Cambria, California.
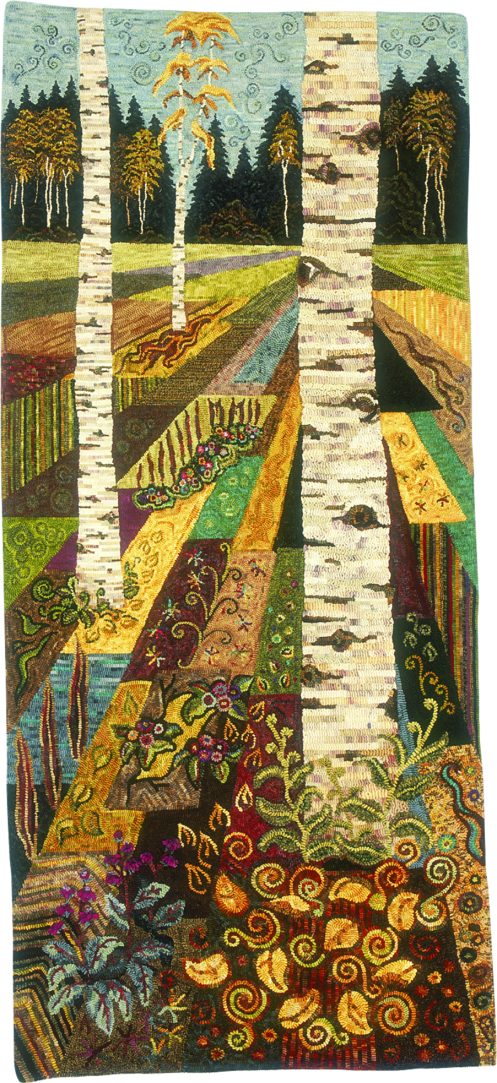
RUSSIAN BIRCH, 29 1/2″ x 66″, #2-10-cut wool on monk’s cloth. Designed and hooked by Gene Shepherd, Anaheim, California, 2003.
“Each line must be in the ‘ditch’ of the fabric,” he says. “Likewise, lines or intermittent lines that run the entire length of the piece must all be in the same ditch.” Gene states that when hooking next to or within those lines, one must always make sure he or she approaches each line with the same regimented fashion.
In Gene’s rug, Miss Weigle, (also a finalist in the upcoming A Celebration of Hand-Hooked Rugs XV), a #6-cut of wool was used everywhere except for the Greek Key sections. He explains, “I moved to a #8 cut for the Greek Key as two rows of that would fill the design perfectly. If I had stuck with the #6, I would have had to come up with some skinny row of wool to fill in.” By experimenting with cut size, Gene discovered that two #8’s would work perfectly. He’s noticed students who, in doing this section, try to fit in three rows of #6 because they don’t want to change cut size or hand cut a little strip to fill in. “It’s better to experiment to find the cut size or combination of cut sizes that perfectly fill in the design,” says Gene.
Pat Cross of Charlottesville, Virginia, an authority on primitive-style hooking and author of Purely Primitive Hooked Rugs from Wool, Yarn and Homespun Scraps (Martingale & Company), also emphasizes the importance of careful pattern preparation.
“Geometrics are fun and easy, provided they are drawn correctly on the straight of the grain,” says Pat. “The very first step is to make sure all your vertical and horizontal lines are on the straight of the grain.” She says that following a straight line on monk’s cloth and rug warp is easy and on primitive linen Pat uses a carpenter’s pencil. By placing the fat pencil point into an opening of the linen and then pulling the linen away from you with the opposite hand, the pencil should stay in the groove, thus producing a line straight on the grain. “If the vertical and horizontal lines are on the straight of the grain, drawing diagonals is easy,” adds Pat.
Nell Greenfieldboyce, of Washington, D.C., received an honorable mention in Celebration XIV for her original design Five Star One. She describes herself as a novice hooker but one look at her bold design of large stars bisected by a complex pattern of squares, triangles, and trapezoids and it’s obvious she’s earned a promotion.
“Initially I tried to hook each triangle or other shape in isolation, like they were shapes just sitting next to each other but not actually connected. This didn’t work at all,” says Nell. She came up with a new system that interlocked the shapes by hooking long lines that alternated sections of dark and light, with each section serving as one edge for a shape. “I would start by hooking, say, one long line of light color for the side of one shape,” says Nell. “Then, when I reached the pen mark that indicated the start of another shape, I would continue hooking that exact same line using dark wool, until I reached the start of another shape and it was time to switch to light wool again.”
Through working on this piece, Nell observed that the triangles and diagonals of the pattern were not shapes in isolation but could be connected by long reference lines. Because these boundaries were hooked as continuous lines, she says, the mind sees them that way, even if they aren’t straight as a ruler.
In My Many Worlds, by McGown, teacher Suzanne Hamer, of St. Charles, Illinois, the various scribed arcs of the pattern required a regimented approach to contain the curved energy of the piece. “Repeat patterns need techniques that are exact, and hooked the same way and in the same order with each motif,” she says. Suzanne explains that she started with the inner small circle, outlining it so that the wool hit the edge but did not rest on the line. “As I went around the circle, I turned the loops so they pointed to the center. This outer circle held the shape.” She says she spaced the loops with enough room to stay rounded on the top and filled each area with directional hooking going with the grain of the backing.
Diagonals
Whether representing the outline of a roof, the background grid of floral-covered lattice, the classic motifs on Oriental borders, or just the crooked leg of the letter “K,” diagonals are found everywhere. Their mission is to stay in line and let’s face it; they don’t like to obey.
Anne Boissinot, a McGown certified teacher from Ontario, Canada, recommends observing a few steps for doing a rug with lots of diagonal lines. “Place the main vertical and horizontal lines in first to hold the rug from going out of shape. Do not pack loops tightly,” she says. “Butt the next row up against the previous one and sometimes even go into the same hole to achieve a smooth line. Use your fingers, or your hook to adjust the loops.” Taking care to hook inside the motif—to keep its shape and create a smooth edge—Anne likes to start in the upper left hand corner and hook down toward the right hand corner. “If it’s easier to position your foundation on your frame so it appears that you’re hooking a straight line from top to bottom, then do so.” If necessary, she says, hook a row of background around the motif, which can push the loop into place and establish a smoother line.
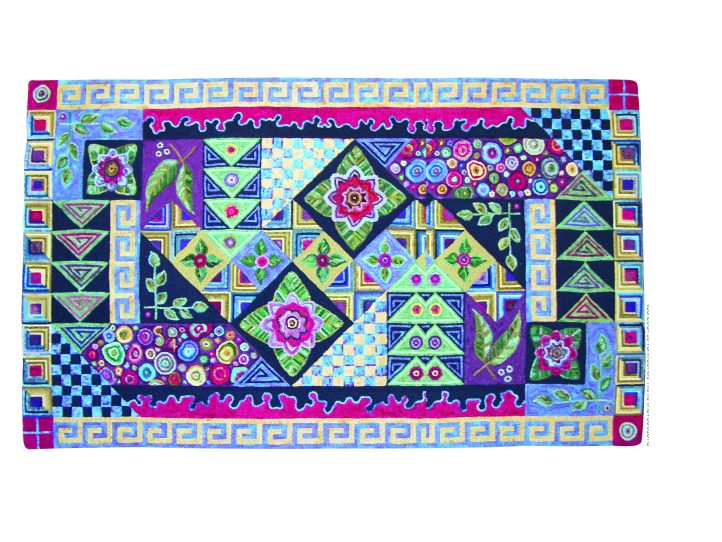
MISS WEIGLE, 60″ x 36″, #6 and 8-cut wool on monk’s cloth. Designed and hooked by Gene Shepherd, Anaheim, California, 2004. PHOTOGRAPHS BY BILL BISHOP/IMPACT XPOZURES
“Try to hook the diagonal as straight as you can,” says Gene Shepherd. “The second and third rows you hook on either side of the diagonal are just as important as the initial diagonal line.” Gene says that lines two and three literally need to push your design line into its diagonal shape. Therefore at times you will need to crowd your hooking over, and then other times back off a little so as not to crowd.
Stars, Circles, and Angles
For hooking well-defined stars, circles, and angles, directional hooking often plays an important role. Anne Boissinot says that many Canadians traditionally focus intensely on technique from the start. “I learned from the beginning to hook in all directions, not to turn my hoop or frame and to set nice, neat even loops no matter what the size of the loop,” she says. To her, the skill is second nature and convenient. For a circle, Anne hooks around from the outside edge, adjusting the hand that hooks and the hand that feeds the wool, so that the line forms an evenly rounded shape. She cautions that over packing, results in those cone-shaped bulges many of us have to correct when making circles.
For stars, Anne begins on a side and when she arrives at the tip she turns her loop to create a point, then comes down the side and starts all over again.
Nell Greenfieldboyce, of course, has had a great deal of practice with stars. “For the points on the stars, I hooked around and then pinched the loop at the very end of the point and gave it a little twist so that it fit in a narrower space and became more ‘pointy.’ The wool underneath stayed straight, so it would wear evenly on the bottom of the rug, but the twisted loop up top was held in place by the tension of the loops around which I would then hook,” says Nell.
Pat Cross says that by using your hook to manipulate the direction of the loop you can achieve many directions. “When hooking a circle, I start from the outside and finish in the center,” she says. “With an angle or corner, I hook down towards me and when I get to the angle or corner, I turn the frame so I can continue hooking towards me. You’ve turned a corner or changed the angle without facing a great deal of difficulty.”
Though Pat, too, pays attention to starting and stopping a star on its side rather than on the tip, she adds, “One of the best things about hooking in the ‘primitive style’ is that things aren’t perfect. It is okay to round off the points of a star.”
Small Motifs
The challenge often arises as to how to place a sharp, clean, outlining edge on a very small motif, especially when the outline loop might comprise a third of the entire motif. Think about hooking eyes, for instance.
“To get the detail that is necessary, a smaller size cut of wool is required,” suggests Suzanne Hamer. “When doing a frontal view of an animal, such as a cat, I first outline one eye, and then the other. Then I check to make sure they are even before I continue.” Suzanne states that it is very easy at this point to make changes. Since the outline of the eye is really a shadow, she makes this strip narrower than the other hooking, and hooks a little lower. Next, she puts in the pupils, then the color of each eye, and lastly, the corners. With this method, says Suzanne, there is no need to do the eyes more than once.
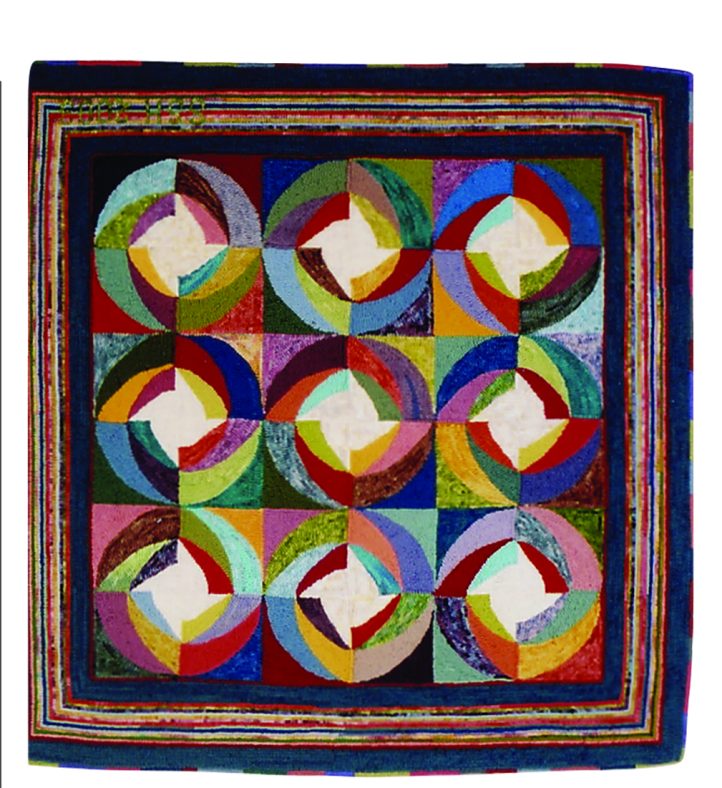
MY MANY WORLDS, 32″ x 32″, #4 and 5-cuts of wool on burlap. Designed and hooked by Suzanne Hamer, St. Charles, Illinois, 2004.
Anne Boissinot employs whatever works best. “I cut the wool a bit finer. Or I might bevel the edge of that row with my scissors to create a better shape around an eye after it is hooked. Or I might have to squeeze in a few loops between the others to create the effect I want. I also change to a small hook but pull the loop to the height of the others. The smaller hook allows me more latitude.”
Having reached the end of our survey of techniques to keep us from falling off the edge, it’s a good time to add this final perspective.
“I don’t worry too much about technical precision,” says Nell, “because my interest in doing geometrics comes from the charming contrast between a highly precise, almost mathematical design and the random, natural variations that come from a mix of different fabrics that get hooked by hand by an imperfect human being.”
CAROL HARVEY-CLARK’S TIPS ON “TUNNELING”
A technique called tunneling offers an alternative way to set a nice straight edge. McGown teacher and owner of Spruce Top Rug Hooking Studio in Mahone Bay, Nova Scotia, Carol Harvey-Clark explains that this method works well for articulating the outline of buildings and its various architectural features as well as grout lines in stained glass or brickwork. “One can achieve great definition by tunneling edges, and then filling in the body of structure in less rigid styles.”
The following are Carol’s directions for a technique to add to your bag of tricks:
- Hold the hook and handle IN LINE with direction of outline, with the handle of the hook held close to your backing material.
- Bring the “tail” to the top, lift first loop, keep it on the hook’s shank, and lift a second loop, keep it on the shank taking care to keep it close to backing so the loops remain pulled at the same height.
- Continue lifting loops until you have four to six (depending upon the thickness of your wool) all facing the same direction on your hook. Then, leaving the wool “feeding” strip alone underneath the backing, gently slide your hook back out of all loops on the shank. You should now have a nice, neat line of those loops.
- Next, use your hook to insert gently into the last two loops that you had lifted. Continue to add more loops to that shank—again four to six—and gently back your hook out of those new loops and proceed, always starting with inserting your hook into the last two loops that you’ve lifted.
- Carol recommends having a long strip of wool to start your tunneling. Otherwise interruptions may impede continuity. She also cautions against over-using tunneling. “A whole rug done this way would encourage grit to lay in the corn cob like rows and cause wear.”