Creating a hand-hooked stair carpet, as I found out, takes a little more planning than your average floor rug. Beyond the usual tasks of choosing colors to match your décor and dimensions to fit the space, you also need to plan designs to fit the risers and allow extra backing beyond the finished edges. And when it comes time for installation, communication every step of the way is imperative.
Let me share the story of my stair carpet. . . .
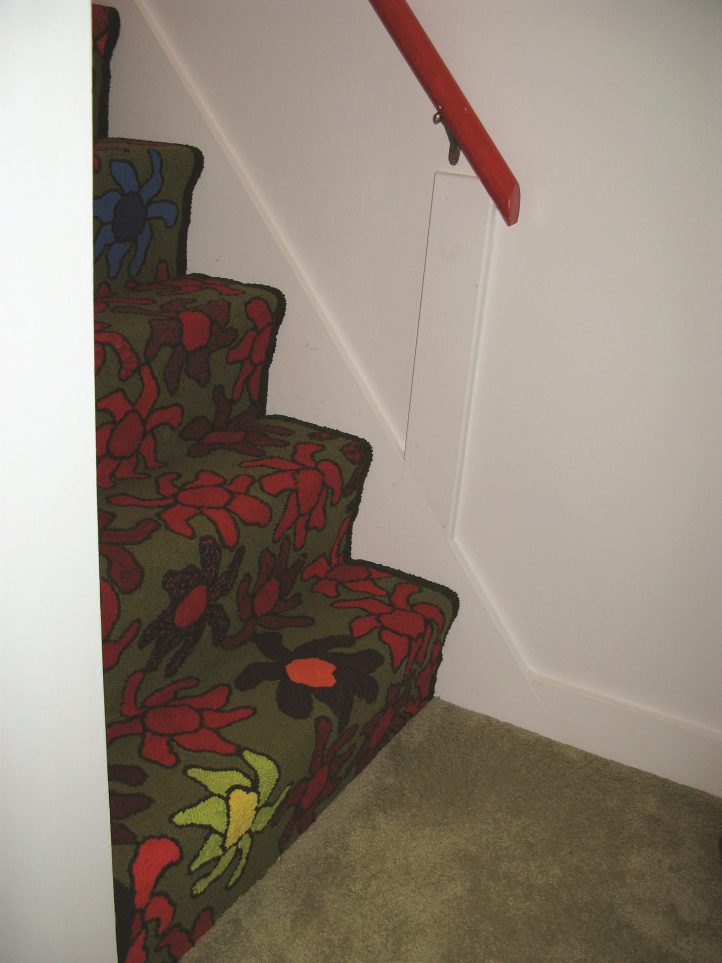
The finished stair carpet as seen from the top of the stairs
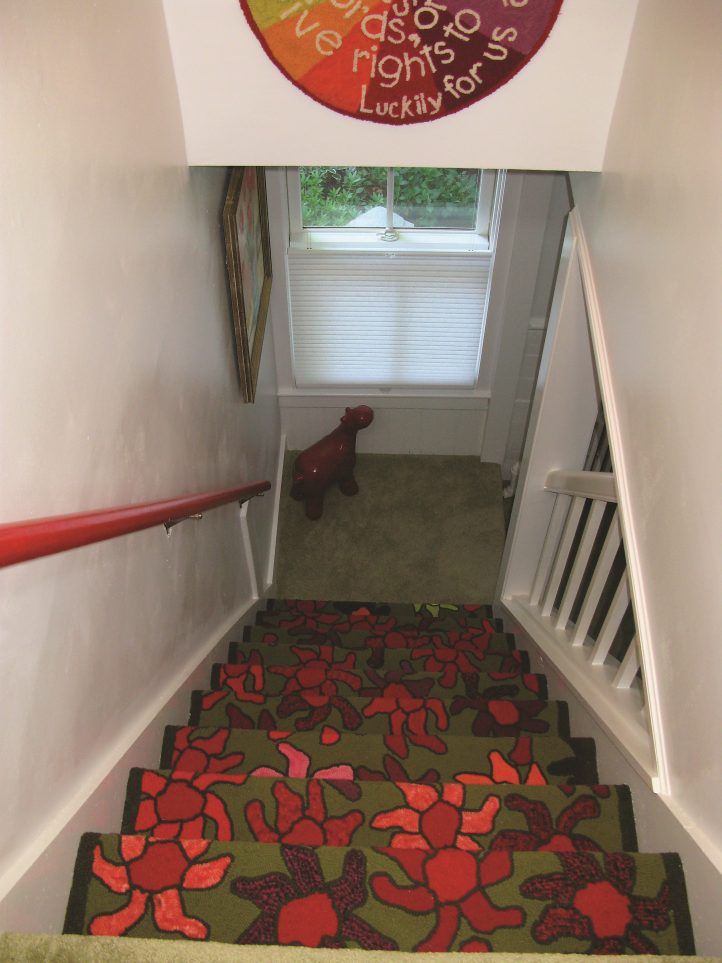
The finished stair carpet as seen looking up the stairs.
An Ambitious Project Gets Underway
A year and a half ago, I attended a rug hooking gathering where a group of serious rug hookers meet each year to work on both hooking and dyeing projects. At the conclusion of the four-day event we were all given an outline of a quickly drawn flower shape and instructions that we were to hook a reproduction of this unlikely shape.
So, home I went with this funny-looking flower shape. I left it out where I would see it as I went about my daily life, hoping that inspiration would come along with a bright idea. My husband and I had recently moved into a three-story house that had been built in 1859. Right after moving in, I had a stair carpet commissioned for the stair-way between the first two floors; at the time I did not consider even for a moment making my own. Now inspiration hit! I would make a stair carpet for the second staircase, and I could use my funny-looking flower motif for the pattern. Now there was a bright idea!
Color planning was my first task. As is true for most rug hookers, I had many, many odd pieces of wool that I planned to use up as I hooked the stair carpet. The flowers themselves would be predominately red as I had lots and lots of different red wool. Interspersed with the red flowers would be bright blue, yellow, and orange flowers. For continuity, I made the centers of all of the flowers the same bright red.
I decided to outline each flower in dark green and use that same color to make a narrow border on the sides of the carpet. For the background, I chose a medium green. Naturally, I headed to Dorr Mill and bought a bolt of each of these colors, therein ending up with much more wool than actually went into the carpet!
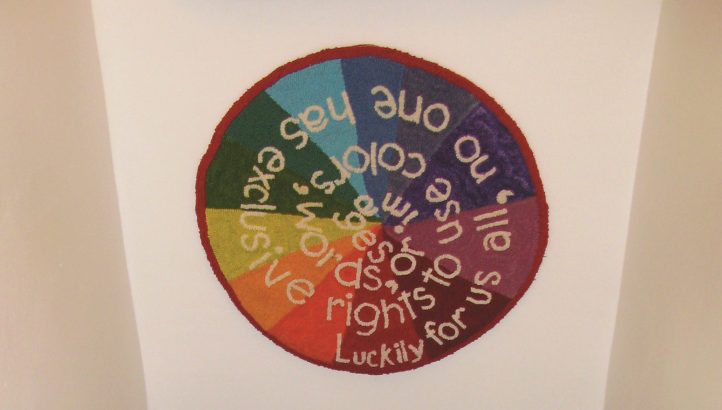
The round piece on the wall above the staircase (see page 50, bottom left) is titled Catharsis. It is 24″ in circumference, #4- and 6-cut wool on linen backing. It was designed and hooked by Emily Robertson, completed in October, 2009.
Next, I needed to measure the staircase. The actual width of the staircase was 27″, and it was about 14′ long. But rather than writing down measurements from the staircase and transferring them to the linen, I decided to unroll my bolt of linen right on the staircase. I then marked it for width and length, adding extra length just to be on the safe side. I cut the backing, leaving 4″ on all four sides. Other than sewing the edges on my grandmother’s 1924 Singer sewing machine, I planned to not finish the edges in any way, as the carpet installers would just fold them back as they went along during the installation.
The next day, I started drawing the pattern. I copied the flower motif on card stock, cut out the shape, then traced it on the backing. Each time I drew the flower, I turned it a bit so that the viewer’s eye would not be able to match the oddly shaped petals as they moved down the staircase. I wanted the shapes to make an interesting pattern as one stood at the bottom of the staircase and looked up at the carpet.
The backing for the stair carpet was a big, big piece and rather unmanageable. I folded the ends separately in accordion fashion then sewed them together using loose, big stitches of double-threaded knitting worsted yarn. I left the center 6′ open so I could work on it during the June session of the Green Mountain Rug Hooking School in Randolph, Vermont.
Finally, I was ready to start hooking. I chose a #6 cut, since that is the width I use for most of my projects. At rug school I was able to hook eight to ten hours a day, so I made good progress hooking the open center of the rug. When I finished hooking that part, I exposed more of the pattern by letting out the stitches that held one of the ends closed. Then I sewed the center together. Most of the stair carpet was hooked in hot weather, so it really helped not to have so much bulk on top of me as I worked.
It took me about three months to finish hooking the stair carpet, and since I was done well in advance of the entry due date for the Hooked in the Mountains Show at the Shelburne Museum in Shelburne, Vermont, I decided to lightly baste the edges and display the finished stair carpet at the show.
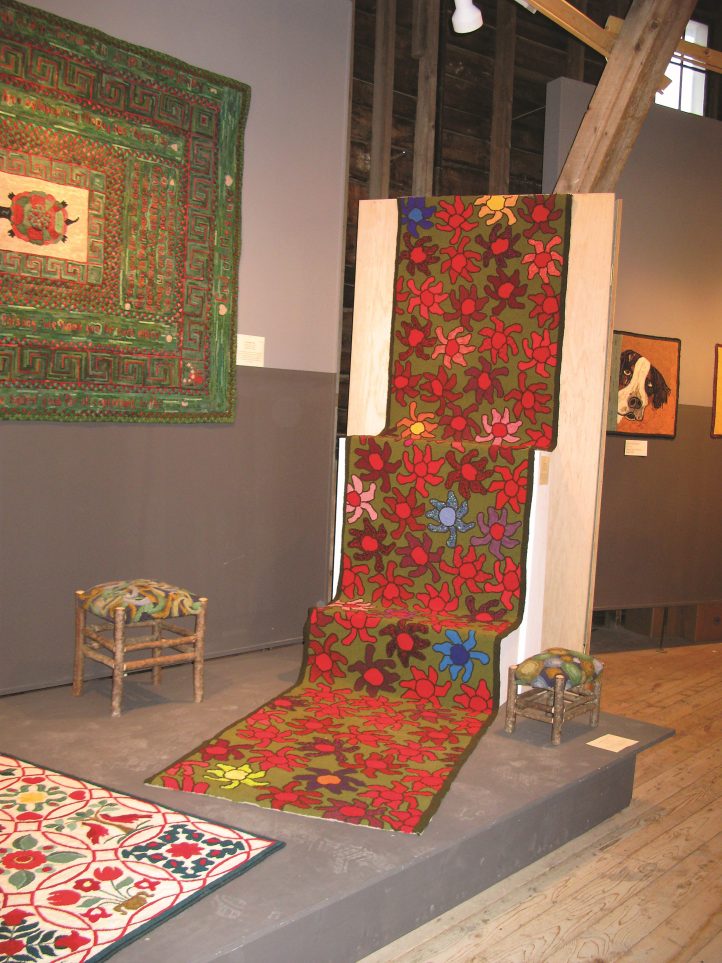
Floral Stair Carpet, 27″ x 168″ (14′), #6-cut wool strips on linen backing. Designed and hooked by Emily Robertson, Cambridge, Massachusetts, 2009.
Installation Day
Before I started to make my stair carpet, I had a long talk with the owner of a carpet store. This company had done a lot of business with me over the years, and I was always pleased with the work they did and the service they pro-vided. I told him about the stair carpet and asked if his company would install it for me. “For you, yes. You can have anything you want,” was the owner’s reply.
I was quite relieved. I clearly remembered how the stair carpet had been put into my childhood home with small carpet tacks, and how the ends were folded over at both the top and the bottom of the staircase. However, knowing how to install carpet and actually having to do it are two different things.
The bottom of the second floor staircase. The installation is looking great!
On the day of the installation, things started to fall apart. The men assumed that the installation was business as usual, and I assumed that they realized they were working with a handmade rug.
The men spread out their tools and brought in the manufactured hallway carpet for installation. The installed carpet looked wonderful, just as good as the previous work this company had done for me.
I was filled with anticipation as they began to put down the stair carpets. One gentleman worked with my handmade stair carpet on the upper staircase while another worked on the custom stair carpet I had ordered for the lower staircase. Because the stairways were only 27″ wide, it would have been awkward to have asked the man working on the lower staircase to stop work so that I could run up the stairs to view the work on the upper staircase.
And so I did not go upstairs to look at how my stair carpet was actually being installed. Big mistake! The first stair carpet was fine, and I walked up it, eagerly anticipating the vision of my own hooking professionally installed on the second staircase.
My first reaction was one of shock—and then wonder over what had happened to my carefully laid out, brightly colored flowers that I had so meticulously planned for various stair risers. They had disappeared. Then my eye arrived at the top stair riser to see a piece of plain green hallway carpet on the top riser. I was aghast! When I asked what had happened to the two bright flowers on my stair carpet that were supposed to be there, the installer said my piece was too short!
Staircase Tips
It is possible to install your stair carpet yourself. Your local library will have a book explaining how to proceed. Two common techniques are using carpet tacks or the old-fashioned metal bars that are screwed into the stair.
Some stair carpets are narrower than the stair tread and run down the center of the staircase, leaving the wooden stair and riser showing. I made my stair carpet cover the entire stair tread and riser because the stairs were made of plywood and were never intended to be seen.
Wrapping the stair carpet around the edge of each step or having it pulled down straight from the top of the stair is a personal preference. That decision will affect how much stair carpet you will need to make. Be sure to measure accurately!
Rather than make a whole stair carpet you can make stair pads for each stair tread to be installed separately, or you can make stair riser mats that would be installed on the risers only. See RHM November/December 2001 for inspiration.
Hard wool wears better than really soft wools, but when I look at older hooked rug stair carpets, I am impressed with how little wear they show, especially having been hooked with whatever wool was at hand. Most notable is Heather Ritchie’s staircase in her home in Reeth, North Yorkshire, England. That stairway gets a lot of use and the stair carpets she put down on her stairs look just the same today as they did eight years ago.
I was nearly in tears, but I certainly didn’t want to cry in front of these men. Instead, I told them that it had taken me three months of steady work to make the carpet and the installation was all wrong. If indeed the piece was too short, then why hadn’t they consulted with me? They could have put the plain piece of carpet on the first riser where it would never have been seen. As it turned out, the installer had blithely cut off portions of the stair carpet at both the top and the bottom of the stairs.
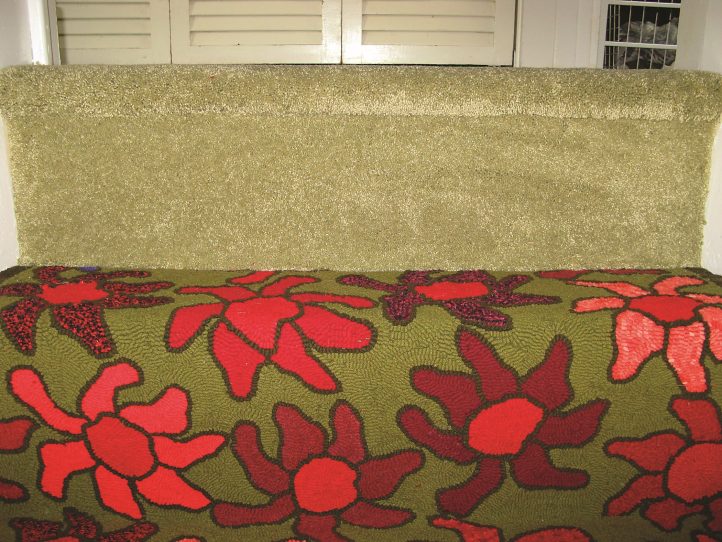
The top stair riser was an unpleasant surprise. What on earth went wrong? And what could be done?
It was a standoff, with the aesthetics of the stairway being the loser. I was devastated, but there didn’t seem to be anything else to say or do. They packed up their equipment and left, and I spent the next 24 hours grieving and depressed. Support and help arrived the next day when a rug hooking friend, Celia Oliver, came to visit. Celia was a calming influence and suggested that I just hook another small piece of the pattern and have them install it. We talked about adding a message to the new piece, and I felt much better. Perhaps I could salvage a bad situation.
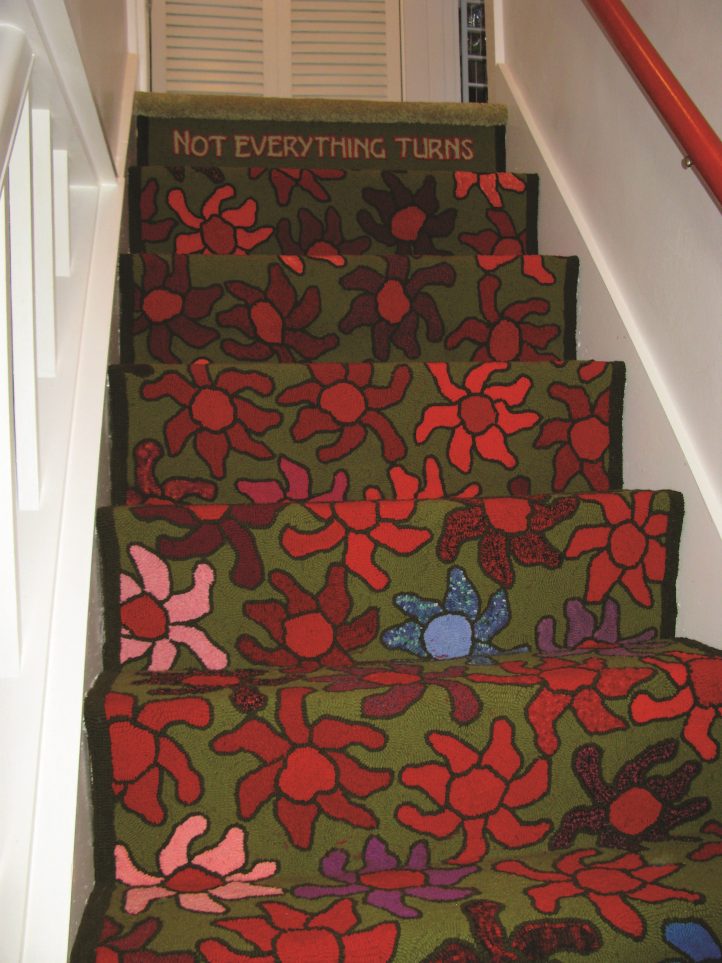
The following day, yet another rug hooking friend, Devin Ryder, came over. Devin reminded me that many of my humorous rugs have helped others make the best of a troublesome situation, and that I could do the very same thing with the stair carpet. We came up with the saying, “Not everything turns out as planned,” and I got right to work creating a patch to match the rest of the carpet.
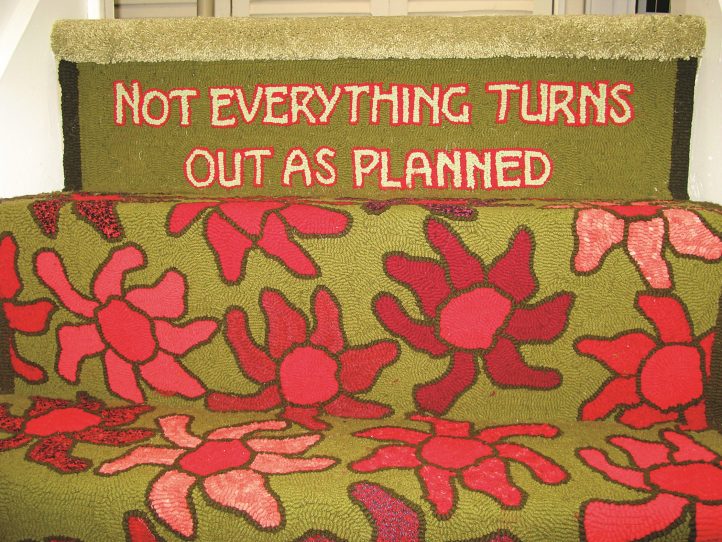
The additional piece for the top riser is installed. It measures 27″ x 9″. The words are outlined in dark green and filled with the red that was at the center of all of the flowers.
I like to think that the stair carpet has been trans-formed into a piece of humorous folk art. The carpet installer came back and removed the plain piece of commercial carpet and put in my humorous saying, and every-one was happy. In my long life I have learned that all’s well that ends well, and this stair carpet project is a fine example of the truth to that saying.