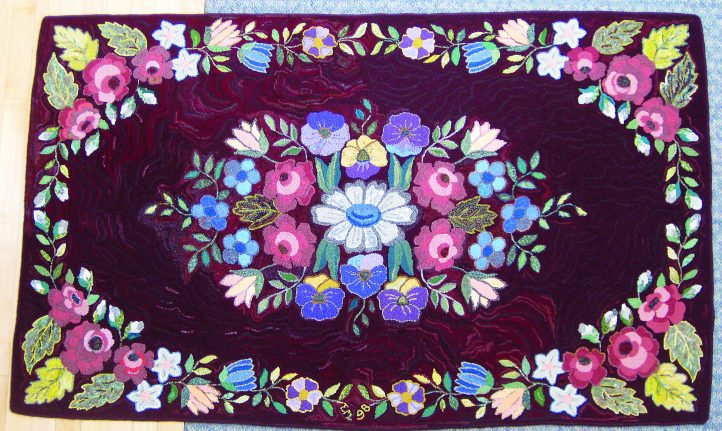
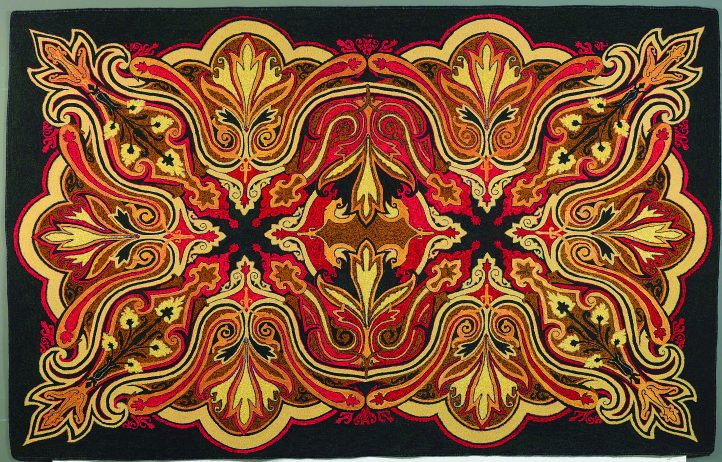
Floral Hall Primitive, 62″ x 94″, #6- and 7-cut on burlap. Design by Herrschners, hooked by Eloise Mohrman, Wellington, Ohio, 1979. Eloise and a friend acquired duplicate patterns for $1.00 each when a homeowner decided to part with a stash of rug hooking patterns. Eloise hooked her rug in spring colors, while her friend chose fall colors. Gathering enough wool for her first primitive was a challenge. She learned to wash the wools before she measured for the amount needed because shrinkage of the original material can throw quite a curve into planning.
Eloise especially enjoyed working the flowers. She hooked the background and the main elements at the same time to avoid handling the piece too much while it was on her rack.
PHOTOGRAPHY BY CONNIE BRADLEY
Completing a large rug is not just a physical challenge. It’s a mental challenge too. Let’s look at both aspects—the physical and the mental—and consider tips on how to successfully finish an oversized rug.
Get Mentally Prepared
Be certain you like the design. Rug hooking is a hobby, but it’s also a form of therapy—and hooking a large rug from beginning to end takes a lot of time and energy. As you are hooking, you want to enjoy the development of the pattern and the placement of the lovely colors. The process of creating a large piece can consume your time and energy; if you don’t like the design, you definitely won’t enjoy the process.
While the process of creating can consume you, don’t let it. Periodically get up and move around. Hooking without breaks is sometimes invigorating when you see how much you can accomplish, but it’s likely to cause long-term aches and pains in your hands, arms, shoulders, and back. If you tend to get caught up in your work, set a timer to remind you when it’s break time. Remember to move!
Large hooking projects are appealing as recreation, as retreat from household duties, and as a way to be alone with your thoughts. Thinking and hooking go together.
Get Physically Prepared
A large rug eats up a lot of wool. To finish one, you’ll need copious amounts of blankets, skirts, slacks, and/or large yards off the bolt.
Wash or clean everything before you begin hooking. This step helps the fibers adhere to each other and makes the wool easier to cut.
Sort your wool by texture. You might end up with thick, thin, and rough wool, but different thicknesses will work together. A variety of textures makes a more interesting rug, especially for primitive designs.
Then sort your wool by color. Be careful to control the busyness of colors competing with the background. Borders, scrolls, and geometrics need to match or be complementary so they rest the eye—both yours as you hook and the viewers’ as they admire your rug.
You will find that many large rug patterns need to be transferred to backing before you can begin to hook. Often it will take two pieces of backing that then need to be joined together. If your pattern needs to be joined, overlap the edges 1″ and sew them together securely. You can hook right through that double layer of backing.
Once your wools are gathered and your backing is ready, divide your wool into four parts, one portion for each quarter of the rug. Work one-quarter of the rug with the first quarter of wool. Start in the center and work to the edge or vice-versa. You will know quickly if you have enough wool—including background wool—to cover the entire design. If more of a certain wool is needed, now is the time to discover this. You have time to acquire more wool or adjust your plans to compensate.
Large rugs need to be worked on a large frame and not disturbed more than necessary. Try rolling up the excess, and pin it or use quilt clips to hold the extra backing out of your way. This way you can reach over or around the rug to the portion fixed in the frame to hook.
A Word about Perseverance
Once a large rug is under way, think of its completion as more of a goal to be reached than a rug to be hooked. If you have the desire, if you really want to hook this rug, you will do it!
Remember that rug hooking, for most of us, is a hobby; it is not work. Hobbies are diversions, what we do in our spare time once the household chores are done and our day jobs are over. So as you sit and hook in your spare time, let your mind delve into your project without guilty feelings.
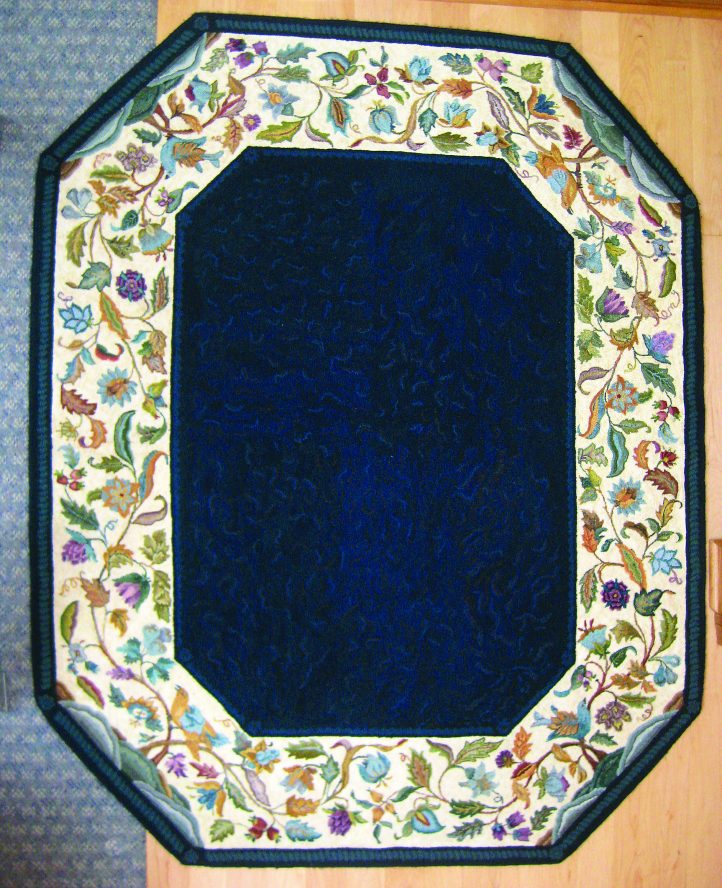
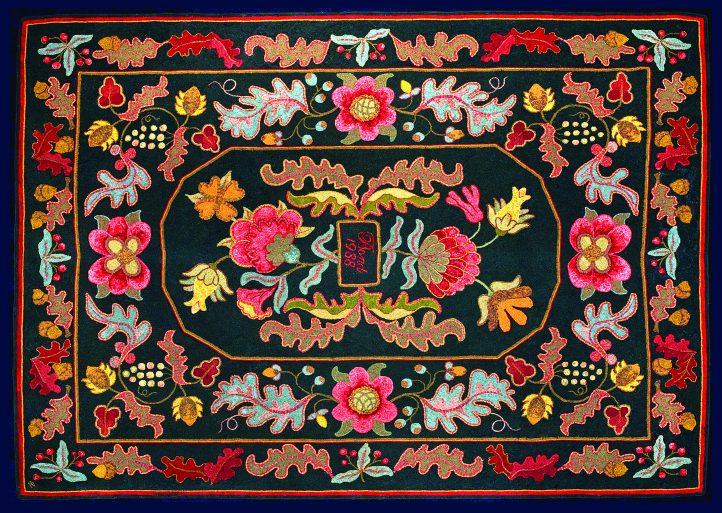
Cumberland Crewel, 60″ x 84″, #3- and 4-cut wool on burlap. Designed by Joan Moshimer and hooked by Eloise Mohrman, Wellington, Ohio, 2004. While visiting Kennebunkport, Maine, Eloise saw a finished print of Cumberland Crewel mounted on the wall in Joan Moshimer’s studio/shop. She remembers thinking that the piece was so lovely—she couldn’t take her eyes off it. She filed the idea in the back of her mind as a rug that she would like to do someday. Several years passed, and the pattern became available through an estate sale. A lot of wool came with it, but not the colors Elie wanted to use. She combined three dark shades to keep the background from looking flat. Eloise puts the finished rug out in the spring to bring a bit of cheer after a long winter.
If you’re waiting for cooking to be done, or waiting for family to arrive home for the day, put in a few minutes on your rug. This activity will calm you right down. Rug hooking therapy relieves tension and eases the nerves.
As you move along, set new goals. Periodically evaluate your progress to see how far you’ve come. Occasionally take a hard look at your piece; this is one way to improve your work, and it is satisfying to watch your progress. Thinking about who might end up with the finished rug can give you an extra boost when you feel your determination wavering.
Finishing a Large Rug
To finish a large rug, try a herringbone stitch done with needlepoint yarn. The herringbone stitch crosses the edge a couple of times and is worked over a cotton cording. Due to the complexity of the stitch, it provides terrific coverage—and the tight wool yarn really protects the edge. The yarn/cord combination safe-guards the hooking and keeps the edge from breaking and wearing.
After a large rug is yarn bound, attach cotton tape at the base of the whipping and over the raw edge of the foundation fabric. This gives a nice finished look to the back and helps preserve the edge. If the rug is unusually large, double the tape width by overlapping it with a sewing machine stitch. This helps add weight to the edge and stops it from getting kicked up when walked on.
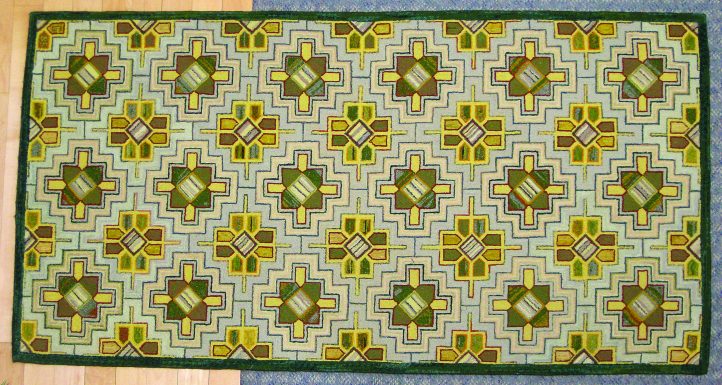
Vida, 31″ x 63″, #3-cut wool on burlap. Designed by Pearl McGown and hooked by Eloise Mohrman, Wellington, Ohio, 1980. Eloise over-dyed green plaid to marry fabrics for this rug. Once two of the tile patterns were figured out, the remaining patterns were easy. The yellow in the design helped keep the gray at bay. Even after being on the floor for 20-plus years, this rug has held up well.
BINDING A LARGE, ROUND RUG
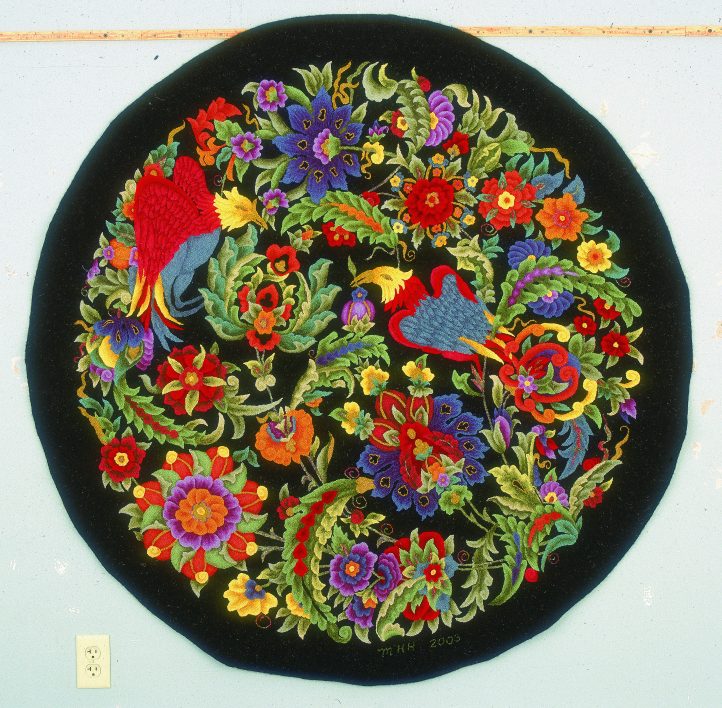
Istanbul, 60″ round, #3- and 4-cut wool on linen. Designed by Pearl K. McGown. Hooked by Peggy Hannum, Lancaster, Pennsylvania, 2009.
After hooking three very large round and oval rugs, 5′ to 7′ in diameter, Peggy Hannum has some sound advice on how to bind the edges of a rug so it lies flat. “We tend to stretch the edges as we bind around the outside, which creates a rippled edge. What has worked successfully for me is to bind with cording and yarn, whipping about 18″ as usual, then stop, put the rug flat on the floor, and very gently tug the cording. The cording will move a bit under the overcast yarn, tightening the edge. Be careful to just nudge the cording or the edge will curl under.” By using this method, Peggy has convinced her round rugs to lie flat on the floor.
COLOR PLANNING A LARGE RUG
Paisley Shawl, 68″ x 107″, #3-, 4-, and 5-cut wool on rug warp. Designed by Louise Hunter Seiser. Hooked by Cindy Irwin, Pequea, Pennsylvania, 2008.
Paisley Shawl is the first rug Cindy color planned, and she found it to be quite a struggle. “I took the pattern to my tennis club, laid it out on the court, went upstairs to the observation deck and took a picture. Then I took the picture to a blueprint shop and had them enlarge it to poster size. I used colored pencils to help me figure out where the colors went. I was told later that you can use dyes like watercolors and paint them onto the poster.”
So Cindy started fooling around with colors and finished one corner. Once that corner was settled, the rest of the rug was repetition. Sometime later, she discovered that she also had the middle motif to color plan. She ended up doing a lot of outlining in the middle of the rug to make the colors work together.
Cindy’s advice? Take pictures of finished motifs and use them as visual aids .“That way, you don’t have to stop to look at the finished part of the rug to figure out what to do next. After the rug is planned out, it’s nice to be able to work on it without further thought.”
GO BEYOND LARGE WITH A BED RUG
18th Century Bed Rug, 9′ x 12′, #3 to 10 hand-cut wool on linen. Designed by Quail Hill Designs. Hooked by Anne Bond, Northville, Michigan, 2009.
Anne Bond offers the following tips for those who are considering hooking a bed rug:
- Request extra linen around your piece when you order your pattern (approx. 8 inches).
- Create a binder for reference. Take close-up pictures of each motif and put them on regular paper so you can write notes and keep track of all you are doing.
- Select a great plaid or texture that has several colors. This will be the main wool to guide you through the other choices of wool used throughout the rug.
- Work with 4–6 pieces of dyed wool at a time, mixing them as you go. One piece will always be gone before others. Try to vary the amounts of wool with each dye color; I cut a different amount from each piece.
- Hook background as you go. You will be able to see how your colors are holding, and more importantly, you don’t want to be left with a year of hooking only background!
- Create interest. Try these ideas:
- Different cuts
- Different heights
- Hook in contour
- Anagodlyn – holds color together and has the appearance of the skin of an orange (hook in all directions)
- Hills and valleys – great for background, creates soft movement to move your eye from one motif to another
- Finishing. Find a large table, such as the dining room or pool table, or bed on which to place the rug for easy access for binding.
- Make a scrap bag. This should contain samples of all of the pieces of wool used in the rug so you can do repairs when needed.