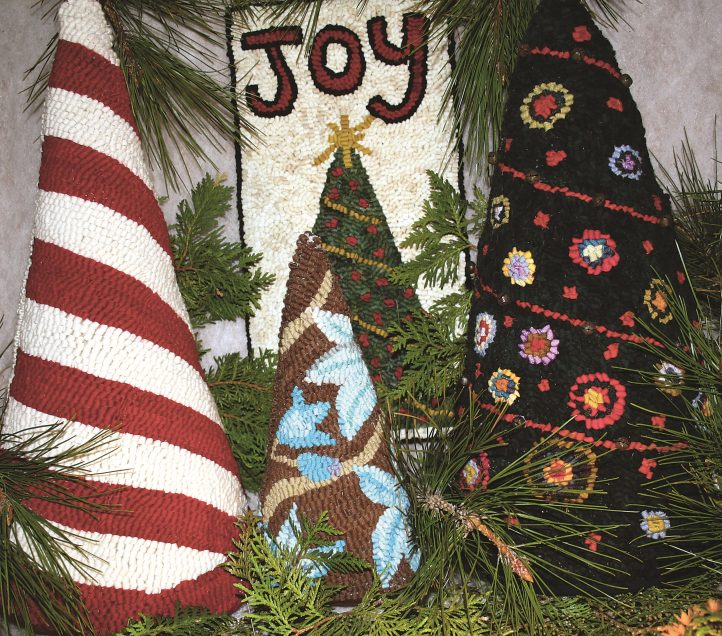
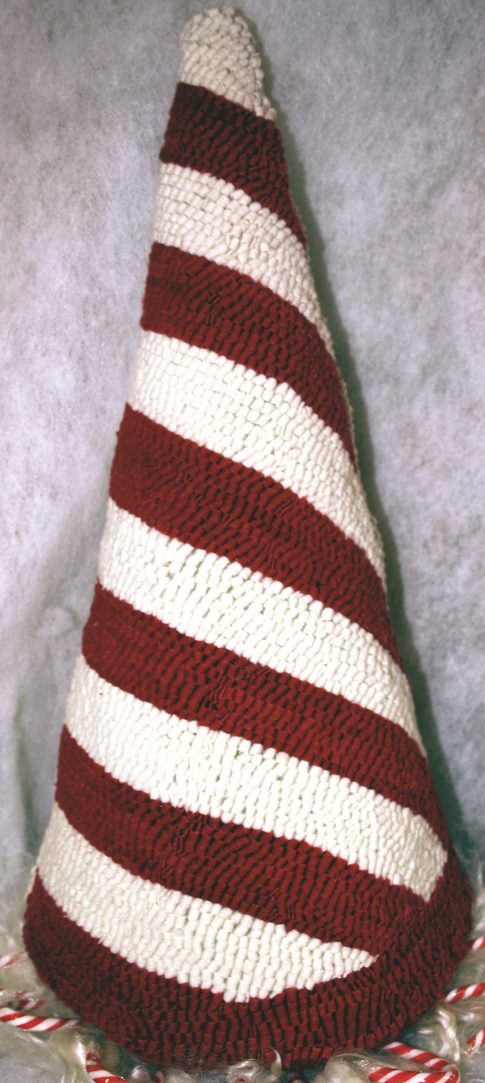
Three-dimensional trees will brighten up any décor.
When I think about Christmas, my thoughts turn to Christmas trees. I love having a little tree in each area of my home, decorated in a theme. Best of all is the main tree in the living room, laden down with our precious family ornaments. So it stands to reason that once I started rug hooking I would add hooked trees to the mix.
There are many beautiful, simple ways to design and hook or proddy a tree. Using the basic template provided here, you can make a tree to fit any corner of your home. Enlarge the pattern to whatever size you want. Then draw whatever suits your fancy. Take ideas from the fabrics, or wallpaper, or a collection you might have.
Where is the tree going to go? You could have a little hooked tree in the kitchen, the hallway, the back porch, or the kids’ rooms. These delightful trees are perfect for families with small children because they won’t break.
Design something yourself, and step into the delicious freedom of doing what you love, in the way you want, in the colors you choose.
PENNY TREE
Using the basic template, I enlarged the Penny Tree to a height of 20″. I allowed an inch all around as a seam allowance, traced it onto paper, then onto Red Dot, then onto backing. I prefer Scottish burlap or rug warp for projects like this, as they have more body than linen.
I drew random circles for the pennies and little dots for the tiny filler dots. I used red wools for these. I also added diagonal lines that appear as garland across the tree. The key is to use your imagination and play with your design.
On the back pattern, I drew a poinsettia with leaves. I used a lot of my wool worms, or snippets, to fill in this design.
Two sides of my Penny Tree, 20″ tall, hand-dyed wool on burlap. Designed and hooked by Liz Smith, Upper Coverdale, New Brunswick, Canada, 2012.

MATERIALS
- 1 black watch tartan shirt
- 1/4 yd. assorted dark greens
- Worms, or snippets, in assorted colors for pennies and dots
- Red snippets for garland
- Package of tiny rusty bells to sew on after construction of tree
WALLPAPER TREE
For this little beauty, I drew inspiration from the new wallpaper in my daughter’s bedroom. As the mother of an active three-year-old, my daughter liked the idea that this little tree can be upset on the floor without breaking or causing injury. I made the pattern 13” high.
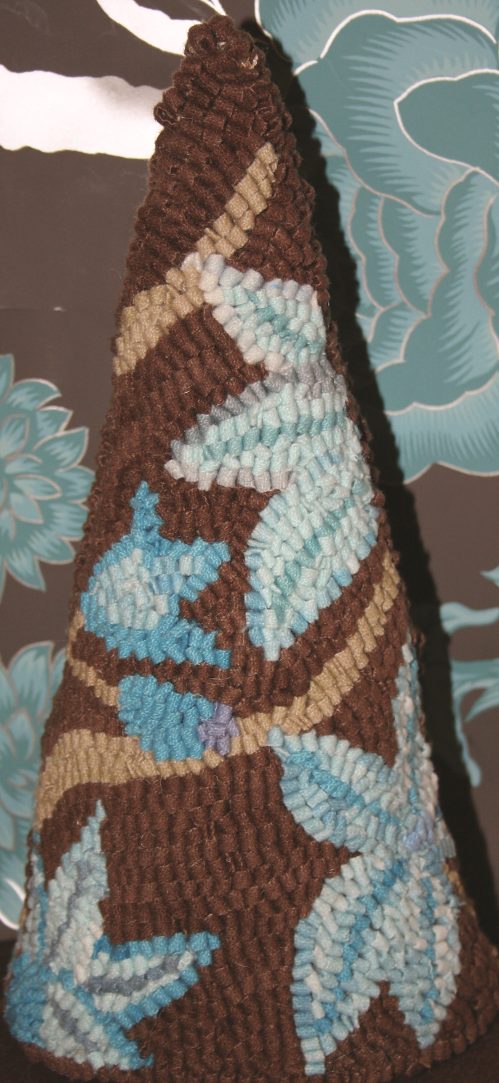
Wallpaper Tree, 13″ tall, hand-dyed wool on burlap. Designed and hooked by Liz Smith, Upper Coverdale, New Brunswick, Canada, 2012.
MATERIALS
- 1/4 yd. mottled soft brown wool
- 1/4 yd. assorted blues (I used 3 shades of robin’s egg blues.)
- 1/8 yd. beige
- Tiny silver beads (optional)
BASIC CONSTRUCTION FOR 3-D TREE
To create your own three-dimensional tree, follow these basic construction steps and add in plenty of imagination.
- Decide on the size of your tree and enlarge the pattern.
- Draw the design on paper, filling in and playing with it until you have something you like. For sewn trees, you’ll need two copies (a front and a back) with a seam allowance of 1″.
- Transfer the pattern to the backing. Remember that you will need two pieces, a front and a back.
- Hook or proddy the pieces—or do a mixture of both techniques.
- After you are done hooking, steam them flat, and allow them to dry. Apply a bit of Fray Check just outside the hooking, around the entire design, and let it dry overnight.
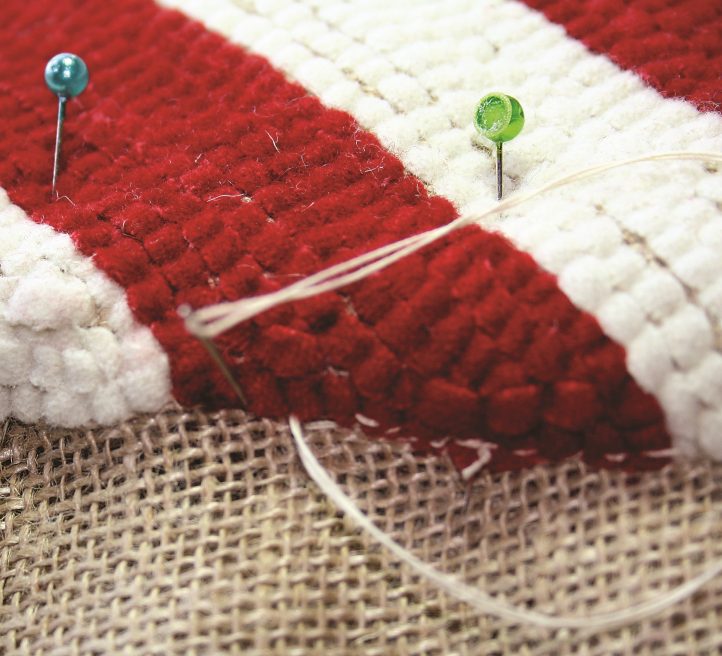
Sew together.
- Pin the front and back pieces right sides together. Sew them together using a doubled length of heavy duty thread. Sew as close as possible to the hooking; leave the bottom open.
- Trim the extra burlap away, leaving about 1″. Carefully trim a bit extra at tip. Now slowly and carefully turn your tree right side out. You will have to coax the tip a bit; take your time.
- Stuff the tree with Polyfill; do not over-fill. You can add a sandwich bag of kitty litter or sand at the base later to prevent the tree from tipping.
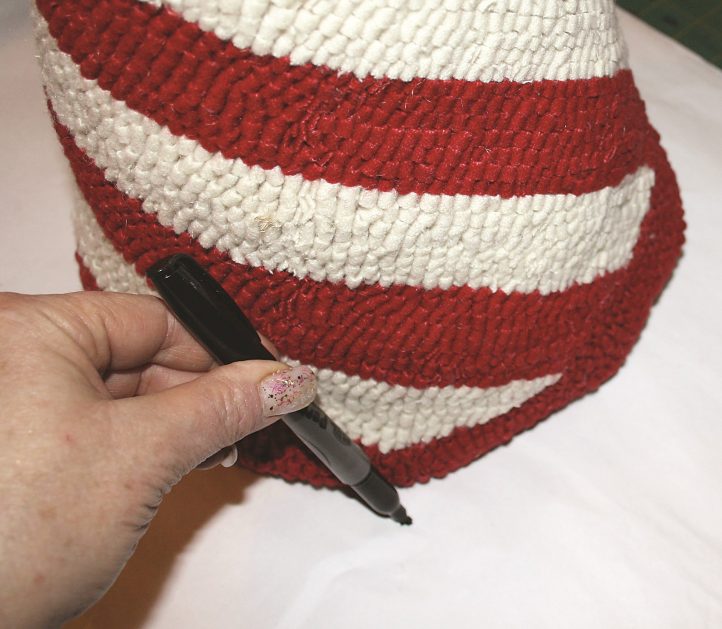
Mark the base.
- Stand your tree on a piece of paper and draw a line around it. Now add 1″ around the outside of your first line. Use this paper pattern to cut the base of your tree out of wool.
Pin the base.
- Carefully pin the base to the tree, folding the edges under as you go. You don’t want any puckers or wrinkles, so take your time. If you want to add weight, now is the time to insert the flattened sandwich bag of sand or kitty litter, and gently add a bit of Polyfill around it. Do not overstuff the base of your tree; it needs to be flat.
- Use a doubled strand of heavy duty thread to sew the base piece to the tree. (I prefer thread to wool, but it’s your choice.)
- The finished tree is ready to bring holiday cheer to your home.
The finished tree.
MORE IDEAS USING TREE DESIGNS
- Small 8″ x 14″ wall hanging.
- Hooked chair backs or seat pads.
- Pillows for anywhere.
- Hearth mat using just trees for winter, or decorate the tree, add stars, and make it “Christmas-y.”
- Stair treads for entrance stairways.
- Small grouping of trees in hallway; make a display using a long mirror, votives in between trees, and a sprinkle of fake snow.
- Make small trees to match your friends’ décors as gifts.