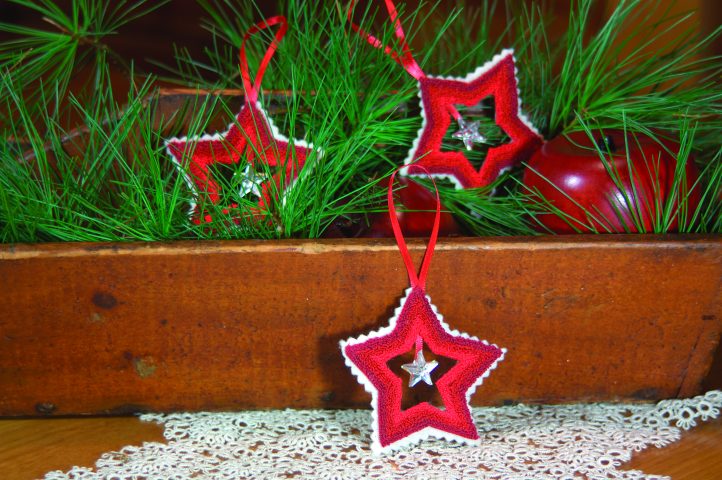
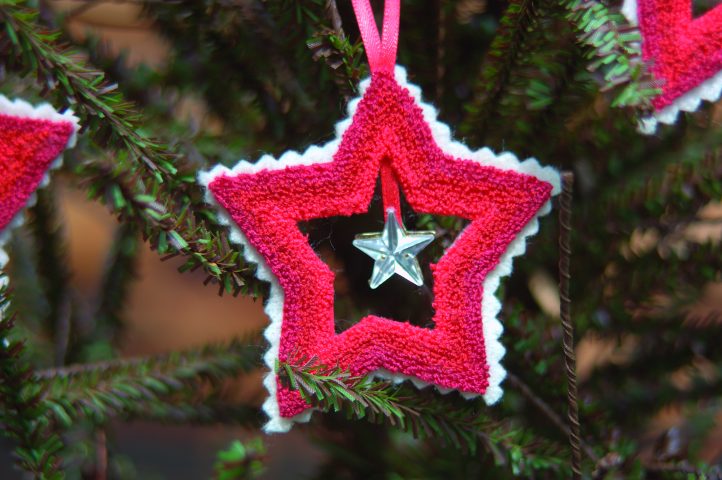
Star Christmas Ornaments, 23/4″ in diameter, embroidery floss punch-hooked into cotton. Designed and hooked by Marinda Stewart, Round Rock, Texas, 2013.
BY MARINDA STEWART/PHOTOGRAPHY BY DANIEL D. SMITH
Handmade ornaments personalize any Christmas tree. This star was designed to be fast, simple, and inexpensive to make. It’s easy to set up multiples in a large hoop and make several at a time. It would be perfect to use in an ornament exchange.
Skill Level: Easy
MATERIALS

- 5″ square piece of red tightly woven cotton (I used Cotton Couture cherry by Michael Miller Fabrics.)
- 1 skein each of light, medium, dark floss (Try DMC #666, #817, #498.)
- #3 medium punchneedle
- Embellishing glue
- Seam sealant
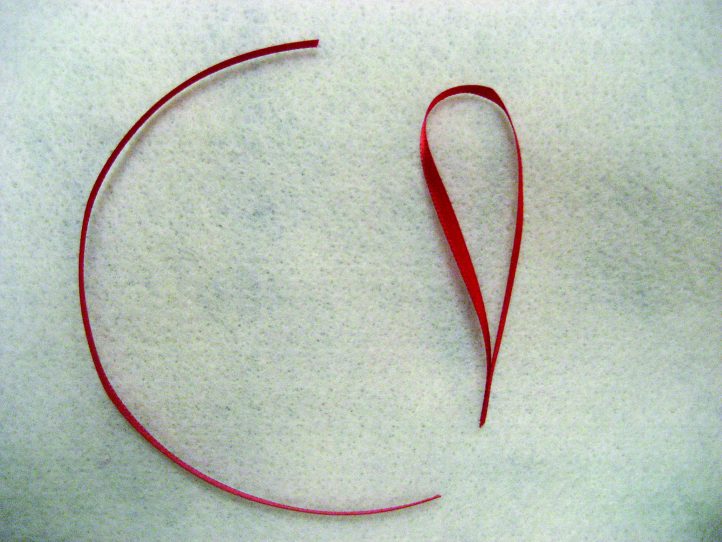
- 1/4 yd. 1/8″ double-faced red satin ribbon
- 1 small piece of white felt
- 2 white star rhinestones, sequins, or the equivalent
- Sharp embroidery scissors
- Small flat paintbrush
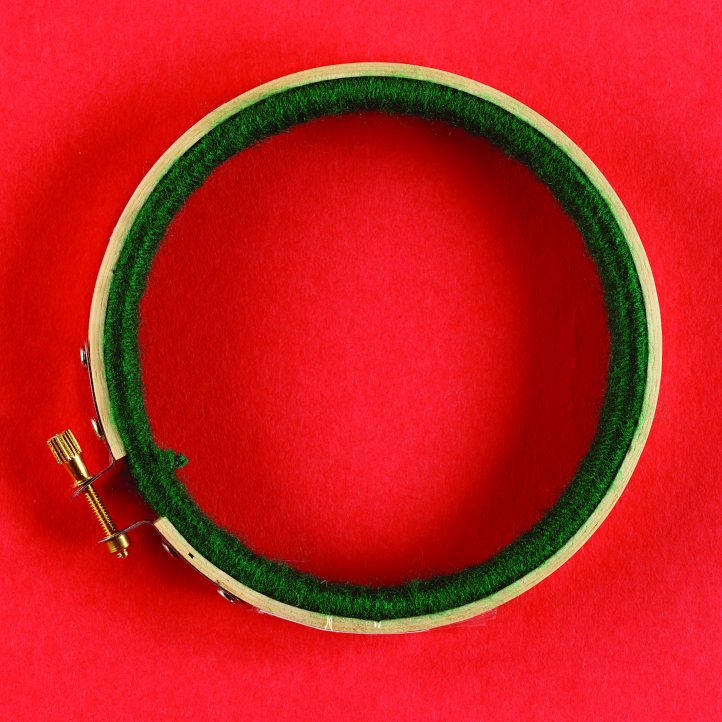
- 5″ embroidery hoop (preferably wooden with wrapped inner ring)
- Pencil
- Pinking shears (optional but recommended)
Directions
- Trace the star pattern onto the wrong side of the fabric using the pencil. Stretch the fabric tightly in the hoop. An embroidery hoop with the inner ring wrapped in yarn will hold the fabric tightly and lessen the possibility of hoop marks.
- Follow the manufacturer’s directions to thread the punchneedle. Work with two strands of 6-strand floss throughout. Start at the outside edge with the dark thread (#498). Work 3–4 rows around the star. Change to one strand of the dark (#498) and one of the medium (#817) blended together. Work one transition row. Change to two strands of the medium (#817). Work for 3–4 rows. Work another transition row using one strand each of medium (#817) and light (#666). Fill in the remainder of the star using the light (#666). Note: The order of the colors may be reversed from light at the edge to dark at the inside.
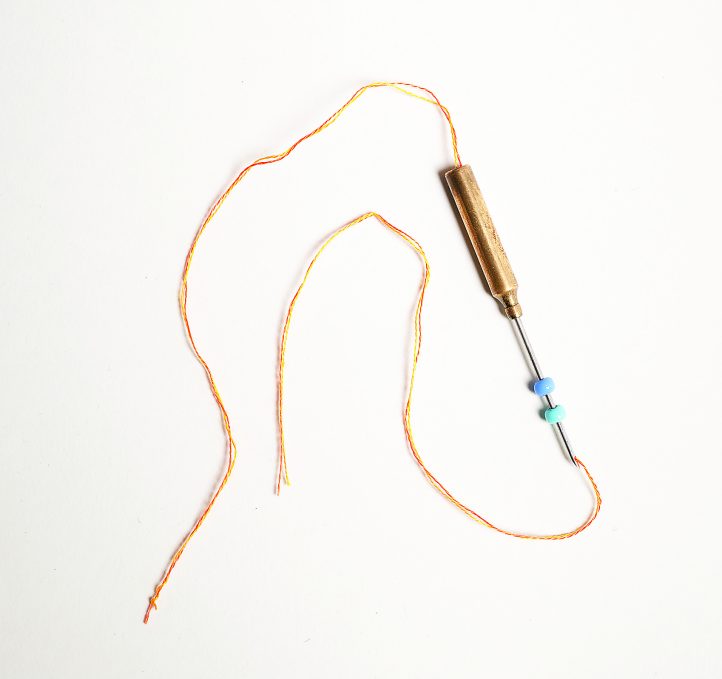
Work with a punchneedle loaded with 2 strands of 6-strand floss.
- While the embroidery is still tightly stretched in the hoop, seal the outside and inside edges with a thin line of seam sealant, such as Fray Check, on the back of the embroidery. Let the sealant dry. Repeat the application a second time.
- Once the sealed edges are dry, use the small paintbrush to lightly coat the back of the embroidery with an embellishing glue such as Gem-Tac. Extend the glue beyond all the edges of the stitching. Let it dry.
- With sharp embroidery scissors, carefully cut out the embroidered star as close as possible to the stitching without cutting into the loops. Set the star aside.

- Cut 1″ of 1/8″ ribbon. Glue the ribbon between two rhinestone stars. Let the glue dry. For the hanger, fold the remaining ribbon in half. Glue the raw ends together. Let it dry.
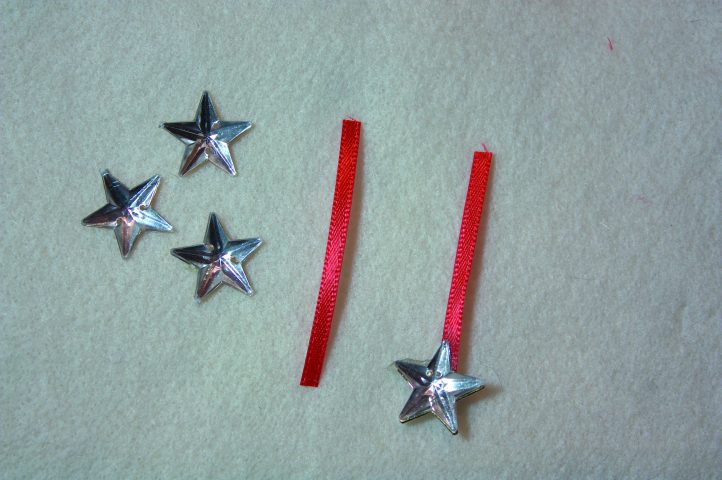
- Glue ribbon hanger and star dangle to the wrong side of the top point of the star. Let the glue dry.
A WORD ABOUT GLUES
I recommend Fray Check by Prym-Dritz because it dries clear and does not discolor the fabric or embroidery. The embellishing glue I use, Gem–Tac by Beacon Adhesives, dries clear, remains flexible, and seals the loops in the fabric. Not all glues and sealants are the same. These particular products give my projects consistent results. Generic white or clear glue will compromise the finished pieces.
A WORD ABOUT PUNCHNEEDLES
My two favorite brands of punchneedles are Bernadine’s Needle Art or Igolochkoy by Birdhouse Enterprises. When purchasing a punchneedle, make sure the tip of the needle is sharp enough to push aside the weave but not so sharp that it tears through the warp and weft. The needle should be highly polished with no rough edges, and the eye should be centered.