PROJECT AND PHOTOGRAPHY BY MARY ANNUNZIATO AND JACKIE BURKE
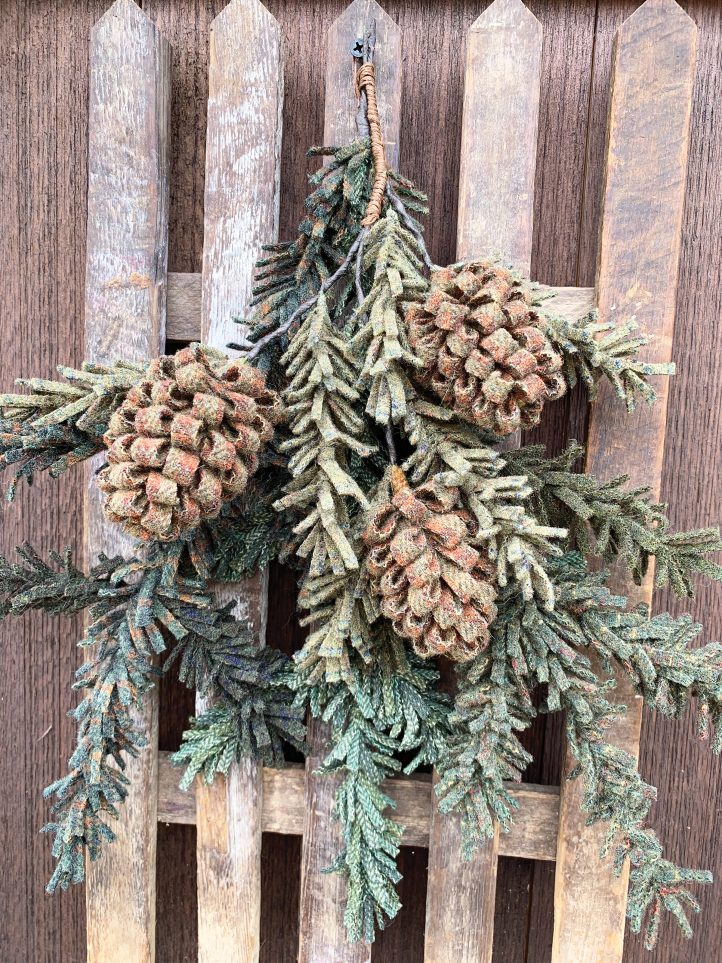
This holiday project debuted in 2021 at Sauder Village Rug Hooking Week. The realistic wool pinecones are fun to make, and a variety of wonderful colors of wool can be used to create the beautiful design. The instructions are fairly simple. Enjoy!
SUPPLIES:
- 18-gauge wrapped floral wires (3 at 8″, 3 at 16″, 6 at 51/4″, 12 at 6″)
- Wool strip for pinecone color ( 11/2″ x 60”)
- Wool strips (skinny) 3 at 1/4″ x 60″
- Wool strip (green) for branches (1″ x 60″)
- Floral tape (brown) and 32″ piece of bind wire
- Additional items needed: tacky glue, sharp snipping scissors, a few straight pins, sewing machine, wire cutters, string for hanger
- Miscellaneous yarn, threads, embellishments
MAKING THE PINECONES
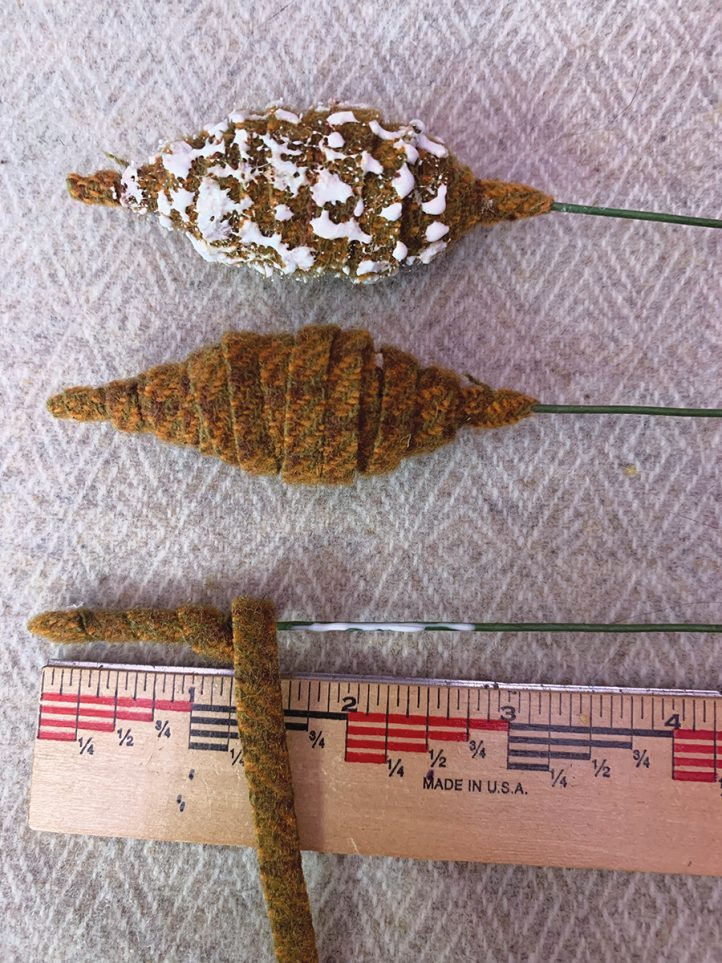
- To prepare the shape, run a 3″ line of glue on 8″ wire.
- Twirl 1/4″ strip of wool to cover the 3″ of glue. Stop. Twirl strip back toward the top (stop 1/2″ from top). Continue twirling down the wool (with a little glue) 1/2″ from bottom. Stop. Continue up and down (thicker in the middle) to get the shape for the pinecone.
- To prepare the strip for the pinecone, fold 1 1/2″ x 60″ wool strip in half (3/4″ x 60″) and sew entire length near edge.
- Snip on folded edge toward seam (1/4″ to 1/3″ fringes) about 3 fringes per inch.
- Before applying glue, attach the fringed strip near top of shape (fringe faces away from wire) and twirl down the shape to test if you like it. If it’s too skinny, add wool. If it’s too chunky, remove some wool.
- When satisfied with the shape, add a thin coating of glue to the shape (leave 1/2″ at bottom without glue) and attach fringed strip. Pinch margin of wool 1/2″ down from tip of shape and begin twirling around the shape, carefully creating the pinecone. Cut and glue, leaving 1/2″ of wool showing (at bottom) of the underneath shape. A straight pin will hold the end in place (which you can remove later).
MAKING THE BRANCHES
- Fold green wool (1″ x 60″) in half (1″ x 30″). Cut off selvages and snip thin fringes, leaving 1/8″ margin at top. When you get near fold, unfold the strip to finish fringing. Run a line of glue (3″ to 4″) on the 51/4″ wire. With fringe facing away from wire, attach 1/8” margin to top of wire, pinch, and twirl wool down the wire. Cut and glue in place, leaving about 11/2″ wire showing to attach to pinecone wire. Make all 6 branches.
- Attach 2 branches to each pinecone. Twist one branch wire close to bottom of pinecone and secure with floral tape. Twist second branch below end of first branch. Secure and cover the wire.
- To connect pinecones, fold 32″ piece of bind wire in half and twist together. Hold 2 pinecone stems together and start wrapping (start at cut ends of bind wire) to join stems. Attach the third stem with bind wire (you can cover bind wire with floral tape). You should have excess wire to use later to attach the pinecones to the pine boughs.
MAKING THE PINE BOUGHS
- Fold wool strip (1″x 60″) in half (3/4″ x 30″) and cut off selvages. Fringe wool by snipping thin fringes. Leave 1/8″ margin (fringe carefully, keeping the front and back piece lined up so you don’t cut through). Run 4 1/2″ line of glue on the 6″ wire. Note that each pine bough can be made with one color of wool or mixed.
- Holding wire in your dominant hand, place margin of wool at the tip of glued wire, pinch between thumb and finger, and twirl wool onto wire. Leave 1 1/2″ of wire exposed to attach to 16″ wire later. Make the 12 branches; 4 will be added to each 16″ wire.
- To attach the branches to the 16″ wires, gently twist the exposed wire of one 6″ branch about 5 1/2″ down on the 16″ wire and secure with floral tape. Twist the second branch close to first and secure with tape. Add 2 branches about 3″ below the first set.
- Bend the 4 branches down to prepare 16″ wire to be wrapped with fringed wool. Run a line of glue and attach margin of wool to the tip of 16″ wire. As you twirl toward the first set of branches, bend them upward (out of your way). Glue and twirl toward the second set of branches. Leave 2″ wire exposed. Cut wool and glue in place.
- For the hanger, fold string in half and knot. Tie the knotted end near fringes at the base of wires.
- To finish the boughs, twist exposed wires together. Cut a piece of floral tape 6″ and wrap the 3 exposed wires tightly together.
- To add the pinecones, use bind wire left on a pinecone branch to wrap around 2″ stem (leave string hanger out). You can leave “as is” or cover bind wire with floral tape.
